Menu toggle

Changing front springs - lots of pics

steveoz32

New member
I can't post all pics up as I have over 60 pictures alone of the steps I took and close ups of stuff when changing out the first front spring, but thought these may come in handy. If anyone in future searches for this and follows what I did I am not responsible blah blah blah for any injury or damage caused, I'm just posting these up for info :) :

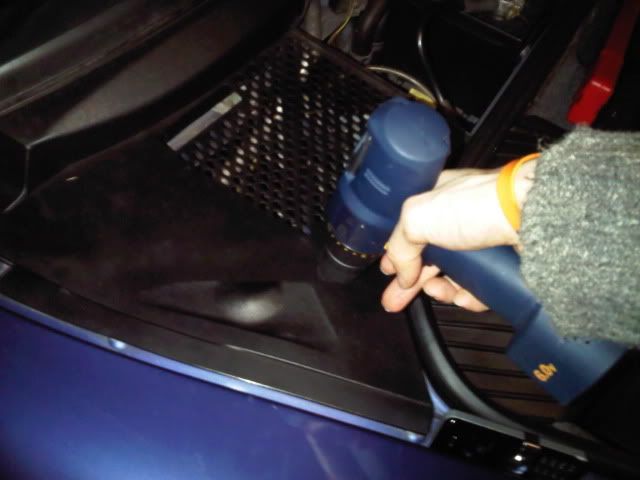
Suspension turret access is under here:
fspring2.jpg


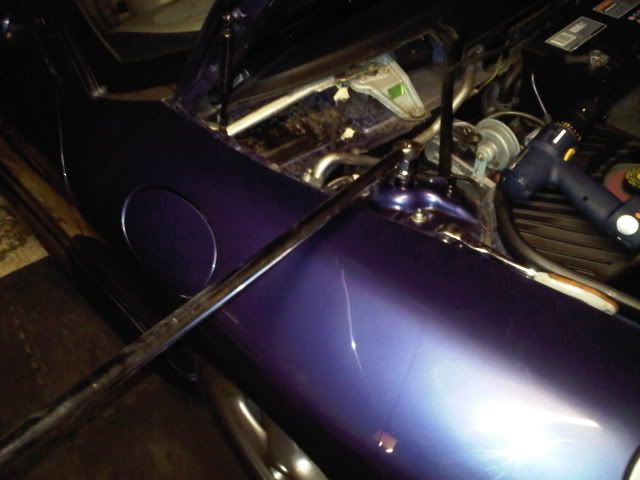
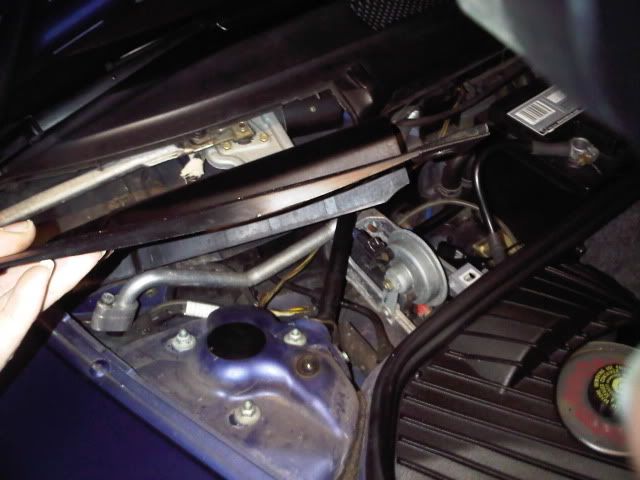
Slide pannel out, pop cap off, and I put a big bar on the top nut to break it:
fspring3.jpg

fspring5.jpg


Loosen steering rod slightly:

fspring6.jpg


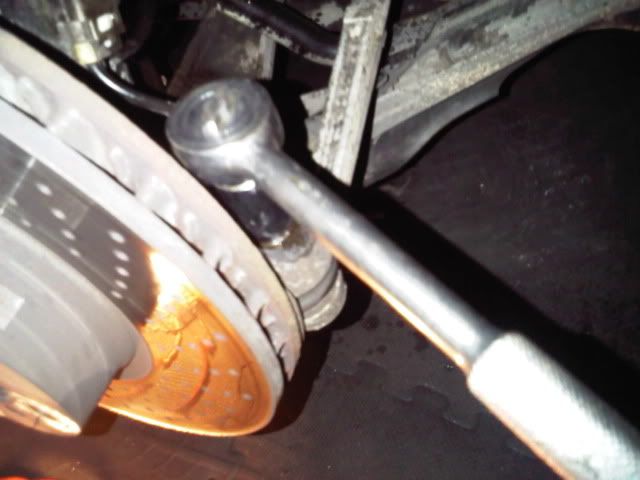
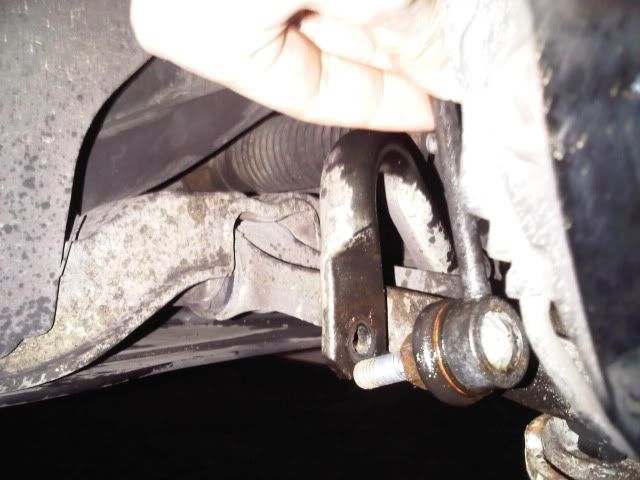
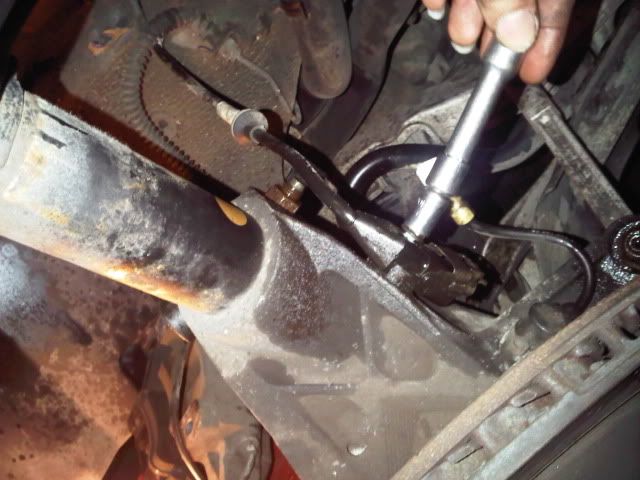
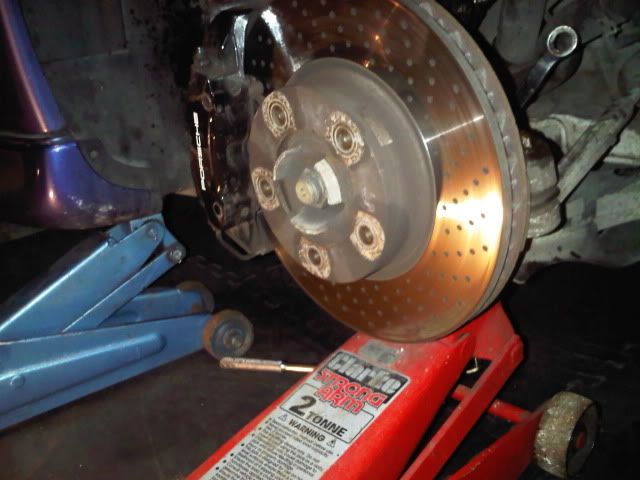
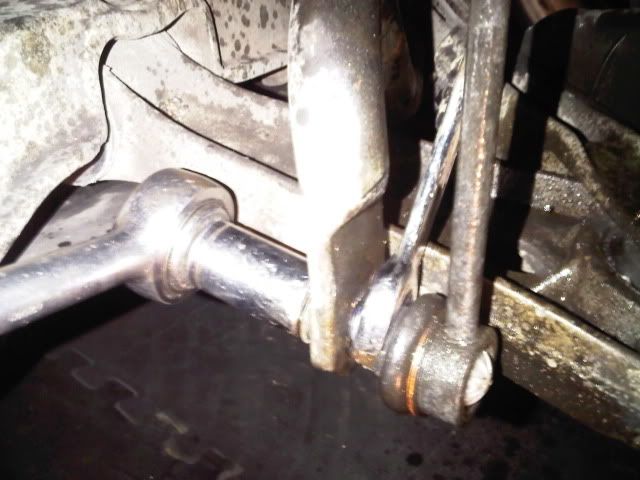
Jack hub up to take weight and pressure off of droplink and ARB, use spanner and socket to unbolt:
fspring9.jpg


fspring8.jpg


Easy to remove now with hand:

fspring10-1.jpg


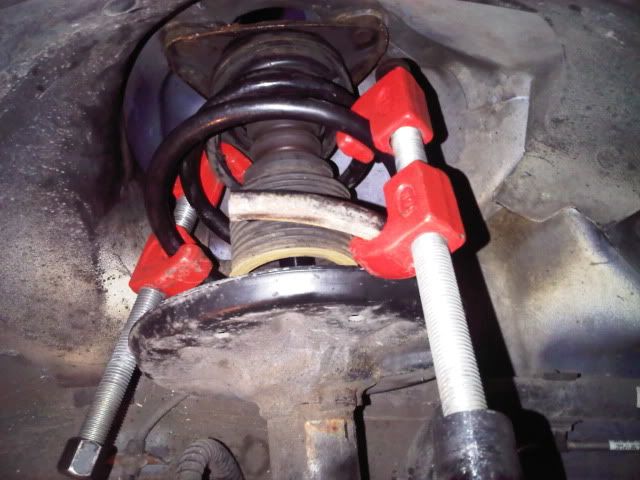
Compress old spring:

fspring11.jpg


Undo bolts on turret (mark them so you know which way they go):
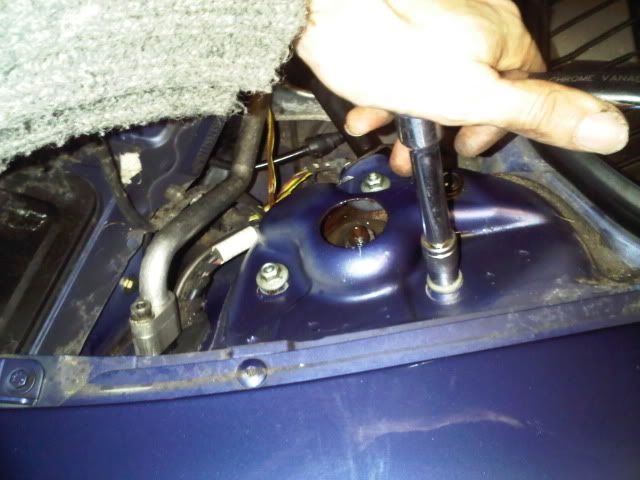
fspring12.jpg


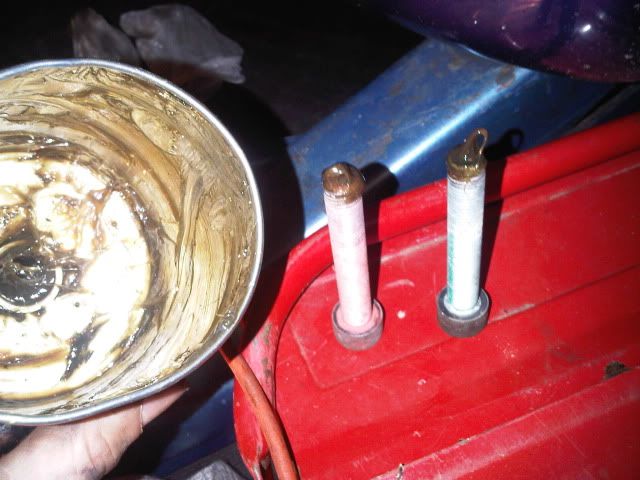
Pop this out:

fspring14.jpg


and this:

fspring21.jpg


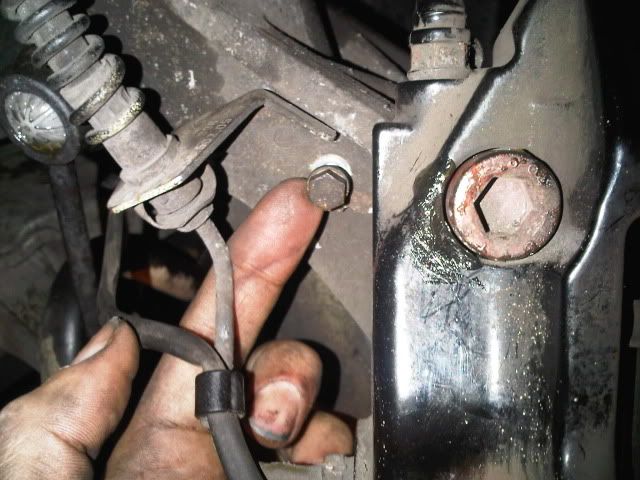
Undo brake line bracket:

fspring15.jpg


Get a big allen key and bar on the calliper:
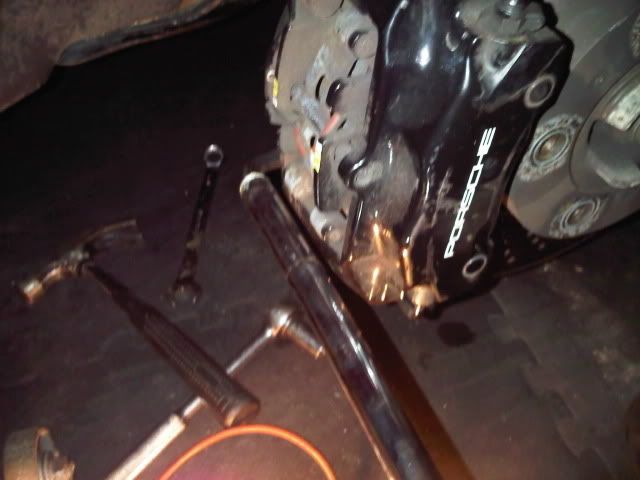
fspring17.jpg


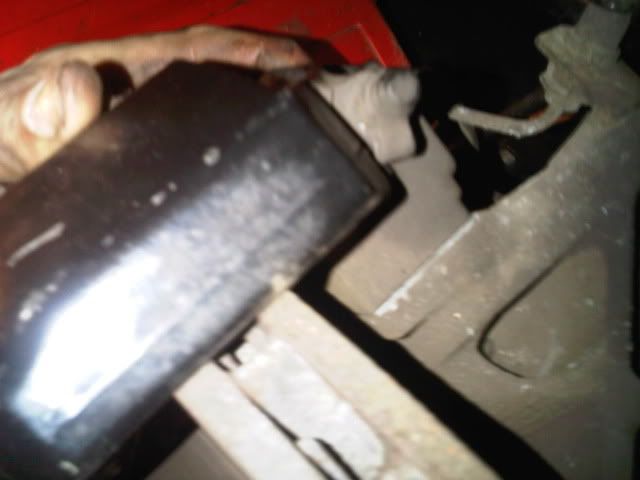
Gently tap calliper free with soft wood:
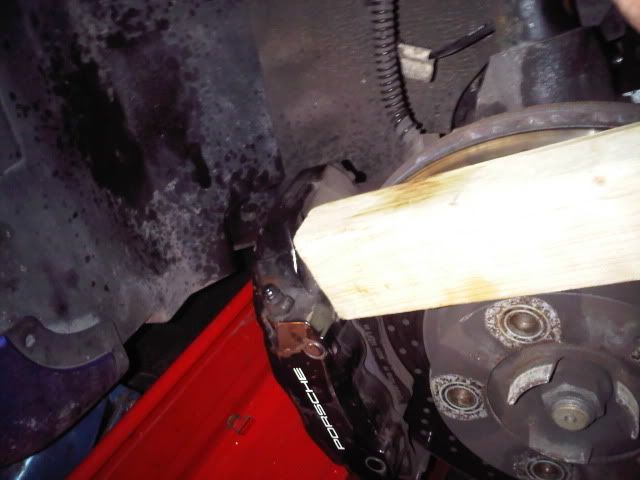
fspring19.jpg


Unclip and remove sensor connectors:

fspring23.jpg


Undo sensor block and mount:

fspring25.jpg


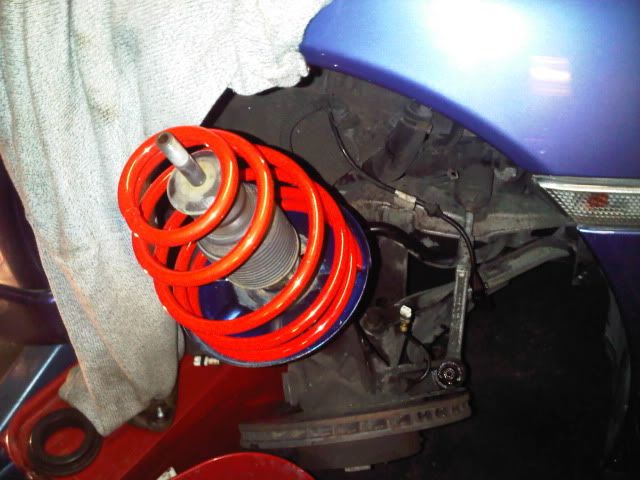
It will come free now, compress shock downward by pressing on it, and push wishbone down, turn steering all the way to drivers side to fully extend steering arm, pull strut out:
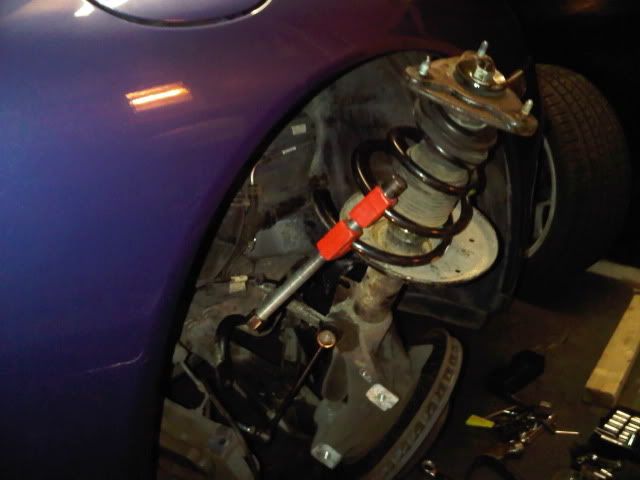
fspring26.jpg


Undo top nut fully with spring still compressed and don't stand infront of it like me lol, I've had a compressor slip / give way before on previous cars and had a top cap in my chest, it wasn't great....
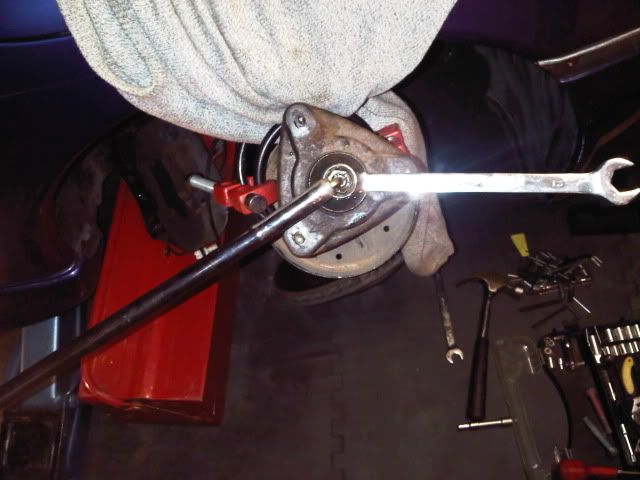
fspring28.jpg


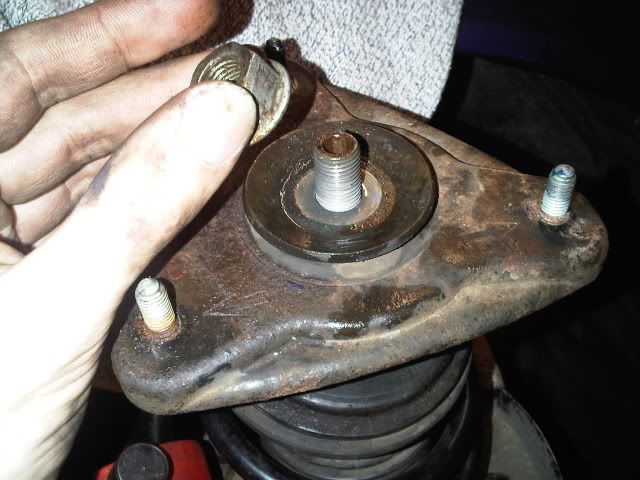
Remove top nut:

fspring29.jpg


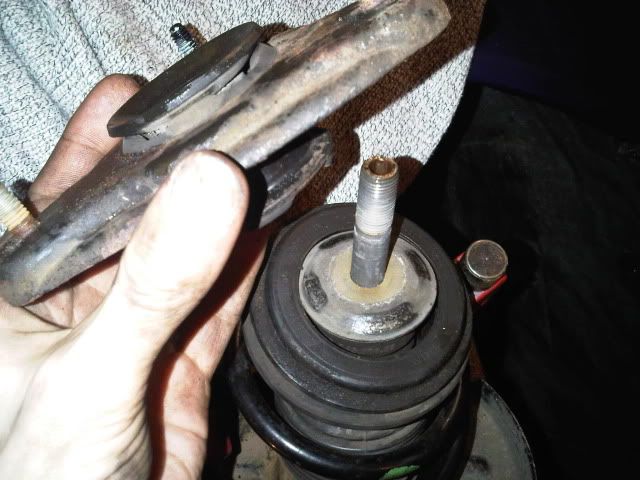
Remove cap / mount:

fspring30.jpg


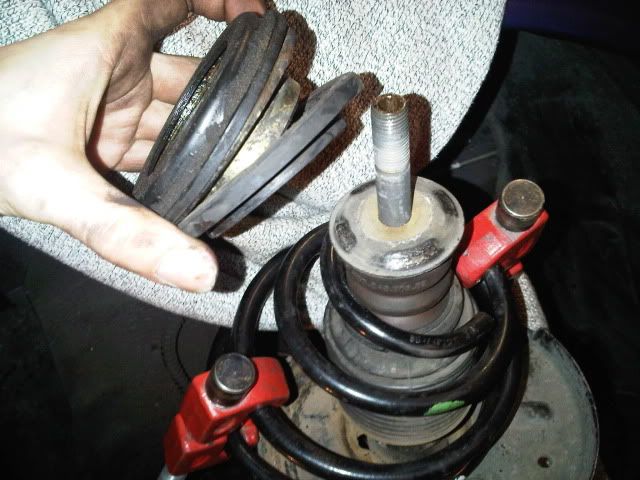
Remove bearing / sleeve assembly:

fspring31.jpg


No need to remove dust cover or washer if you don't want to, clean up strut (I cleaned off and repainted to stop any corrosion here):
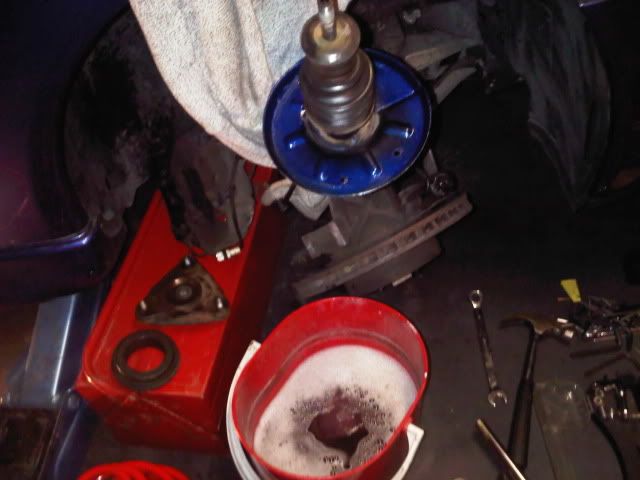
fspring33.jpg


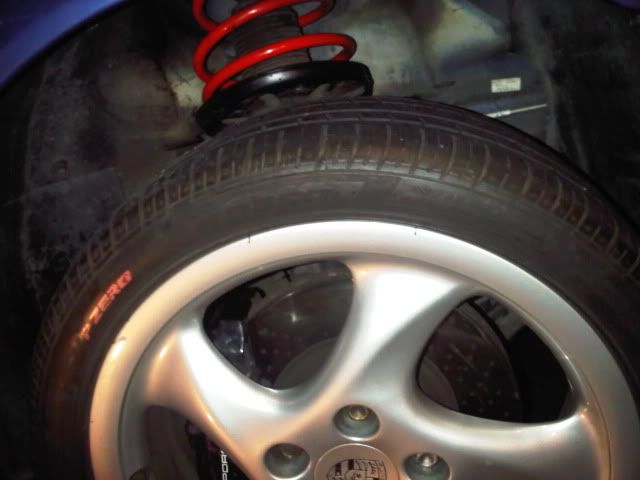
New spring on:

fspring34.jpg


I cleaned bearing sleeve and packed with fresh grease:
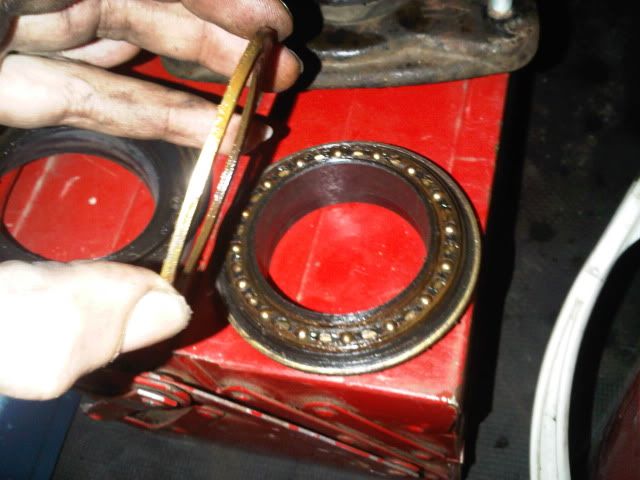
fspring35.jpg


Pop everthing back on seating rubber etc correctly and tighten up:
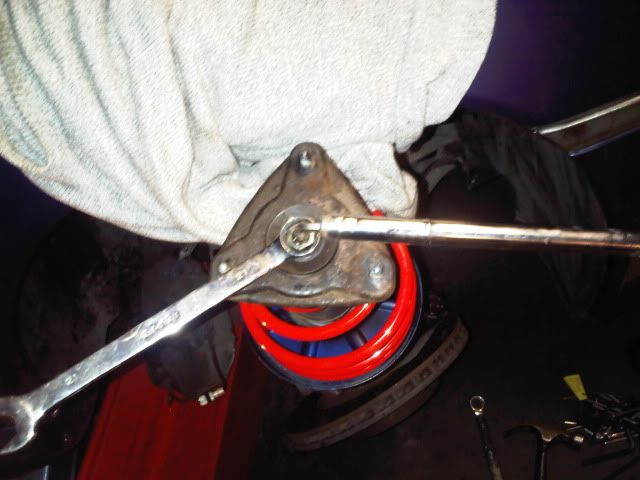
fspring36.jpg


Compress new shorter spring slightly, press down under arch and in:
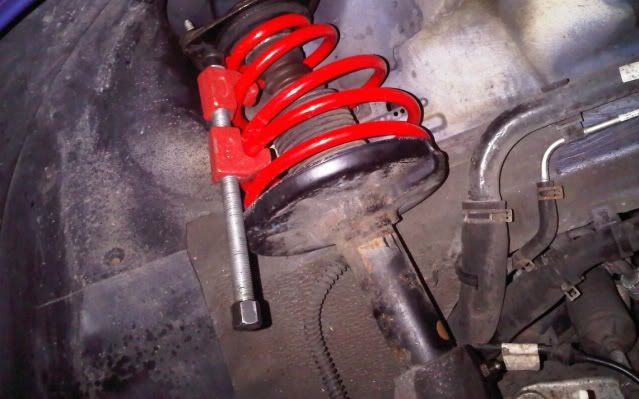
fspring37a.jpg


Bit of silicone lube around the bolts and top to keep it all nice:
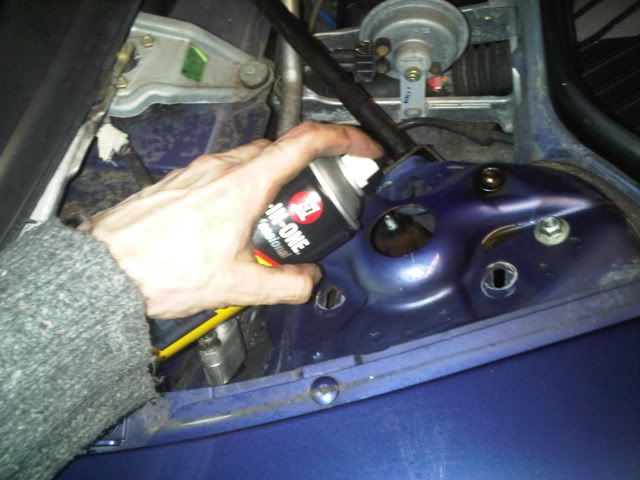
fspring38.jpg


Lift up and bolt back on in correct position (need to line up with marks and ensure correct angle of turret):
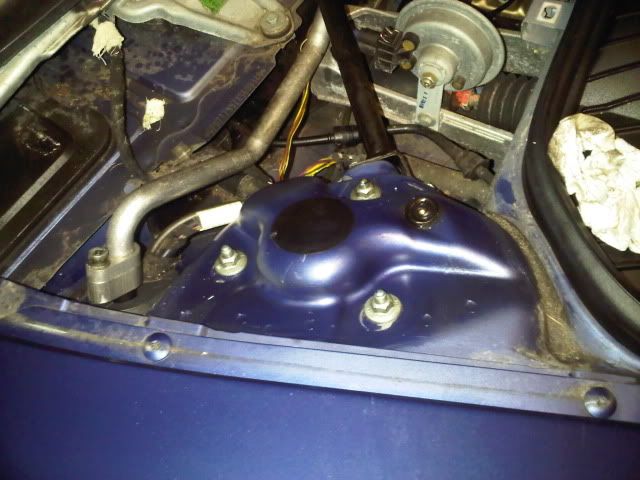
fspring39.jpg


Replace connector and reroute wires to correct place and connect:
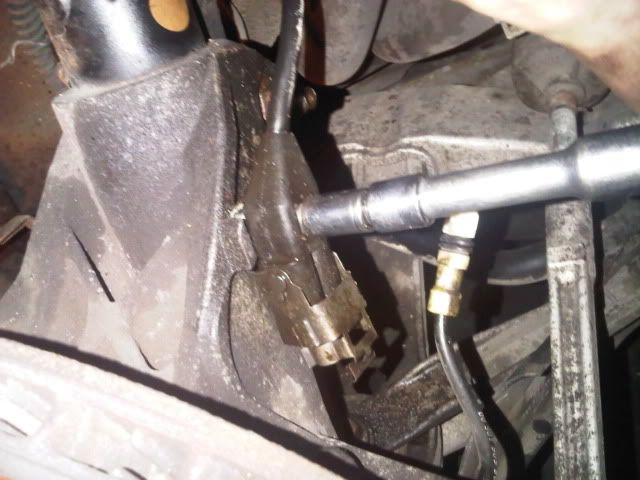
fspring40.jpg


Use something softish to pop these back in:
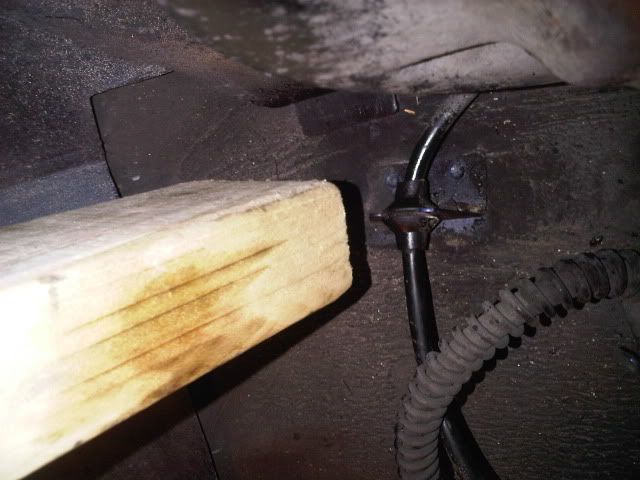
fspring41.jpg


Line calliper up:

fspring42.jpg


Greased bolts and popped back in:

fspring43.jpg


Jack hub again and put drop link back on:
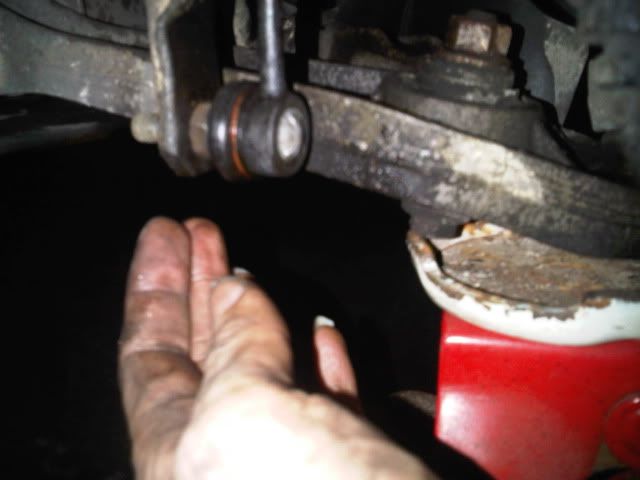
fspring46.jpg


Put brake line bracket back on:

fspring47.jpg


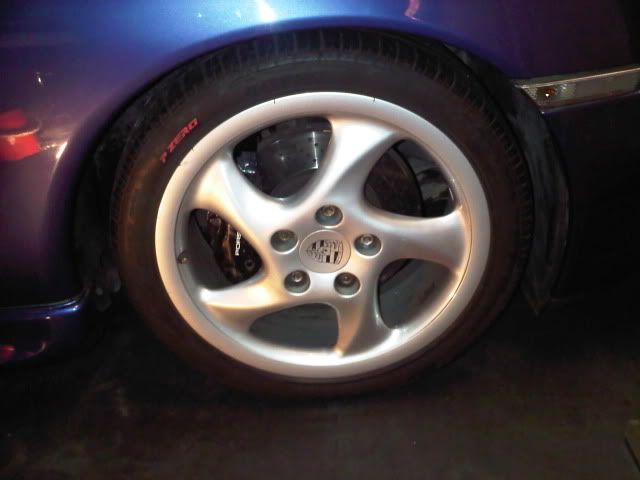
Wheel:

fspring48.jpg


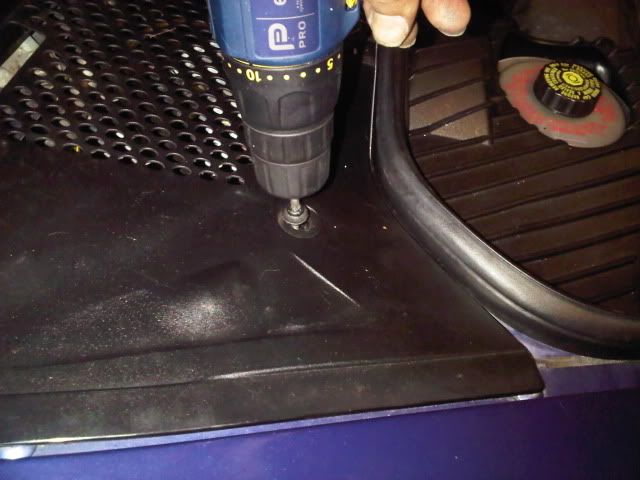
Replace cover:

fspring49.jpg


Drop car down:

fspring50.jpg


The spotting you see is penetrating oil, I pop that on all bolts before I start, I also degreased the brake disc when I got it all back together.Good idea to wash the arch liners out if you have time.

I haven't taken the back pics off of my phone yet, and I haven't got time to sort them out and upload them at the mo, but will try to get around to that soon.


Cheers,

 
Good post there steve, i think the rears are much simpler to remove. After you changed the springs and it was a bit lower did you get the geometry checked?
 
Thanks :) Yup, the rears just drop off really once unbolted and the bottom pin is removed. The front's are the trickiest.

I'm going to have to get the geo checked, I keep hearing things about centre of gravity, it's not too far from me being near tamworth, have been up that way a fair few times so will pop up there once I'm happy they have settled and I have put the new spacers on :)


Cheers,
 
Nice post Steve, out of interest how long do you think this project (front springs) should take? Also do you think a novice could undertake this without too much scope for a disaster?
It's okay - I won't hold you responsible..[:)]
 
Hi Mark,

Thanks :). I notice yours is a c4, having driveshafts at the front may make this a little more tricky. It would be best to ask around on here to see who has changed them on a C4, you may still be able to angle them out - I've done this before on FWD cars with the shafts attached, they do have some movement to come outward and angle down, however, if you pull the shaft too much and past the oil seal you will quickly dump your gearbox oil all over the floor - I can't confirm this will happen on yours though as I am not familiar with the c4. This normally isn't a big deal on most normal cars (just messy) it normally just pops back in and seals, and you just refill the oil or change it anyway. Richard will probably have a better idea if this sort of method is possible on yours (I must say, I don't know if this way is good practice, probably not, but I've done it on many cars before).

However, providing it's not much different, changing the front springs can be done in under 1 hour. Expect the first one to take at least two or even more though if you've not done anything like this before. Locating compressors and winding them down requires some time, it can take several attempts to locate them in the right place and compress the spring in such a way that you can remove the strut. Other than compressing the spring and taking apart / putting the strut back together, it's all just a few nuts and bolts.

Rears are not as fidly, but require a lot more force and strength to get them lined up. As an example, you can depress the front canisters with your fingers once the spring is compressed, the rears however won't compress easy, they have some serious poundage! I can literally put all my weight on one when it's off of the car and un-aided by a spring and it just drops slowly, when you release it, it expands pretty quickly. When the strut is put back on the car, the only real way to compress the shock is to wind the springs in, and carefully jack up the bottom of the strut using a guiding tool to locate the shock back to the hub (and a large rubber hammer!).

Keep in mind that the Indi's I called before doing mine all have said that it will take half a day or more to replace all four, and they have all the right tools and experience + others to help.

On a scale of 1-10 for someone who doesn't do this sort of thing often but is pretty handy with spanners, I would say a 6-7.


Cheers,

 
Just out of interst, why do you compress the springs when putting them back in? I would have thoughy that if they are 25 mil shorter they would sit on the damper without needing to be compressed.
 
Hi Chris, the springs are progressively wound, so they have softer active coils top and bottom that are not wound tightly and a lot more of the stiffer tightly wound ones in the middle (to try and make the car comfortable in a straight line but stiffer when trying to twist so that the car has less roll is my understanding). The standard ones have inactive coils top and bottom wound tightly together just for seating and extra height, and then have the active coils spaced further apart towards the centre. The result is the rear springs are pretty much identical in height because the aftermarket ones do not have inactive coils top and bottom. The front don't have anywhere near as many coils as the rear, but are only a little shorter.

With the rears the shock and the springs still need compressing to get it back to the same height as the hub, as when it is connected it is under load, fully expanded you are about three inches away from getting the mount back on.

With the front, as long as everything is disconnected, you would probably have room to remove the wishbone joint, push down and remove the hub and everything attached and put back together as well, But attached to the car you have no chance of pushing the wishbone down and pulling the strut from the arch as there just won't be enough clearance.

You need to compress them slightly when putting back on so you can get the top cap and all of the gubbings back on to the shock too, otherwise it puts too much stress on the threads while tightening and you could chew the nut up.

Hope this helps.


And thanks Miny :) I thought that more than anything these pics would be helpful, as it pretty much shows the removal process of the drop links too, and everyone can see how a strut is assembled. Short of unscrewing the canister from the strut and removing that, there isn't much more to standard shocks and springs.


Cheers,
 
Interesting post,Steve-I would never have considered replacing the spring from the top-I would have done too much & taken out the complete strut.
I would also suggest ,anyone doing this inc experts to wear a good pair of well fitting polycarbonate safety goggles as well as keeping clear of the line of the clamps /springs.Also best to ensure the seating positions for the clamps are as dry as possible.
 
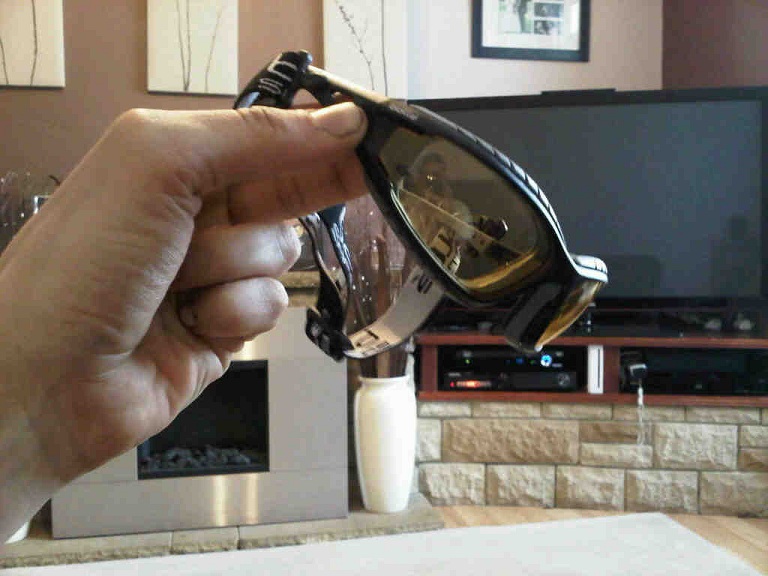
Indeed, old fashioned DIY spring compressors like that can slip and slide around a spring as the coils are never vertical. You always have to hold the spring compressor in place to get it started, and even when compressed as they are under so much pressure, they can 'pop' off or slide around. I've got some Bolle ballistic glasses I use for shooting, and I have a spare I use for wearing when doing car stuff, they are great value and I'd recomend them to anyone, they are also tinted in yellow to help situations where light is poorer.

I always start off wearing gloves as well to try and save my hands a bit, but they always end up tearing or I get fed up of not being able to feel where things go properly.


Here they are:


2261409764B9460C8F89804A52BF581A.jpg


*edit link below, well worth the cash to save your eyes, having suffered a pretty nasty corneal injury before I try to use these whenever I can*

http://www.lannertactical.com/tactical1/XX-Bolle-Raid-Tactical-Ballistic-Glasses.html

 
Cheers for the reply Steve, I may give it a go after looking into the issues you mention with mine being 4wd.
Regards, Mark
 
No problem, good luck if you go for it.

I notice you are in bournemouth, FYI the best quote I found for all four springs was around £200+ VAT from Steve Bull in Devizes - about an hour from you.

I was tempted to accept, but I wanted to do it myself so I knew what was done and I could clean and paint up bits + check bearings etc. I'm sure Steve Bull is great, but most garages would probably just throw the springs on and leave the rest as is, as that's all they are being paid for.


Cheers,
 

Posts made and opinions expressed are those of the individual forum members

Use of the Forum is subject to the Terms and Conditions

Disclaimer

The opinions expressed on this site are not necessarily those of the Club, who shall have no liability in respect of them or the accuracy of the content. The Club assumes no responsibility for any effects arising from errors or omissions.

Porsche Club Great Britain gives no warranties, guarantees or assurances and makes no representations or recommendations regarding any goods or services advertised on this site. It is the responsibility of visitors to satisfy themselves that goods and/or services supplied by any advertiser are bona fide and in no instance can the Porsche Club Great Britain be held responsible.

When responding to advertisements please ensure that you satisfy yourself of any applicable call charges on numbers not prefixed by usual "landline" STD Codes. Information can be obtained from the operator or the white pages. Before giving out ANY information regarding cars, or any other items for sale, please satisfy yourself that any potential purchaser is bona fide.

Directors of the Board of Porsche Club GB, Club Office Staff, Register Secretaries and Regional Organisers are often requested by Club members to provide information on matters connected with their cars and other matters referred to in the Club Rules. Such information, advice and assistance provided by such persons is given in good faith and is based on the personal experience and knowledge of the individual concerned.

Neither Porsche Club GB, nor any of the aforementioned, shall be under any liability in respect of any such information, advice or assistance given to members. Members are advised to consult qualified specialists for information, advice and assistance on matters connected with their cars at all times.

Back
Top