
Guest
New member
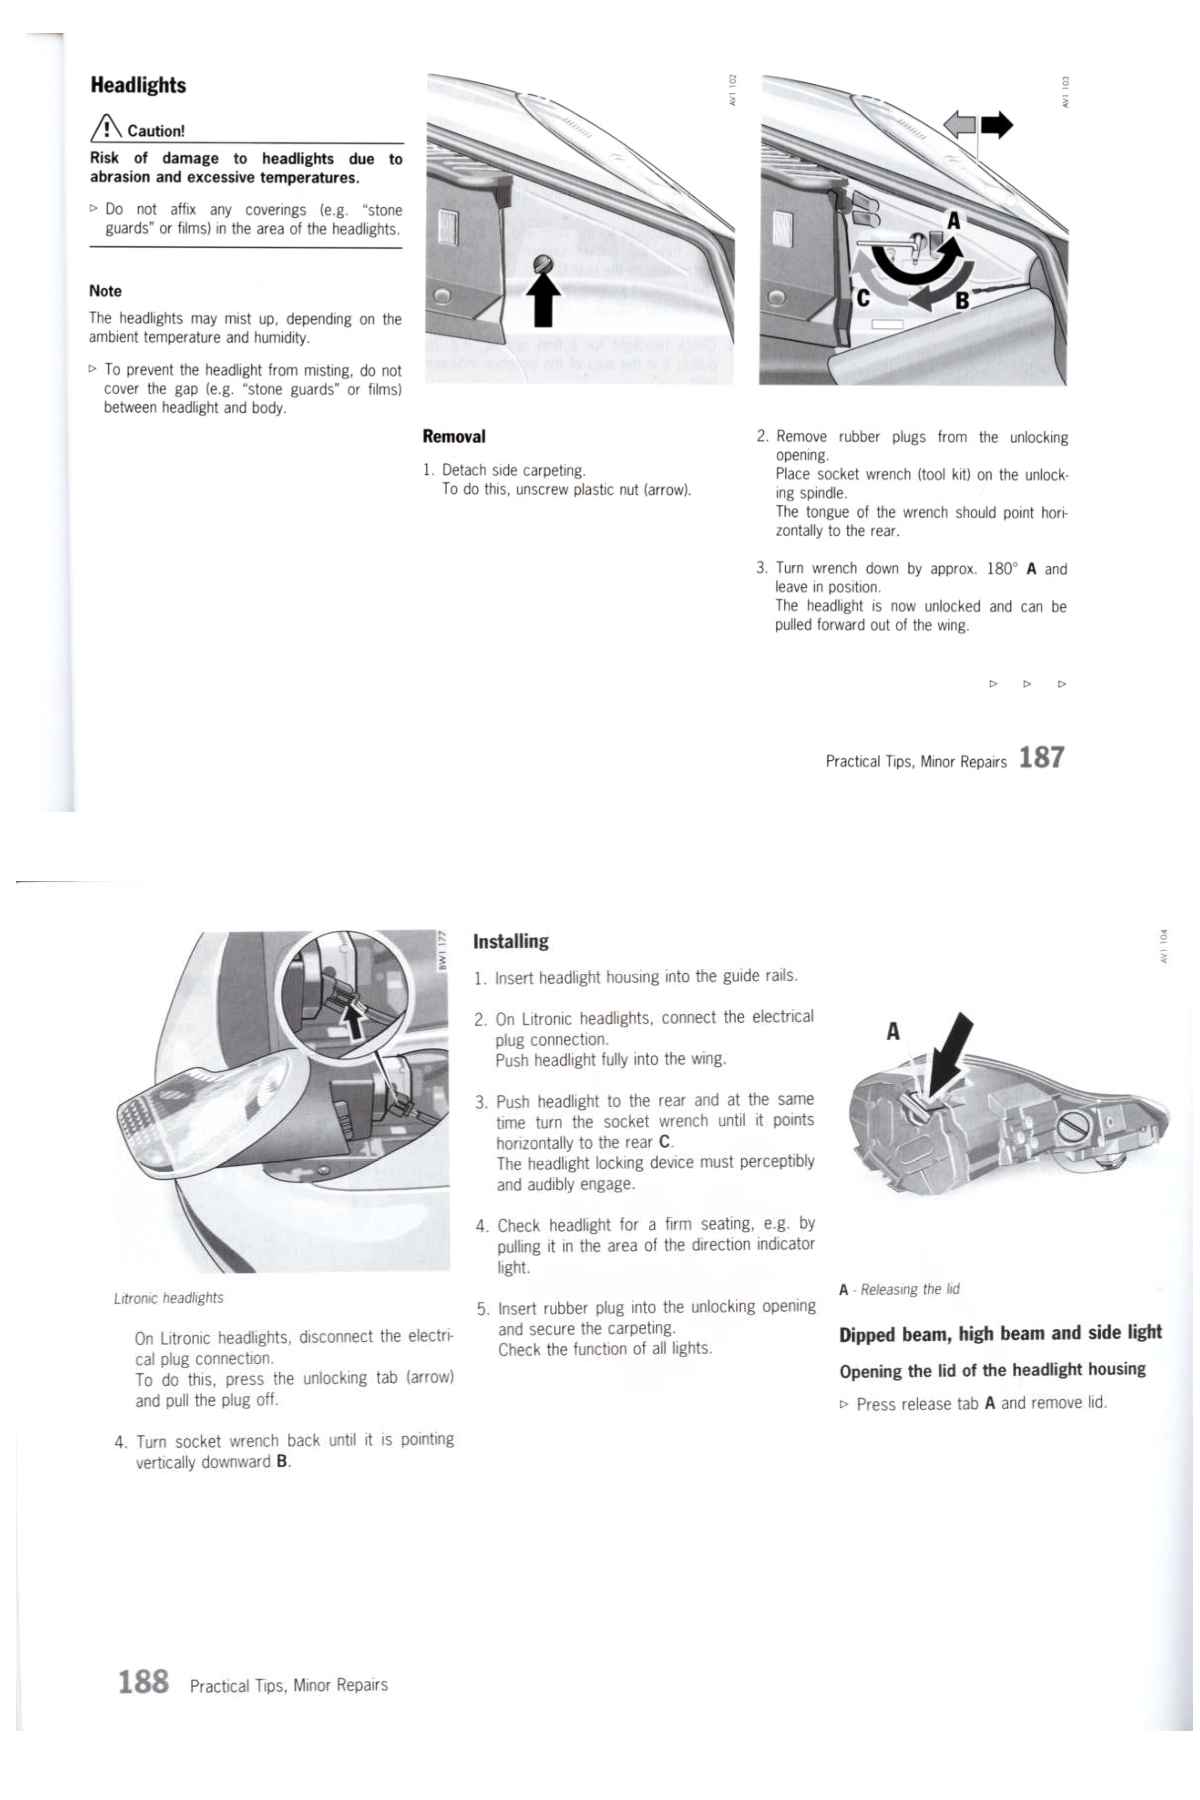
Does anyone know how to remove the front headlights? I've just bought some clear ones and have tried removing the old ones but am having no joy! [ ]
]
When you open the bonnet and remove the inside cover, there seems to be four rubber stoppers which expose four adjustments!!
Does anyone know which one does what??
Regards
David
]When you open the bonnet and remove the inside cover, there seems to be four rubber stoppers which expose four adjustments!!
Does anyone know which one does what??
Regards
David
![[sm=spanner1.gif]](/forum/styles/default/pcgb/spanner1.gif "Spanner1 [sm=spanner1.gif]") Also, if anyone can recommend a "hard plastic" glue that will take a tensile force please let me know as I am still in possession of the plastic bits.[&o]
Also, if anyone can recommend a "hard plastic" glue that will take a tensile force please let me know as I am still in possession of the plastic bits.[&o]
