Menu toggle

iPod Interface Installation

colinbythesea

New member
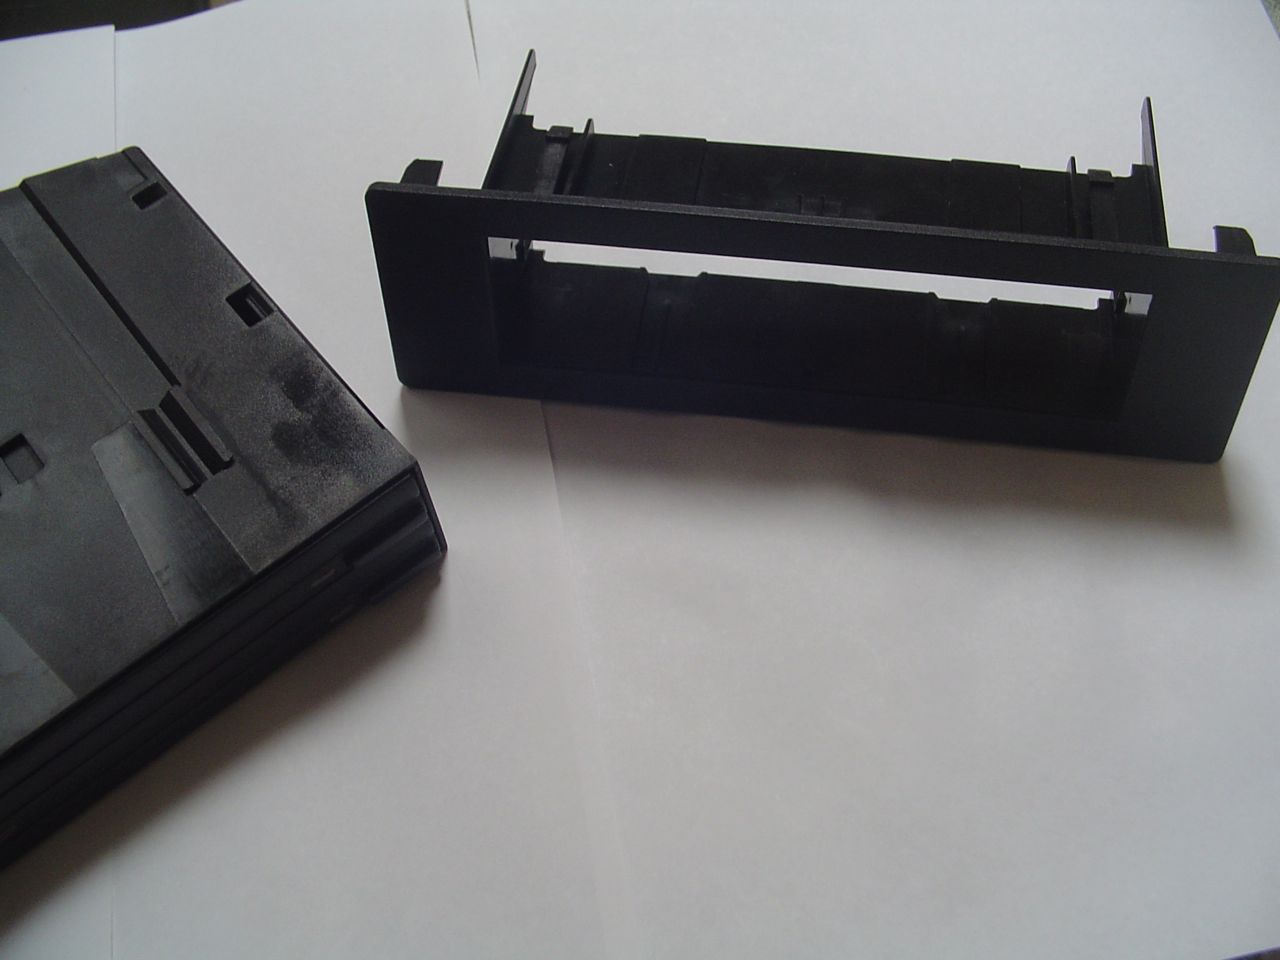
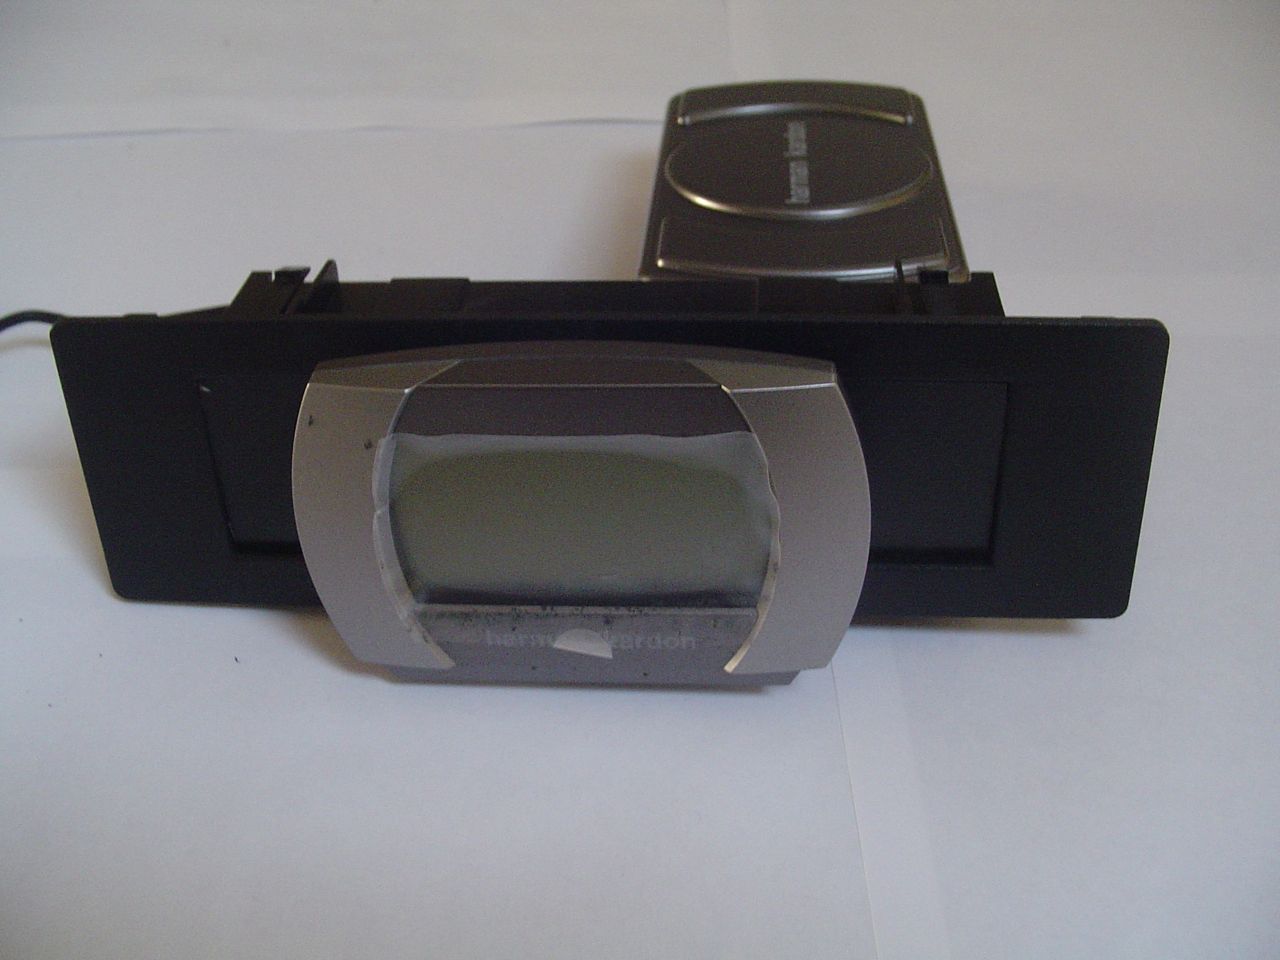
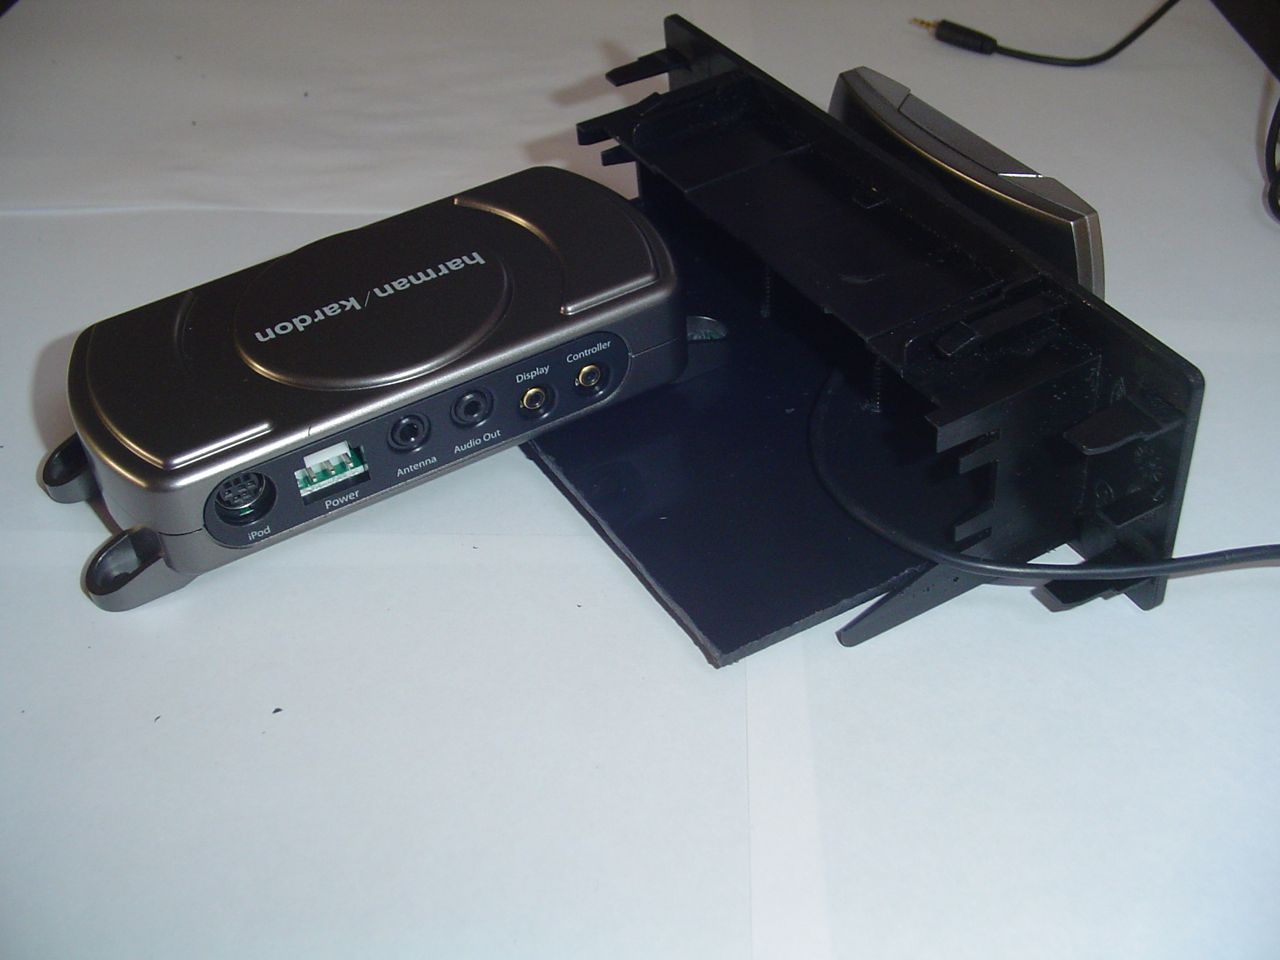
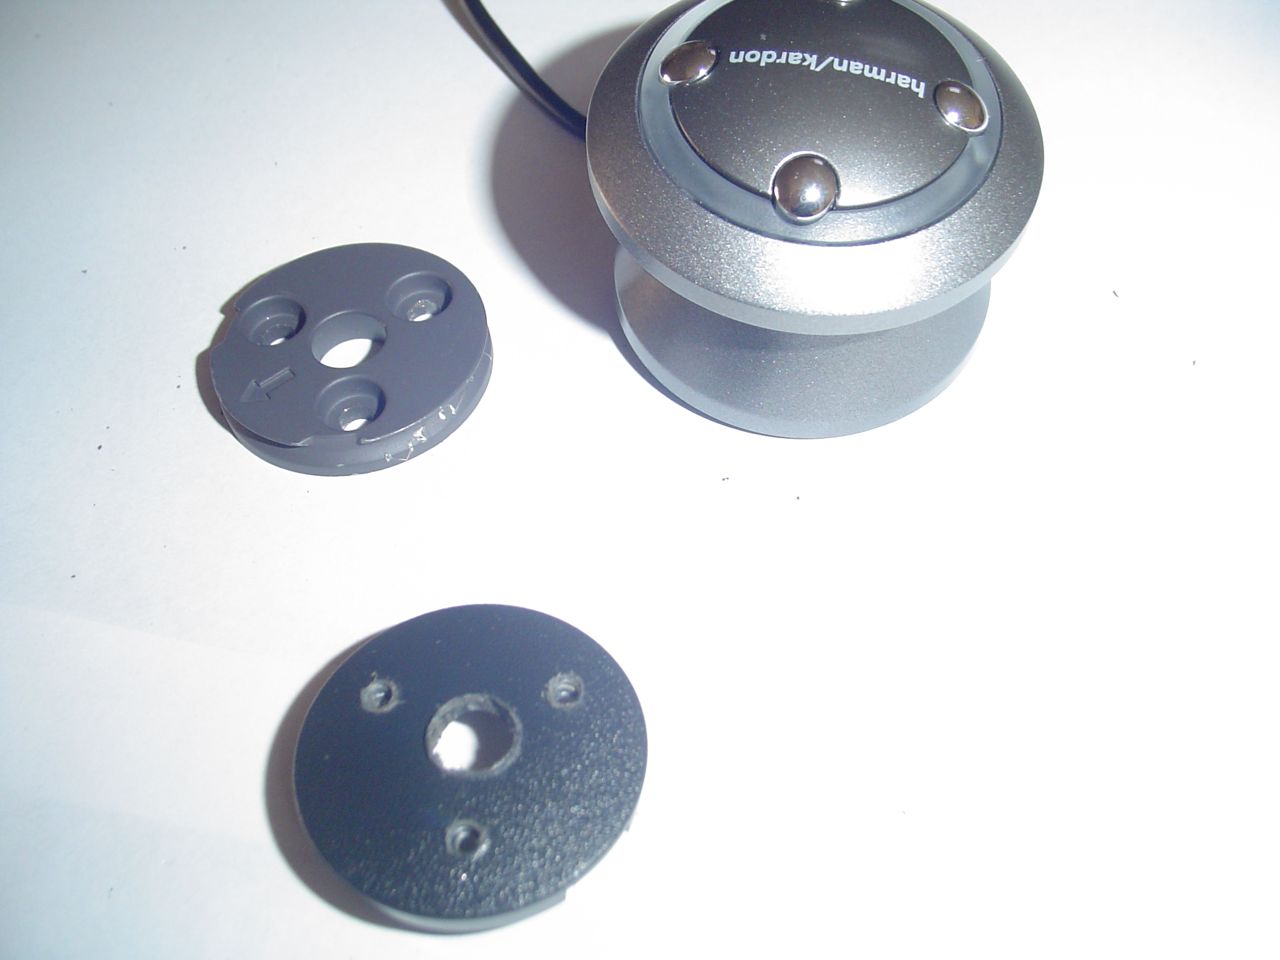
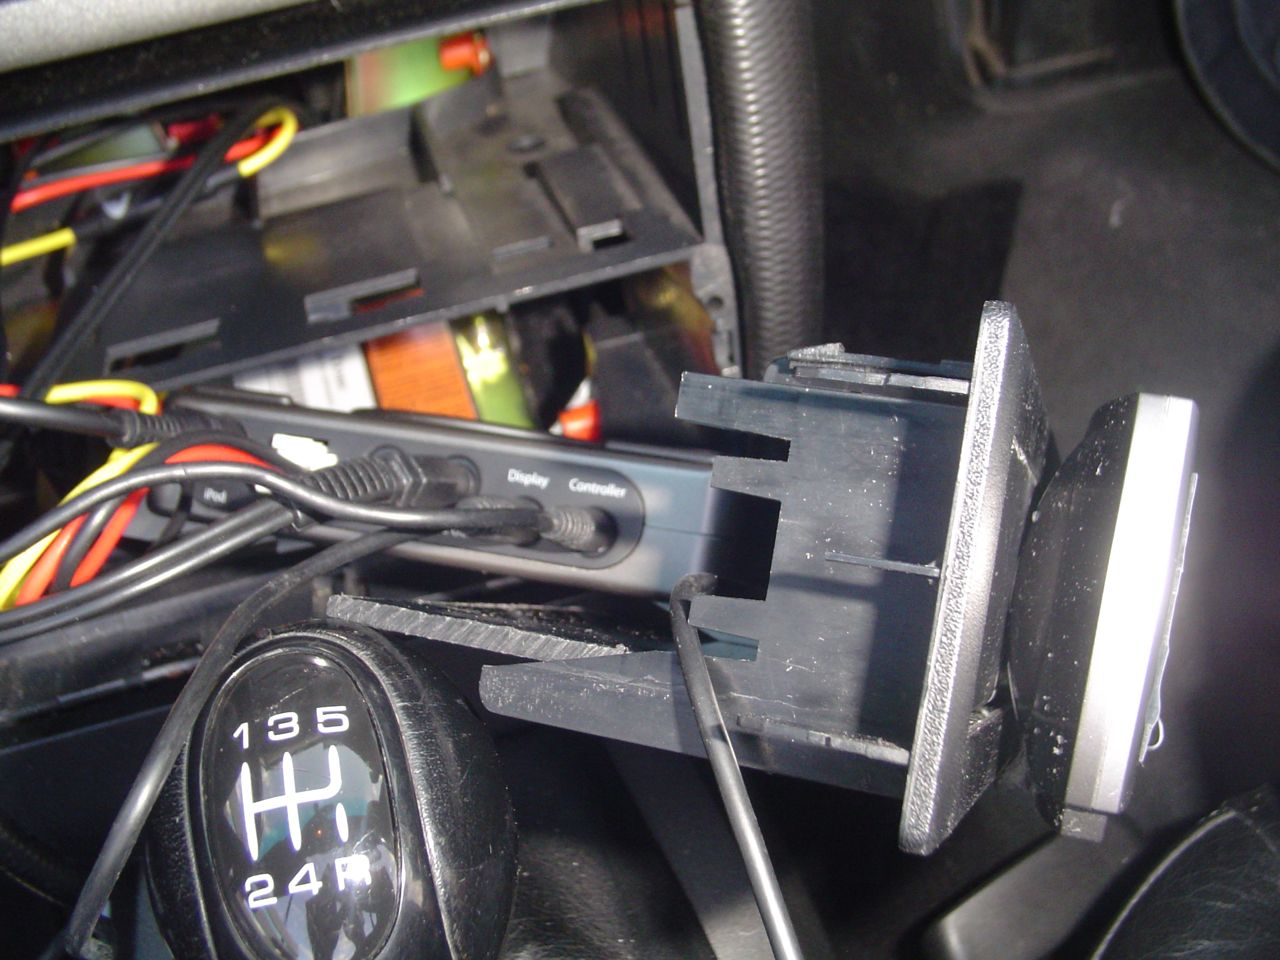
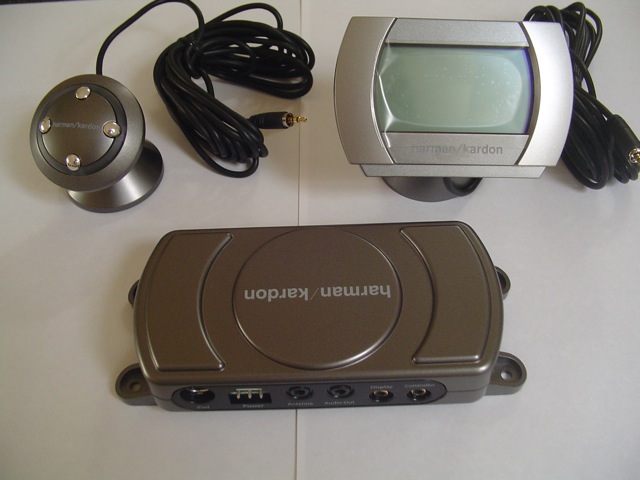
This topic will follow my installation of a Harmon Kardon drive and play iPod interface unit in my Boxster. They are widely available and I scooped mine on eBay for a very low price. The unit consists of 3 main components pictured below, the screen, control and a box of electronics. The control mimics the iPod click wheel and the screen displays all the menus you get on your iPod. A full compliment of cables is supplied each more than long enough to install in a proper size car so there should be no problem in the Boxster cabin.

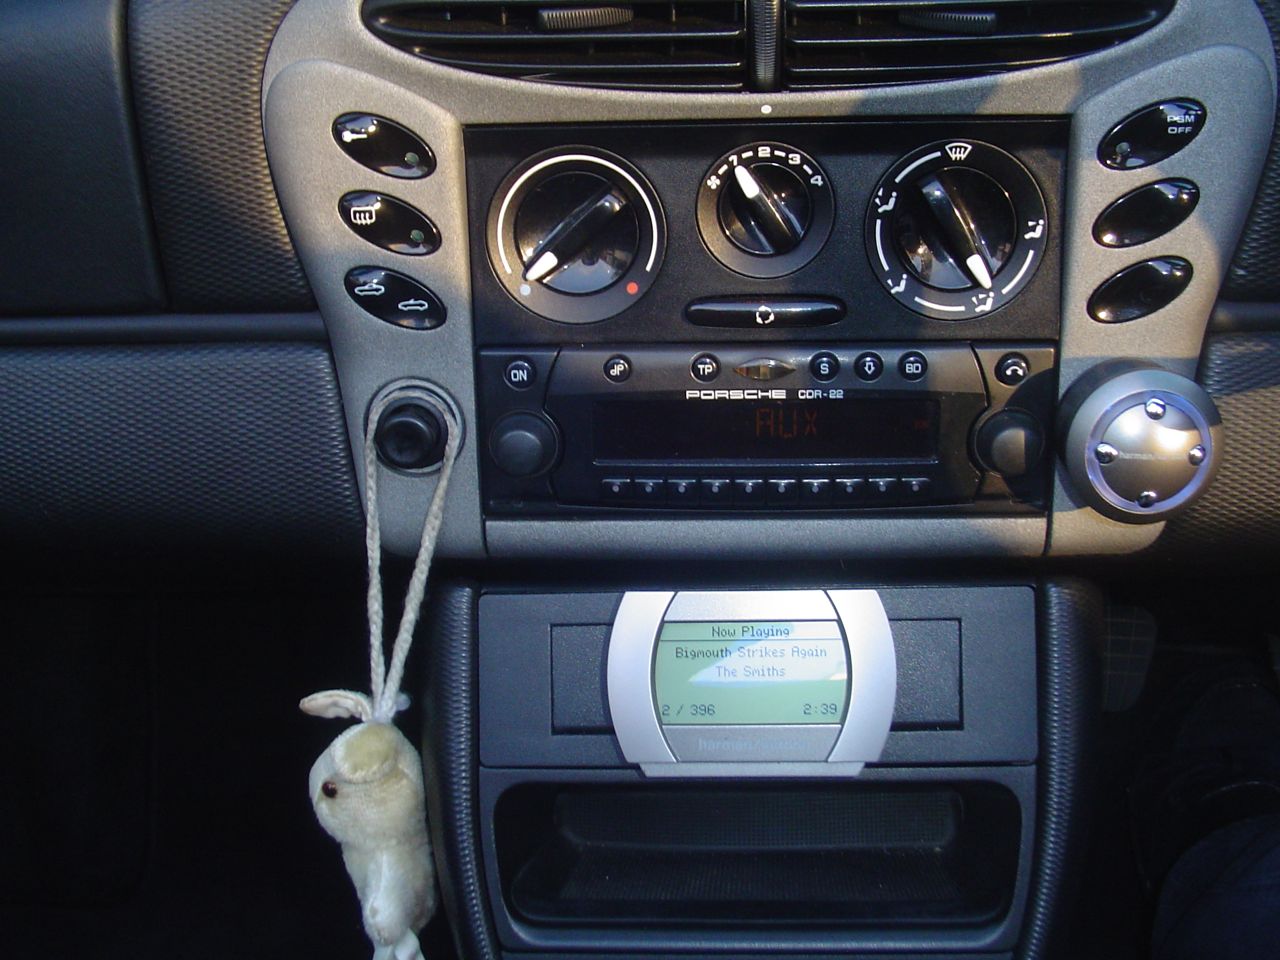
The iPod connects through the dock connector and charges whilst playing. You have 3 ways to connect to the radio, via an FM transmitter so no physical connection but lower quality. Via a wired link in the aerial giving a better quality link that can be tuned in to an FM station, this method means you can keep a CD changer connected as well. Finally through a line in, I will cover how to switch your radio to Aux in mode later.

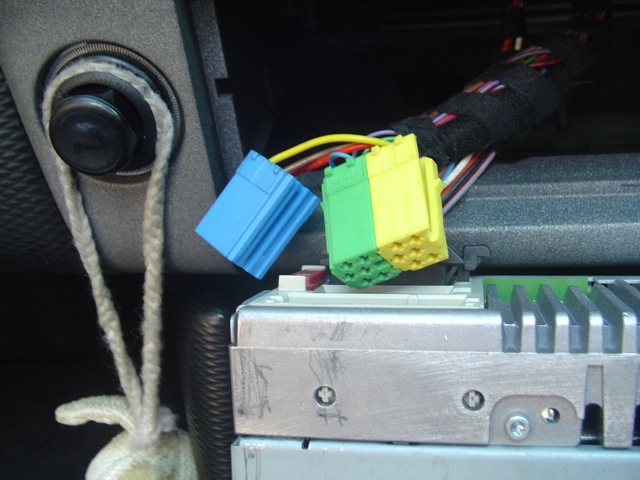
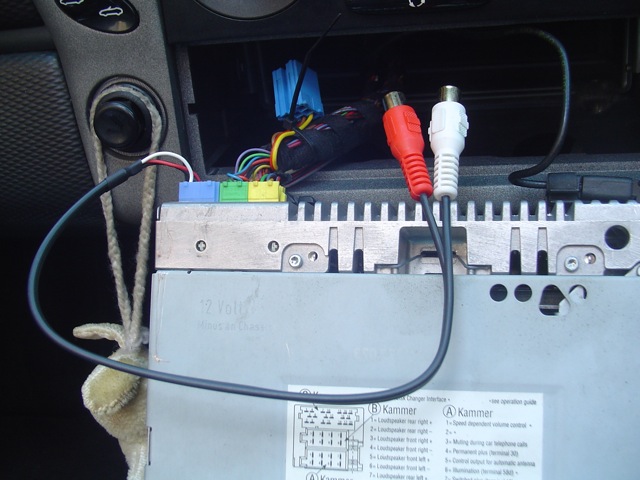
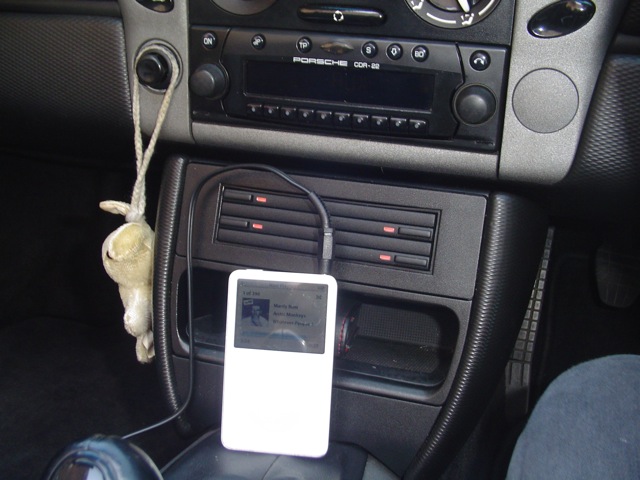
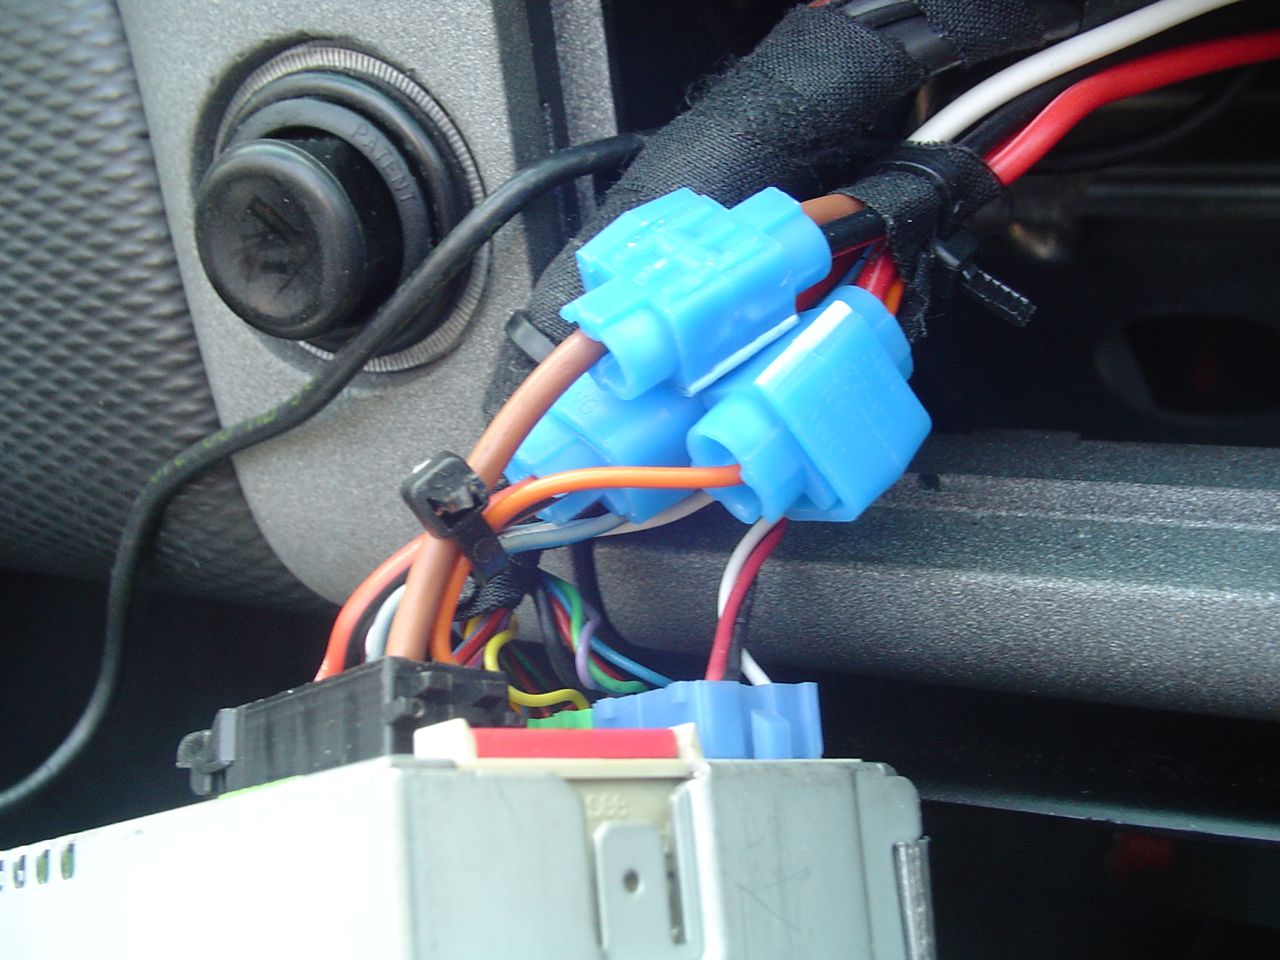
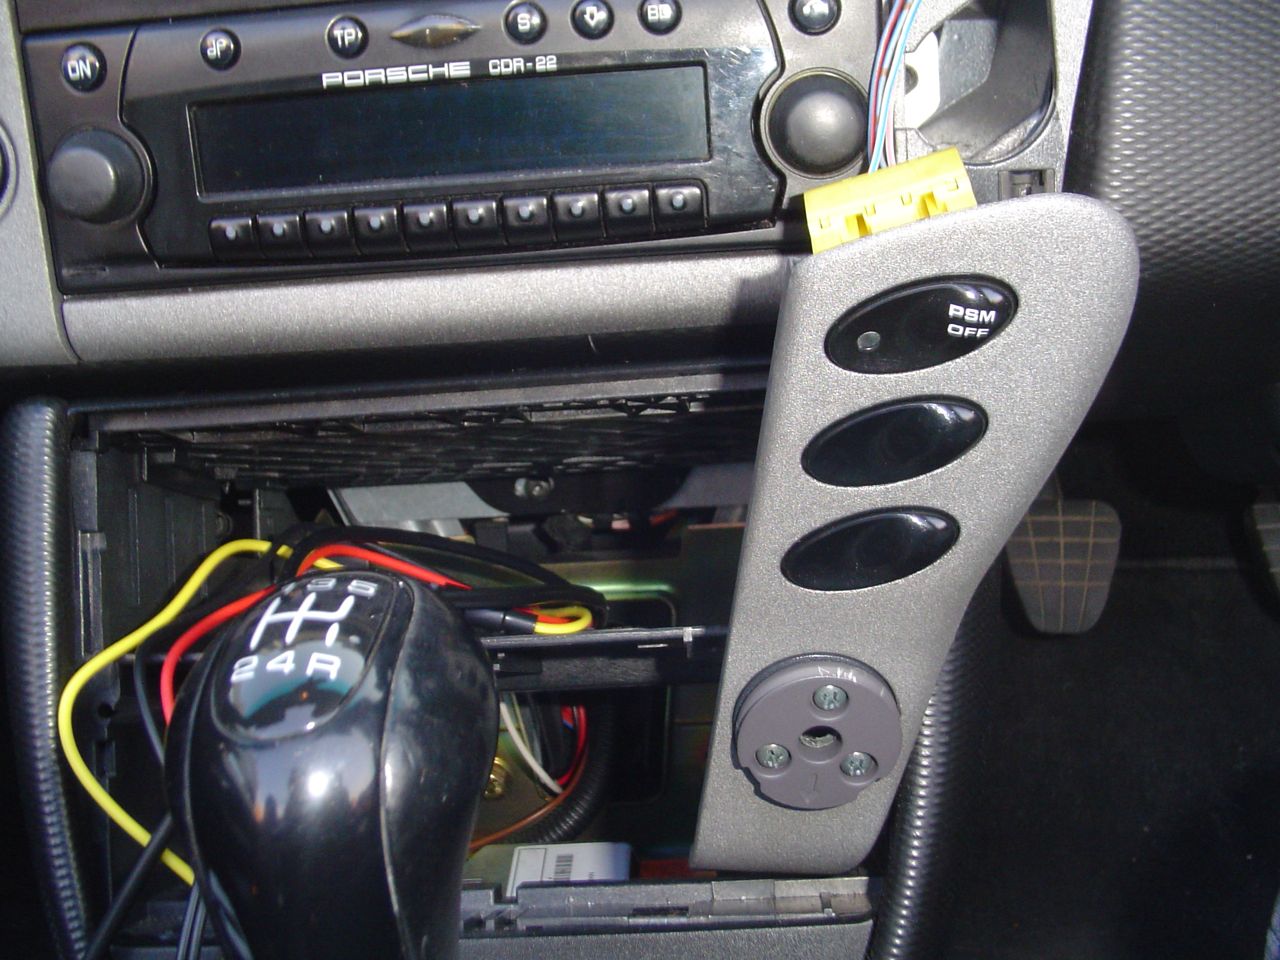
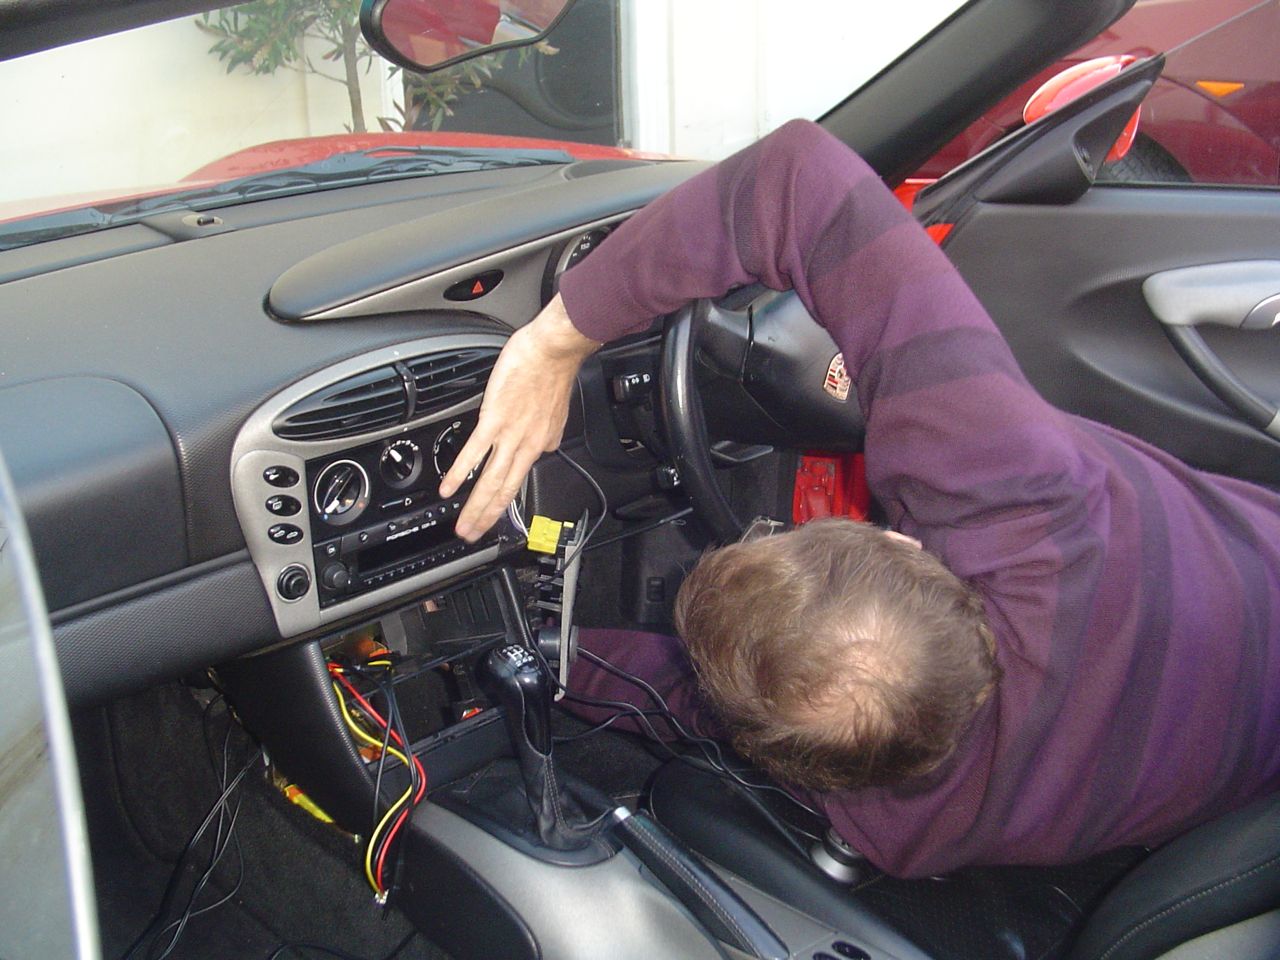
I am installing the unit in my 2000 Boxster with the CDR-22 radio, external amplifier and no CD changer. I will be using the line in and putting the screen where the CD trays are, the control where I have a blanked out hole to the right of the radio and the box behind the screen as there is a load of room behind where the CD trays are. So the first bit is to get the radio out and get a line input.

F86742D90E8F488E8B2554AB18BD8AAE.jpg
 
So here is the first bit, sorry about separating into many posts but the pictures are, no doubt, useful and there can only be one per post.

The first stage is to remove the radio and get a line input. This can be used as a way to connect an iPod, or any MP3 player via the headphone socket. The part needed is an inexpensive cable, I bought mine from from eBay. They are designed for Becker radios which is what Porsche use and rebrand. One end is a plug that goes into the CD changer socket and the other has 2 RCA (phono) connectors.


I pulled the radio out with some removal tools. It is a tight fit and took a few goes to find enough courage to pull it as hard as it needed. I have no radio code so I left the battery connected and hoped the power lines stayed in. This is not recommended so if you have a radio code disconnect the battery first. With the radio out I could see the blue, green and yellow connector. The blue portion is for the CD changer and is connected on my car even without a changer. The connector was pulled out and the blue part seperated from the other 2 parts by unclipping it and sliding it off. This left me with the situation you see in the picture.

5AE63AEF15BE46C58754A90C3583756F.jpg
 
I then connected a cable from the Harmon Kardon unit which is 2 RCA connectors one end and a 3.5mm headphone plug the other. This will eventually go into the box of electronics, but for now I have threaded it down the side of the dashboard to connect the iPod through its headphone socket. The radio went back in at this point.

The final piece of this stage was to change the radio from CD changer to Aux in mode. To do this I held down the TP button for 10 seconds until the word Becker appeared on the display. Turning the right hand rotary control gets it to AUX IN which can be turned on and off by the multifunction buttons indicated on the display. To get out of this menu mode I turned off the radio and removed the key. There is probably a proper way to do it but I haven't found it yet.

In the picture you can see the iPod playing through the headphone socket. Next will be modifying the CD tray area to fit the screen.

D856D978665948F08F3CA9F58F759A6E.jpg
 
I have been making slow progress on this installation today due to circumstances beyond my control, here is an update.

It has been good to get the iPod playing, if only through the headphone socket, cruising around the seaside where we live buying ice creams and photographing my now clean and shiny Boxster. I was going to mount the screen next but plans are changing on this at the moment. The Harmon Kardon unit is very well made and all the components plug into each other so wiring is made easy. You get 2 ways to provide power for the unit, a cigarette lighter plug or a loom to connect behind the dashboard. Today I decided to test the unit out as I had bought it from eBay and wanted to be sure I hadn't bought a bad one. For this I was using power from the cigarette lighter socket. As the radio now has the line in cable connected all was plugged in and worked fine. The drive and play works just like an iPod.

Of course for the permanent installation I will be using the loom provided and connect it behind the radio. As mentioned previously, I don't have a radio code so I don't really want to take out the power plug. Normally I would cut the cars loom and splice in the additional loom with proper crimp connectors or solder joints. But it looks like those terrible scotchloc connectors are my only option at the moment. My plan was to take the permanent feed for the Harmon Kardon unit from behind the cigarette lighter as it would be easy to make a supplemental loom with proper connectors. I would then use one scotchloc connector behind the radio for the switched supply.

So, I tried to remove the cigarette lighter socket from the dashboard. It would not respond to prising out and I was at that point my Boxster seems to keep taking me to where there seemed to be more than enough force happening. Then for a minute I turned off my brain and started to poke around in the socket with my screwdriver. Bit of a spark and fuse gone. Time to take a walk to the motor factors up the road, it's not worth driving because you can't park in Southsea on a sunny Saturday, to buy scotchloc connectors and a fuse.

I went to a cash machine on the way as the motor factors don't take cards under £10. Money would not come out of my business account. To cut a long story short, the rest of the day has been spent trying to sort out direct debits that some thieving oik has set up with our business bank and taken a few hundred quid. Being a business account were only on line to it yesterday but it seems somebody down our road has taken the bank details, used them for direct debits on their house utilities in their name. It is getting sorted now but not much can happen until Monday.

So be careful with your details boys and girls. We shred every bit of paper, even envelopes, and then compost the shredings. So how details got out we may never find out. We do loose a lot of post and have a lot badly delivered so that could be the source. Needless to say progress stopped on iPod interfaces. Will keep you all posted on the power loom (I think) next.
 
Looking around again today, the dashboard panels either side of the radio just clip off so I can get behind the cigarette lighter. I will, therefore, make a small loom to take unswitched 12V and earth to the Harmon Kardon and use the radio switched supply as the final feed.
 
I unclipped the panel off of the dashboard on the right of the radio today for a look. After a bit of time thinking about mounting the control unit, I took the part number from the back of the blanking plug in the hole that's to the right of the radio. Mine is silver so I would recommend finding out what number yours has on the back if you follow this route. A new one was ordered for the princely sum of £1.70 from AFN in Guildford who post it at a reasonable rate. I also ordered one of the improved coolant reservoir caps. A grand total of around £16. Who says Porsches are expensive?

The new blanking plug will get drilled to accept the Harmon Kardon control unit and (hopefully) it will snap in and hold with a small drop of superglue on the back. More with pictures as I get around to it.
 
With a bit of activity yesterday the Harmon Kardon Drive and Play is installed and working. So as time permits I will finish these posts.

After writing that the Harmon Kardon leads are generous in length, my words come back to haunt me. The power lead needed extending so some extra red, black and white (the lead has yellow but I couldn't find any yellow wire anywhere) were crimp jointed onto the lead. One end is bare wires and the other a plug that goes into the box of electronics. After much thought I decided to take power off of the loom at the back of the radio.

Because I didn't want to unplug my radio I decided to use schotchloc connectors. I hate these things, they just seem such a bodge and they can be awkward and bulky. My concern is always that they weaken wires storing up future problems. But decision made out came the radio. The three wires were connected as follows:

Harmon Kardon Red to Radio Red - Unswitched 12V
Harmon Kardon Black to Radio Brown - Earth
Harmon Kardon Yellow (white on lead now) to Radio Orange - Switched 12V

The picture shows these connections at the back of the radio. In the picture the radio has been turned upside down, the plug next to the fuse is at the bottom of the unit. All of the radio socket pinouts are documented in the Porsche audio book. Wires were secured using cable ties so they don't wiggle around in future and snap.

To gain access for cable routing a few things were dismantled. The CD trays came out by opening them all and giving a good hard pull. The oddments tray below it also just pulls out and the carpeted panels each side of the centre console in the footwells pull off. The power cable was then routed behind the radio and back through lower down to end up where the CD trays would have been.

B6E73F062379419CA03E3D1F16D2848C.jpg
 
Now we get onto the exciting bits, installing the screen and control. As mentioned previously the screen is going where the CD trays are. Having removed the CD trays I was left with an assembly of CD trays and facia.

3AD6B058F6DB4E4287E123376DC9B328.jpg
 
Holding the CD trays into the facia are 2 plastic clips each side. Gently opening theses allowed the CD trays to be separated by pushing them backwards.

72C0544CBC85431DAE7817E2BFF73087.jpg
 
Left with a rectangular hole to fill and mount the screen in front of I searched around for something suitable to make a chassis to hold everything and fill the hole. Initially I was going to use sheet aluminium, but my local B&Q were out of smaller sheets so I went to Maplin to see what they had. I found a plastic box with a finish that matched the facias perfectly, Maplin part No. BZ74R.

The box was cut up to make an L shaped chassis assembly which fills the hole in the facia. Its base will allow the box of electronics to be mounted behind and a couple of holes in the front for mounting the screen and passing the cable behind. To mount the screen I dispensed with the Harmon Kardon swivel base and screwed through to the middle threaded hole on the rear of the screen. This gave a more flush mounting otherwise it would have been fighting with the gear lever.

The picture shows the chassis, this plastic is tough, it took out my last dremel cutting blade and took a lot of filing.

7190280E014247E1919214516E0C782F.jpg
 
The chassis was slid into the rectangular hole of the facia. Two holes were drilled in the bottom of the facia to screw through to the chassis. These holes are out of sight behind the facia and won't affect the CD trays should they ever go back in.

Behind was mounted the box of electronics. There are 4 holes to mount the box, or brain as Harmon Kardon refer to it. Using just 2 holes mounted the box on the base of my chassis. It's very light and was perfectly secure. The remaining holes will be hanging in mid air so shouldn't rattle on anything.

The picture shows the whole sub assembly ready to plug in wires and clip back into the centre console.

479EE5106B46431798ECC308AFF6E59B.jpg
 
As mentioned previously I ordered a new blanking plug from AFN for the princely sum of £1.70. I gave them the part number from the back of my silver one and said I wouldn't mind a black one and that's what came. This was drilled to accept the metal base for the control unit. The control unit fits to the metal base and secures With a grub screw.

In the picture is the blanking plug in the foreground with a pattern of holes matching the mounting plate in the background. The centre hole is to thread the cable through whilst the 3 outside holes are used to screw the base on with self tappers supplied. Despite it looking off centre in the picture, I can assure readers that it is all nicely centred, the blanking plug being, conveniently, the same size as the mounting plate.

B1EBD27E94074B4BAA1D744464F8275F.jpg
 
Off came the dash panel to the right of the radio, like a lot of the interior it just unclips. Out came the old blanking plug and in clipped my new one complete with mounting plate. A drop of superglue was put on the lugs behind to stop the whole assembly rotating.

The cable for the controller was threaded through the middle and a way found through to the CD tray area. Back went the dash panel and the controller was mounted on its mounting plate.

122CA3832EE54DE6AAF1679A5ED06F5B.jpg
 
This next bit hurt!

My iPod will live in the locking box in the centre of the car. Again things just unclip, this time on the side of the box is a trim panel that pulls off. A HOLE WAS DRILLED IN THE SIDE OF THE BOX, see I said it would hurt. There is an outer and inner skin to the box, in the picture the 2 holes you see are already in the outer skin, I just drilled through the inner skin. One end of the supplied dock cable has a round connector so that can be threaded through from the inside meaning a dock connector size hole isn't needed.

The cable was tucked under the bottom edge of the centre console on its way to the front of the car. The panel, as before just clipped back on.

9DD359BE43BF4FB5B622756116559EB5.jpg
 
OK, last lap. I now had all the cables coming to the area where the old CD trays used to live. There was a lot of excess cable and none of them are simple cables so cable shortening for the sake of neatness was not an option. The slack was all wound together into a tidy bundle and cable tied together. This was tucked into a space behind the dash. There is an area free above the air bag sensor, I know it's the air bag sensor it says so on top, but I kept everything away from this as there is no way I want to interfere with its operation should it be needed.

The cables were plugged into their respective sockets on the Harmon Kardon Brain (see picture) and my new sub assembly clipped into the CD tray area.

E226CE84076448B4A1C92C49B3DBA319.jpg
 
Panels all clipped back on here is the finished installation. The finish of the unit complements my silver interior, conveniently. Notice how the Maplin box finish matches the original Porsche plastic.

7793E884C26B44DEBA80751287257B5A.jpg
 
iPod playing from the lockable box. Note enough lead was left for the dock connector so the iPod could be lifted out and moved around if it needs to be.

B7701BC11C5347EE9A786ADC8BC290FC.jpg
 

Posts made and opinions expressed are those of the individual forum members

Use of the Forum is subject to the Terms and Conditions

Disclaimer

The opinions expressed on this site are not necessarily those of the Club, who shall have no liability in respect of them or the accuracy of the content. The Club assumes no responsibility for any effects arising from errors or omissions.

Porsche Club Great Britain gives no warranties, guarantees or assurances and makes no representations or recommendations regarding any goods or services advertised on this site. It is the responsibility of visitors to satisfy themselves that goods and/or services supplied by any advertiser are bona fide and in no instance can the Porsche Club Great Britain be held responsible.

When responding to advertisements please ensure that you satisfy yourself of any applicable call charges on numbers not prefixed by usual "landline" STD Codes. Information can be obtained from the operator or the white pages. Before giving out ANY information regarding cars, or any other items for sale, please satisfy yourself that any potential purchaser is bona fide.

Directors of the Board of Porsche Club GB, Club Office Staff, Register Secretaries and Regional Organisers are often requested by Club members to provide information on matters connected with their cars and other matters referred to in the Club Rules. Such information, advice and assistance provided by such persons is given in good faith and is based on the personal experience and knowledge of the individual concerned.

Neither Porsche Club GB, nor any of the aforementioned, shall be under any liability in respect of any such information, advice or assistance given to members. Members are advised to consult qualified specialists for information, advice and assistance on matters connected with their cars at all times.

Back
Top