Menu toggle

Xenons

Neil Eldred

PCGB Member
Member
Hi people,

I just thought I aught to share a jolly good upgrade that I did on my 964 this week. I went to the Autosport show on Saturday and bought a set of Xenons from http://www.hidlighting.co.uk/ It was a doddle to fit without any cutting or spliceing required and the light difference is amazing. Well worth it and you dont appreciate as to how bad the lights are until you upgrade. Sorry if it sounds like a plug but as a 964 owner which has been in PP more times than Jeff Forsyths [;)] I thought that if anyone is on the fence as to getting it done I can heartily recommend it.

Regards,

Neil Eldred
 
Hi Neil

Just had a look at the site. Prices look very cheap - H4 complete car kit at £130? But there is next to no information on the kits themselves.

Am I interpreting the info correctly that their H4 kit is dipped and main beam HID?

Warranty?
 
My thoughts too. £130 seems like a pretty good price if it provides both dipped AND main beam.

Have you fitted them yet Neil??? If so, where did you mount the ballasts?? No butchery needed to the headlamp bowl??? This sounds too good to be true. More info please.

Regards

Dave
 
[FONT=arial"]Our HID systems are suitable for use on dipped AND high beam applications, unlike any other systems on the market (H4 Kits Only)
[FONT=verdana,geneva"]
[FONT=arial"]should be then.[FONT=verdana,geneva"]
[FONT=arial"]
Neil maybe a few pics then, might be handy for us mere mortals.


Kevin

[FONT=verdana,geneva"]
 
The ballast boxes I fitted behind the bumper within the boot space and all that I had to do was drill a hole in the left back of the light bowl on the right hand side (as your facing the car) as the headlight outlet is in the right hand side and the wires from the bulb arent long enough and on the left hand side I had to drill a hole through to the wing. I got some gromits to line the holes and Bobs your auntie. Its the full kit folks which comes with a changeover box for dipped / main adjustment which you plug in one of your old headlight plugs into . There is a warranty card with it which needs to be filled in and sent back I will get some pictures posted soon to show you all.

Regards,

Neil Eldred
 
Thanks Neil - very interested to know how you get on. I've been looking at kits on Hids4u but 'your' kit is half the price.
 
ORIGINAL: Neil Eldred

The ballast boxes I fitted behind the bumper within the boot space and all that I had to do was drill a hole in the left back of the light bowl on the right hand side (as your facing the car) as the headlight outlet is in the right hand side and the wires from the bulb arent long enough and on the left hand side I had to drill a hole through to the wing. I got some gromits to line the holes and Bobs your auntie. Its the full kit folks which comes with a changeover box for dipped / main adjustment which you plug in one of your old headlight plugs into . There is a warranty card with it which needs to be filled in and sent back I will get some pictures posted soon to show you all.

Regards,

Neil Eldred

Neil,

Great to see you're keeping the old love of my life in tip top condition! How has she been treating you? All good I hope. Will be back in the Pork stable very soon - am currently looking around for a 996tt. Hope to see you and more importantly my old baby at an event in the summer if poss.

cheers
will
 
Its all good Will. She is a pampered puppy with 103k on the clock now. I treat her to new discs and pads all round in November and gets serviced on a regular basis. It was in GT Purely Porsche world in July 05 on the 964 buyers guide amongst other things Will be good to catch up and show her to you at an event.

Regards,

Neil Eldred
 
Here are some pictures as promised.


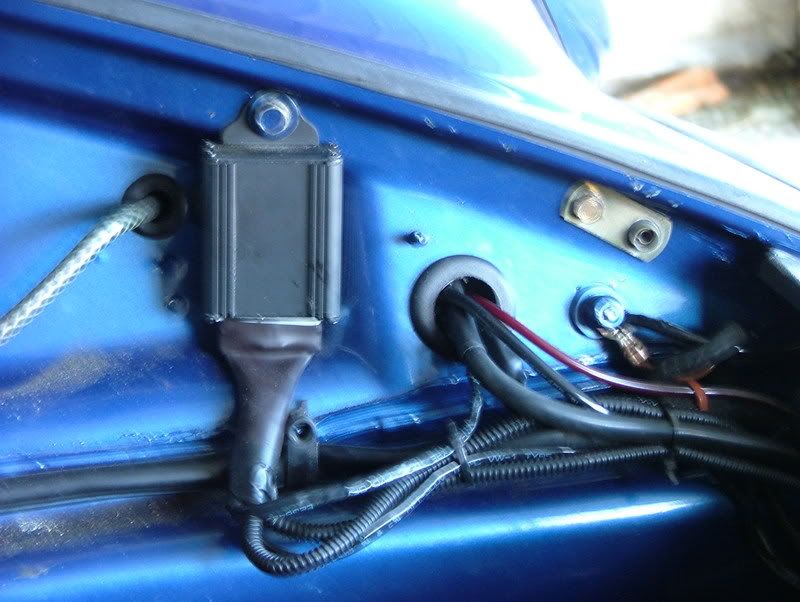
Here is the left hand side ballast box. Note two fuses next to it which are for each box.
http://i122.photobucket.com/albums/o241/neil964_photos/Xenon%20lights/BallastboxLHS.jpg'>

Here is the right hand ballast box. The wire to power it runs along the front and is tie wrapped up.
<IMG src="http://i122.photobucket.com/albums/o241/neil964_photos/Xenon%20lights/BallastboxRHS.jpg

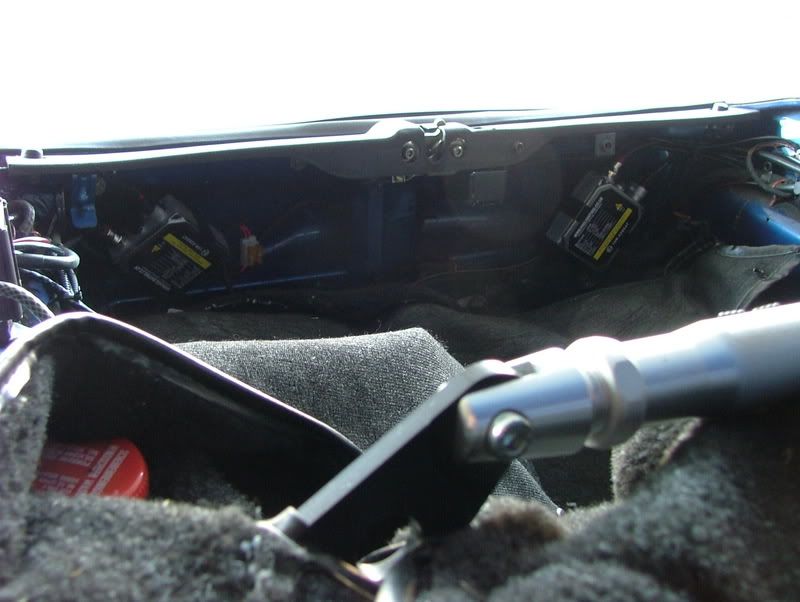
The pair of ballast boxes. They are at that angle because the brackets that come with them are flat with holes in them (a bit like meccano) and the available fixings are two nuts that fix the top of the bumper on just under the plastic lip.
Ballastboxes.jpg


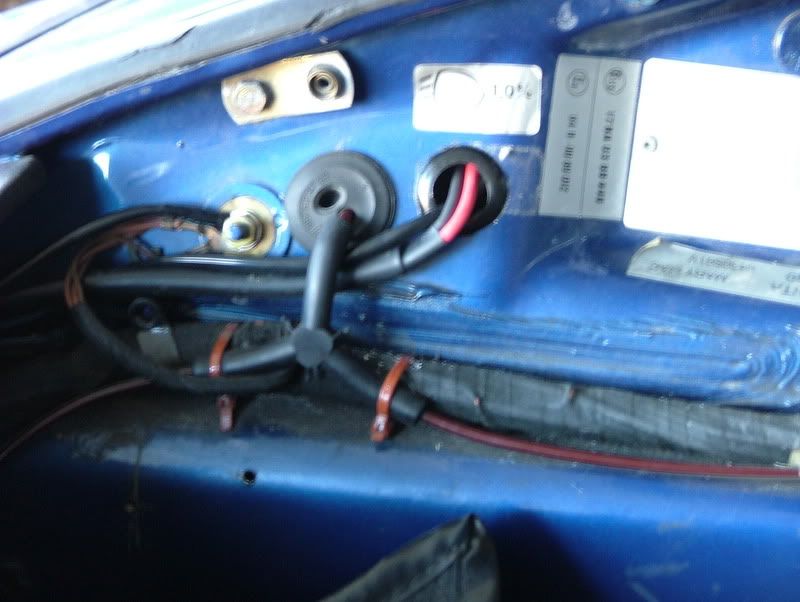
Here is the changeover box from Hi to Lo beam.. One wire goes through the gromet to the plug on the back of the headlight. The other three are to the ballast boxes and on to an earth and the positive feed.
HiLochangeoverbox.jpg


On the left hand side of the light bowl you will see a 25mm hole which I drilled and lined with a gromet. Because of where I put the ballast boxes the lead from the light bulb (which is about 6" long and the wire from the ballast box is about 12" long) isnt long enough so you have to have to push the wires through to the wing then plug them all together (there are 3 wires and its impossible to mix them up) and push the plugged wires back into the wing. The connectors are waterproof but as its a lined wheelarch no water will get in. The original hole on the right where the headlight plug came in I first plugged in the changeover box then wrapped it in insulating tape so it cant come apart and pushed it back into the wing to create space in the light bowl.
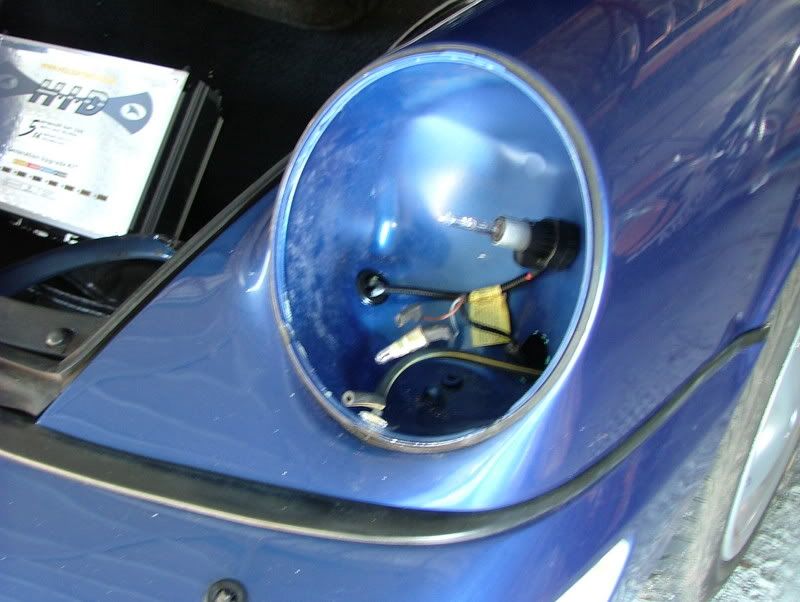
Holedrilledinlight.jpg


I drilled a 25mm hole through to the wing here and lined it with a gromet. I could have used the original one next to it but it would have been too tight to get the plugs for the lights through and have the pipe in the apeture too. Plugging the lights into the ballast box is the same as on the left hand side but there is no need to plug anything into the original headlight socket so again that was wrapped in insulating tape and pushed back into the wing. Note the earth point on the left which has an extra wire on it now which comes from the wiring loom of the changeover box

Holedrilledtowing.jpg


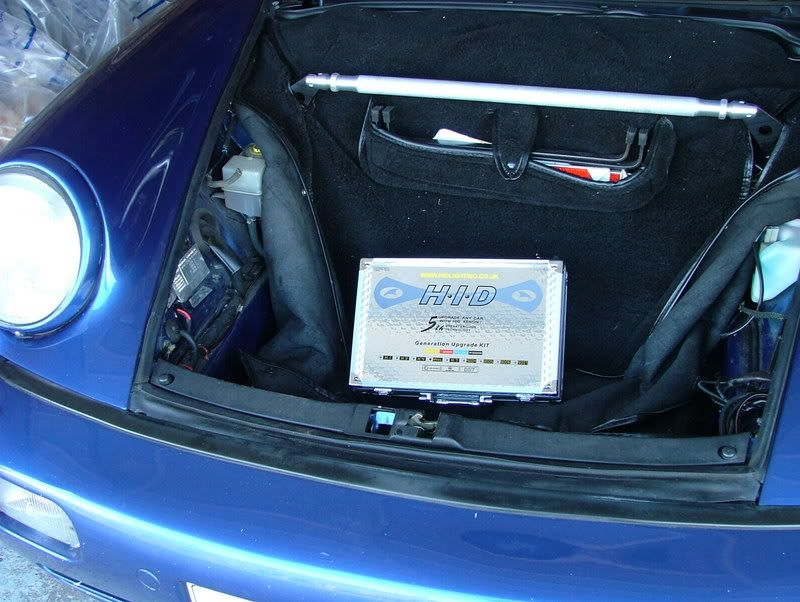
Here is a picture of the kit as it comes from the manufacturers. You will also get a smaller cardboard box with the changeover box

Lightkit.jpg


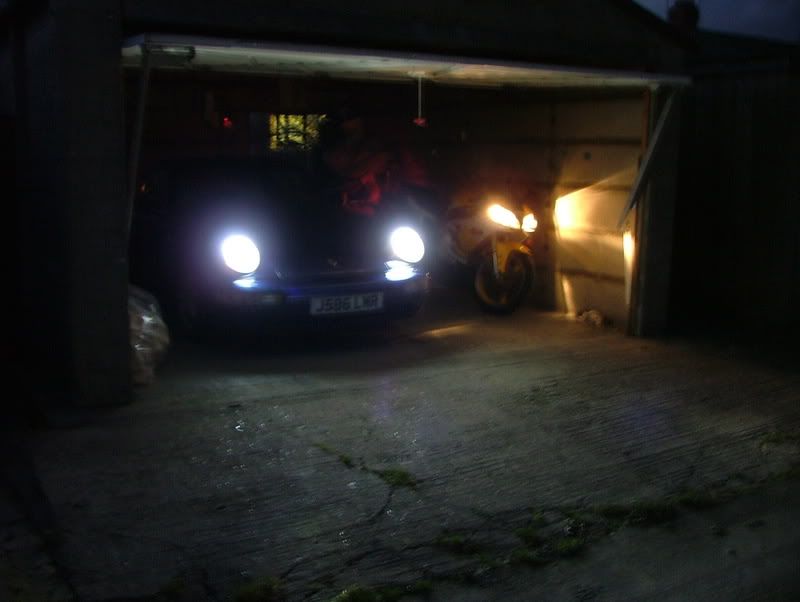
Here is the difference in light quality between the xenons and filament lights. It is a white light and had no blue in it. You can see how yellowy the filament ones are by comparison.

Lightson.jpg


Regards,

Neil Eldred
 
ORIGINAL: kevin

Our HID systems are suitable for use on dipped AND high beam applications, unlike any other systems on the market (H4 Kits Only)
should be then.

Neil maybe a few pics then, might be handy for us mere mortals.


Kevin


Hmm. Hids4U do a main/dip system (I have been looking at it also) so it's easy to spot fibbing in that blurb. Doesn't mean it's no good of course, but misleading advertising and prices that sound too good to be true make me wary. It isn't one of those ridiculously blue kits is it?
 
Have a look at the pictures Fen especially the last one which shows the difference between filament and the xenons.

Regards,

Neil
 
ORIGINAL: Neil Eldred

Have a look at the pictures Fen especially the last one which shows the difference between filament and the xenons.

Yep, looks good in the picture, but I just wanted to check it isn't horribly blue as I saw a 911 recently that had a xenon kit that was.

How does the dip/main bit work, a slight movement of the bulb like the Hids4U kit?

I'm tempted as at that money it's cheap enough to just make the order without thinking too much about it.

BTW any pics of the car with the script - obviously it will just look like mine, but I'm still interested.
 
Hi Fen,

I do believe that the bulb moves or some shutter pops up as its instantanious between the two beams.
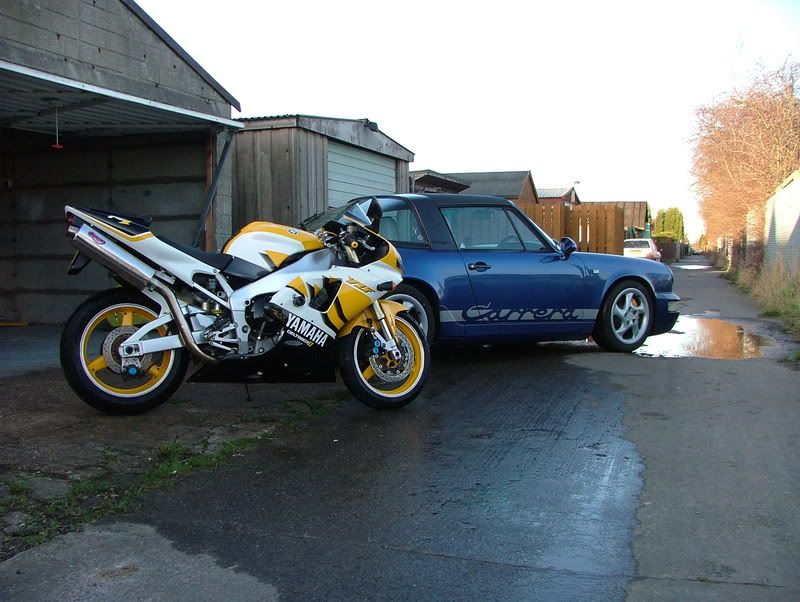
Here is a picture of the script aswel (my bike is in it too).

Porkerandbike.jpg


Regards,

Neil Eldred

 
Excellent. I might have to make an order when I get back from NZ.

The script looks good. I didn't put mine on the plastic shark fin, mainly through laziness, but I still have the necessary bits to do it.
 
I noticed that yours stopped at the fin, however coming from Yorkshire and being tighter than a herrings ar$e at 40 fathoms I had enough transfer left over to cover the fin so I didn't want to waste it [:)]

Regards,

Neil Eldred
 
Neil,

Did you find that the bulb fitted inside the bowl without having to make a huge hole at the back?? I've just fitted a kit to my Pug van - same H4-3 bi-xenon bulbs - and they look huge at the back of the bulb compared to the space taken up by the regular halogen fittings.

I know some people who fitted xenon kits some time ago had to make a large hole at the back of the bowl and I'd be interested if you had the same problem. I noticed that you made no mention of it in your write-up and I think you might have mentioned something significant like that so it may well be that all was well.

Any comment???

Regards

Dave

BTW I got 4300K bulbs on the understanding that the bulb generates more light (i.e. lumens) with the lower colour temperature. I've yet to try them at night but they look pretty bright in daylight!!!
 
Hi Dave,

There is no more drilling required other than the 25mm hole for the wire to go through due to the original hole being on the far side of the bowl on the passenger side ( RHD car). The drivers side needed no drilling in the bowl but needed a hole through to the inner wing due to space constraints with the original holes through there.
The bulbs are rated as 6000K

Regards,

Neil Eldred
 

Posts made and opinions expressed are those of the individual forum members

Use of the Forum is subject to the Terms and Conditions

Disclaimer

The opinions expressed on this site are not necessarily those of the Club, who shall have no liability in respect of them or the accuracy of the content. The Club assumes no responsibility for any effects arising from errors or omissions.

Porsche Club Great Britain gives no warranties, guarantees or assurances and makes no representations or recommendations regarding any goods or services advertised on this site. It is the responsibility of visitors to satisfy themselves that goods and/or services supplied by any advertiser are bona fide and in no instance can the Porsche Club Great Britain be held responsible.

When responding to advertisements please ensure that you satisfy yourself of any applicable call charges on numbers not prefixed by usual "landline" STD Codes. Information can be obtained from the operator or the white pages. Before giving out ANY information regarding cars, or any other items for sale, please satisfy yourself that any potential purchaser is bona fide.

Directors of the Board of Porsche Club GB, Club Office Staff, Register Secretaries and Regional Organisers are often requested by Club members to provide information on matters connected with their cars and other matters referred to in the Club Rules. Such information, advice and assistance provided by such persons is given in good faith and is based on the personal experience and knowledge of the individual concerned.

Neither Porsche Club GB, nor any of the aforementioned, shall be under any liability in respect of any such information, advice or assistance given to members. Members are advised to consult qualified specialists for information, advice and assistance on matters connected with their cars at all times.

Back
Top