Menu toggle

964 Full engine service

AVI_8

New member


Hello all,

I'm half way through servicing my 964, (Valve clearance adjustment, replace plugs etc), taken loads of pics along the way, was just wondering if anyone would find it useful if I made a post about doing it.

I'll also be replacing brake pads all round and driveshaft CV boots as well as fixing a few oil leaks.


I for one am always interested to see pics of DIY stuff [:)]. I even posted my own pics and experiences of changing the handbrake shoes a few days ago (see further down the board).
 
I'm about to do the same, so I would also like to see your pictures ... and hear about the problems [:D]


Well so far so good, and no problems, the valves are adjusted, plugs changed, just the gearbox oil and driveshaft gaitors to change. I'll put up the pics and do the write up in the next few days, busy with work just now when I'm not lying under the car!


I'd be interested to know how long it all takes.

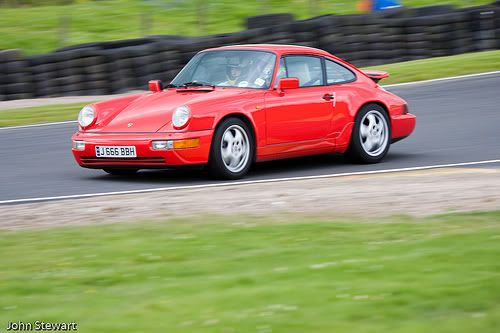
Also ... my Red 964 spent the last 13 years of its life in Edinburgh. I wonder if they ever came across each other? The car is G808 FSJ and was previously owned by David Jones in the Limekilns area.


I don't recognise the registration. I've owned mine 4 years now and in that time I've only ever come across 2 others, apart from at the Porsche meets, it's a fairly rare sight to see another 964 on the road....which is not a bad thing.

Ok so far it's taken me around 4 hours, I'm at the stage where I'm now ready to put everything back together (1.5 hours approx) and thats taking things slowly, a lot of the time I've spent so far has been cleaning things, (3 tins of degreaser) I had 3 oil leaks (that I know of), one from the hoses on the bottom of the oil tank, easy fix it was just a loose hose clamp but took bloody ages degreasing the wheel arch and tank, also oil had been dripping from the lower rocker covers onto the heat exchangers, these should hopefully now be fixed as I've been very methodical in making sure the mating surfaces are clean and will use thread sealant on the lower cover studs as the oil seemed to be coming through the studs.

I've also got another small leak, not sure where it coming from yet as I've cleaned the area but will need to wait until I start the engine which will give me more of an idea, but I have a feeling that it's coming from the cylinder 2 area. I took off the airbox completely as I was hoping to find the leak coming from the oil pressure sender unit on top of the engine (easy fix) but the top of the engine seems to be dry, have a feeling it may be the old 964 archiles heel leak from the cylinder, this is despite the engine receiving a top end rebuild by an OPC 4 years and 7000 miles ago. If thats the case I'll leave it as to fix it would require another engine removal and rebuild which I think would be like cracking a nut with a sledge hammer as the engine is sound and there's no smoke from the exhaust.

Anyway time will tell, which is why I want to wait until the jobs done before writing about the experiences, which I will do in due course...........Thats if I manage to post some pictures, not sure how to do it yet........Steve!
 
Previous owner was a PCGB member, but I got the impression the car had little use in the past 5 years. This might explain the unfamilarity.

Your thread sounds interesting. I fancy doing the same, but I'm worried about what I might unearth.
 
ORIGINAL: AVI_8

Anyway time will tell, which is why I want to wait until the jobs done before writing about the experiences, which I will do in due course...........Thats if I manage to post some pictures, not sure how to do it yet........Steve!

First step is to get them loaded on to a free hosting site like photobucket.com. Each photo will have a direct link automatically allocated below it. Just copy that link (it's the second one below each picture) and then click on the picture icon when writing a post on here and paste the link into the pop up box.
 
3803647464_722237bcfd.jpg


Ah thanks Steve, just like this!

C2 dweller, It's honestly not a difficult job at all, Fiddly at times but not outwith the competence of someone with limited experience, I'll be making a step by step explanation with pics, hopefully will get a chance tomorrow evening to do this.....now that I know how to put up pictures.


Right I'll make a start on my experiences of servicing the 964,

First things first, you'll want a good level of clearance which will mean jacking the car up to a good height. I bought jacking blocks from ebay a while back, they fit in the jack mounting points and prevent damage to the car when using a trolley jack, The cars standard jack won't get it high enough, it's ok for changing a wheel but not much else. I bought a new jack from argos, ÂŁ60 quid which has a long reach, lifted the front first (I'm changing the gearbox oil so need the car to be level), put a set of axle stands inder the front crossmember, then lifted the rear of the car, jacked it up under the suspension arm lust outboard of the shock mounting.

It goes without saying that you're going to be spending some time under the car so make sure that it's secure, you don't want to ba taking any chances of it falling on you!!!
Front

053.jpg


Rear

047.jpg


Next thing to do once you've got the wheels off is to drain the oil, it helps if it's warm though not too hot or you'll burn your fingers (speaking from experience) run the engine for five mins if it's cold, (warm oil is thinner so it'll drain more easily)

Here's a tip, puncture the oil filter at the top with a screwdriver, this will cause the oil to drain from the filter which otherwise would leak out when the filter is removed.


043.jpg


Next drain the oil, there's a plug at the base of the engine to drain the engine and another to drain the oil tank located just behind the rear jacking point at the base of the oil thermostat, you can see the drain plug on the pic I posted behind the rear axle stand. I had to temporarily remove the axle stand in order to get a bucket below the drain plug !!


I've had oil going onto the right rear wheel for some time now, and with the wheel off I could see where it was coming from, one of the lower hoses from the oil tank had been leaking, After cleaning the area (took a whole can of degreaser and an hour of messy work) I realised after checking thehose clamps that one was very loose, so fingers crossed thats why it was leaking and hopefully I won't have to replace the hose.

Some before and after pics of the area

046.jpg


052.jpg


You'll need to remove the rear blower located on the left side of the engine, first remove the lower hose which goes down towards the left side of the distributers, loosen the clamps, remove the multiplug, and take it off. Pic of it here you can see the multiplug and jubilee clips which have to be loosened.

042.jpg


Then remove the 2 bolts holding the blower motor, one of them is hidden at the rear, you won't be able to see it so here's a pic of the blower removed so you can see where it is.

040.jpg


You'll have to unclip the electrical plug also shown on the above pic.

Now you have access to the rear of the engine, look towards the front on the left side you'll see a wire going through a rubber grommet to the sensor on the exhaust cat, disconnect this wire at the plug and push it and the rubber grommet through the hole on the heat shield.

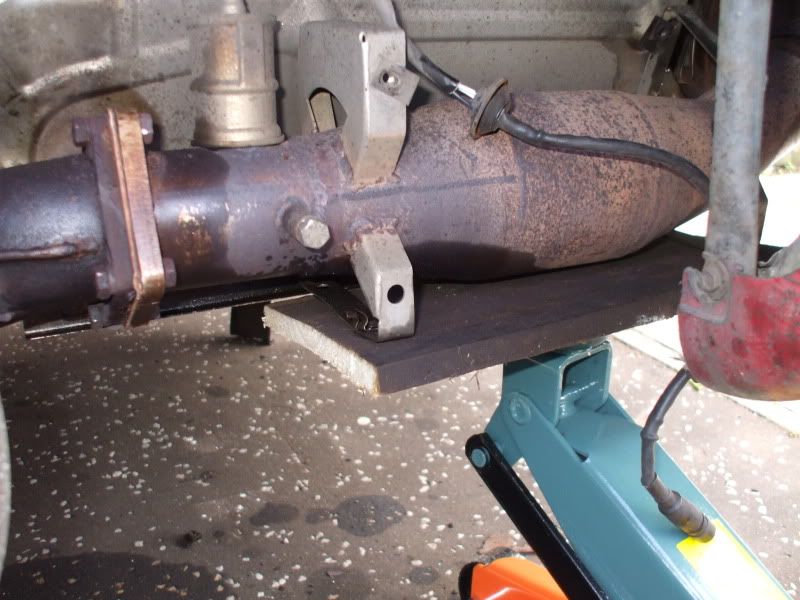
Now you have to remove the exhaust cat, but first you've got to remove the heat shielding, Ideally you want to have soaked the fastenings in penetrating oil beforehand also do this to the bolts holding on the cat.

This was where I came across my first minor problem, one of the fastenings holding the heat shield to the cat didn't want to come off, it was turning the nut at the end of the bolt, and no amount of trying to hold it with pliers (limited access) worked so I had to drill out this bolt, as I don't have an air chisel. If this happens, you have to drill through the bolt using progressivly larger drill bits until you can chisel off the bolt head off. I ordered now fastenings from my local OPC.

Once you've removed the heat shields the cat has to come off, this was the point I was most apprehensive about as I didn't want to round the nuts trying to remove them as it would require a lot of hacksawing with limited access. I soaked the nuts with penatrating fluid the day before and bought a set of 5 sided sockets from euro car parts (couldn't find them enywhere else locally) pic attached, sockets which grip the corners of the nuts are much more likely to round off as the nuts will be very rusty due to the heat thats been transferred over the years.

018.jpg


Now those nuts were very hard to move so I used heat on them, I don't have a burning kit but have used a simple blow torch to good effect in the past, you can get them from the likes of B and Q for around a tenner, I definatelly recommend that you do this, just heat up the nut for a minute of so, this will cause it to thermally expand and will make it much easier to remove,

048.jpg


Once those nuts are loose (one of mine snapped which is not a problem as your engine service kit comes with new nuts and bolts anyway) you'll need to loosen the clamp on the other side of the cat, again you'll get a new nut and bolt in the service kit.

It helps if you can support the cat while you remove the bolts. I used my trolley jack with a piece of wood

049-1.jpg


Next to do is to remove the silver heat shielding and the metal shielding one on each side, I wont go into much detail here it's fairly self explanatory, once they're off you now have access to your rocker covers.

045.jpg


My heat exchangers were very oily and I noticed that there were drips of oil on the end of the lower studs on the lower rocker covers which had been dripping on the heat exchangers , I'm hoping that I've discovered another of the oil leaks that I had, In theory oil shouldn't come through those studs as the rocker cover gasket goes around them. But I can't see where else it could be coming from.

Now remove the covers there's 11 studs on the lower and 6 on the uppers, once you've removed the studs pull off the covers by putting your fingers in the spark plug access holes (you've removed the plug leads by now) if it's stuck, tap the covers gently with a soft mallet, no don't thump them with a claw hammer, they're light alloy!

Now you've got the covers off, you'll want to make the engine easy to turn over by removing the plugs, some people say don't remove the plugs until you've adjusted the valves just in case a piece of carbon is dislodged in the process and gets stuck between the valve and the seat, personally I think thats unlikely, I removed one plug from each cylinder before adjusting the valves.

I'd read all sorts of horror stories about how difficult it is to remove the plugs........a load of tripe! I used the tool which (should) be in the tool kit which came with your car and used it on all of the plugs, it's got a rubber insert which will seat the tool at the correct angle once pushed onto the plug, at worst it's a bit fiddly on some of the top plugs, no.6 being the most difficult to access due to the power steering pump, just have a look at the angle of the spark plugs so that you know where to put the tool. If you don't have the correct tool, you'll probably need to buy a universal joint for your socket set and a small extension bit. Pic attached of the spark plug tool.

020.jpg


Pic of old VS new plugs, mine weren't too bad.

033.jpg


Valve covers off

032.jpg


If you find that you're still getting leaks from the lower valve covers it's likely that they've warped. It's pretty common that they do and the only real fix is to put new ones on.

Keep up the good work [:)]
 
holy mother of mercy its a bit harder than on my first mini [:)]

I've also seen your first test picture - your cars looks great. I've recently had my car painted and gone for the no-stone chip on the sill covers (like yours). I've also extended this to the rear bumper.

can't wait to see the next instalment.


Posts made and opinions expressed are those of the individual forum members

Use of the Forum is subject to the Terms and Conditions

Disclaimer

The opinions expressed on this site are not necessarily those of the Club, who shall have no liability in respect of them or the accuracy of the content. The Club assumes no responsibility for any effects arising from errors or omissions.

Porsche Club Great Britain gives no warranties, guarantees or assurances and makes no representations or recommendations regarding any goods or services advertised on this site. It is the responsibility of visitors to satisfy themselves that goods and/or services supplied by any advertiser are bona fide and in no instance can the Porsche Club Great Britain be held responsible.

When responding to advertisements please ensure that you satisfy yourself of any applicable call charges on numbers not prefixed by usual "landline" STD Codes. Information can be obtained from the operator or the white pages. Before giving out ANY information regarding cars, or any other items for sale, please satisfy yourself that any potential purchaser is bona fide.

Directors of the Board of Porsche Club GB, Club Office Staff, Register Secretaries and Regional Organisers are often requested by Club members to provide information on matters connected with their cars and other matters referred to in the Club Rules. Such information, advice and assistance provided by such persons is given in good faith and is based on the personal experience and knowledge of the individual concerned.

Neither Porsche Club GB, nor any of the aforementioned, shall be under any liability in respect of any such information, advice or assistance given to members. Members are advised to consult qualified specialists for information, advice and assistance on matters connected with their cars at all times.

Back
Top