Menu toggle

968 Crossmember dimension & Jakes refresh

frogisland

New member
I'm trying to find a solution for my e9 racecar build and it may present itself via a 968 part. I'm trying to find the width of the gap on the 968 front crossmember where the wishbone attaches. It's the inside wall to wall dimension where the front wishbone & bush fit.


thanks
JP
 
Hi JP I will measure mine for you as it doesnt have a lot attached to it at the moment!
P1010732.JPG
Jake
 
I have a 944S2 crossmember on my garage floor at the moment and the dimension is 61mm +/- 0.5mm. The bush that fits measures 61mm across the metal insert faces measured with a vernier. The 968 and 944S2 crossmembers are the same part number. Hope this helps.
 
thanks guys, appreciated. Jake...you should be ashamed of that! Also see my post re vapour blasting, might be of interest. ....a man of my own mind though...and to encourage you on:
DSC_0574.jpg
DSC_0558.jpg
DSC_0540.jpg
1.jpg
 
darn you JP........... Its a particularly frustrating project. I think you had the advantage of respraying at the same time?
 
You're right, but still hugely satisfying once it is all together even with some of the patina of the original paint (my engine bay was not painted). The problem is keeping it clean afterwards. Very difficult to get a balance between using and maintaining that fresh look. Possible, but alot of work. Just make sure you use it without compromise afterwards, that's where most of the satisfaction comes from, otherwise it turns into a true garage queen. My e9 will be entirely satin black, shell and components, with the exception of the outer panels...makes keeping it clean easier! Keep up with posting photos though, some of enjoy seeing others efforts. JP
 
i am thinking of using a clear dynawax coat on the wheel arches - i want to protect but also use it. There is a certain pleasure knowing the surface is good under the wax. On the undersides i have gone for a black wax as its grey'ish with all the protection removed. Lots of pics (Mainly for me to remember how it goes back together) here [link]https://picasaweb.google.com/108037537021429740964/UnderbodyTidyUp?authkey=Gv1sRgCIbzl-bantL1YA[/link] [link]https://picasaweb.google.com/108037537021429740964/HeadlightRemovalAndCleanUp?authkey=Gv1sRgCNLGovKswum0Tg[/link]
 
Truly epic, many would call you (us) mad bastards, but it is hugely satisfying dismantling and reinstalling everything - just like a big jigsaw! You would certainly give me a run for my money...i like this one, been there, got into alot of trouble. Even had powdercoating in the oven and electro cleaning working away on the patio [:D]
P1010514.JPG
I can't even offer any advice, you appear to have everything covered, although there is always just one more photo you wish you'd have taken and a little guesswork comes into play. My e30 racecar went through the same treatment [:)] (actually took the engine bay and wheel arches back to bare metal, then resprayed) http://smg.photobucket.com/albums/v384/frogisland/e30%20Build/?start=all
CIMG2082.jpg
Looking forward to some photos of the assembled (and finished) item. Re the wheel arches, i found the bare paint was easy to keep clean once in a good state, wheels off every so often and thoroughly washed. I had the problem with rubber from the trackdays under the arches and along the side of the exterior but i suspect this won't be an issue. I took the front/rear PU's off and plastic wheel arch liners out after 2 years for a general reclean, easy weekend's work. I also used a great deal of stainless fastenings and fixings in areas not on general view and especially underneath - in particular self tappers. For 'Z' clips (the spring steel flat clips that self tapping screws go into) i found aftermarket ones corroded quickly, so generally bought repalcements from Porsche. JP
 
Thanks JP I like the engine out picture. I have a 205 1.9 GTI which is going to get the full strip down treatment. I reckon its easier just to taken it all to pieces rather than fannying around. My project started with a headlight that wouldn't pop up! In then discovered a few oil leaks and got carried away!
 
Personally i think youve all got WAY way too much time on your hands......[;)][:D][;)][:D] Just kiddin.... Keep up the good work,, polishing and cleaning..... PS a car is for driving....[;)][:D][;)][:D][;)][:D]
 
got the expansion tank in the dishwasher today - set it on timer so it can be ready before someone else gets home.........
 
thought i would list some of the mechanical bits i have done so far in addition to painting things and making them generally nice... replaced sump gasket replaced balance shaft front and real seals and shells replaced oil filter housing gasket and seals replaced engine mounts replaced clutch master cylinder and hose replaced oil filler seals replaced wishbone bushes replaced front wheel bearings cleaned up headlight motor bushes Loads of other seals, bits and bobs and many parts refurbished. Going to publish a "greatest hits" gallery when i get time
 
I am absolutely impressed-it gives a very good reason for not throwing away the old dishwasher when a new version replaces it as well-I suppose one of those -5 minutes for a quid -foaming hot car washers would help. Keep up the excellent work[:)]
 
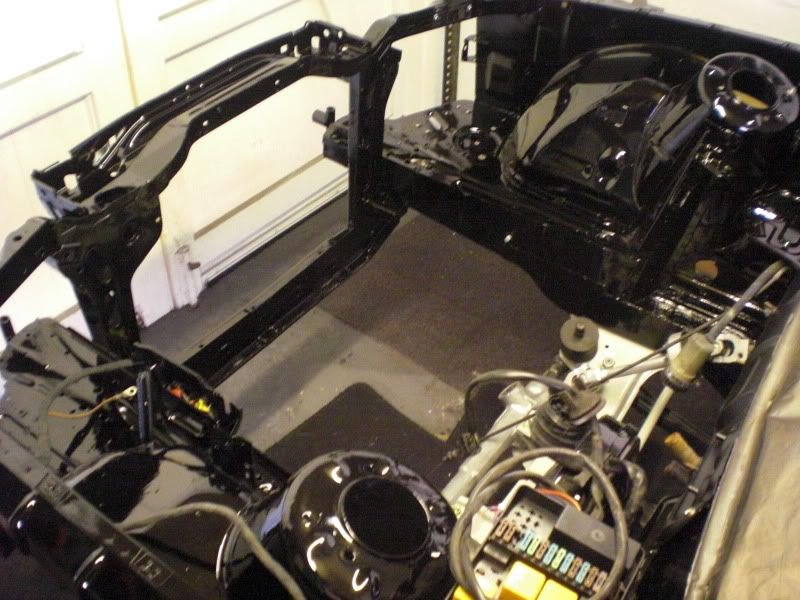
latest update on my work copied from 968 UK Latest update Engine bay starting to come together now
P1010769.JPG
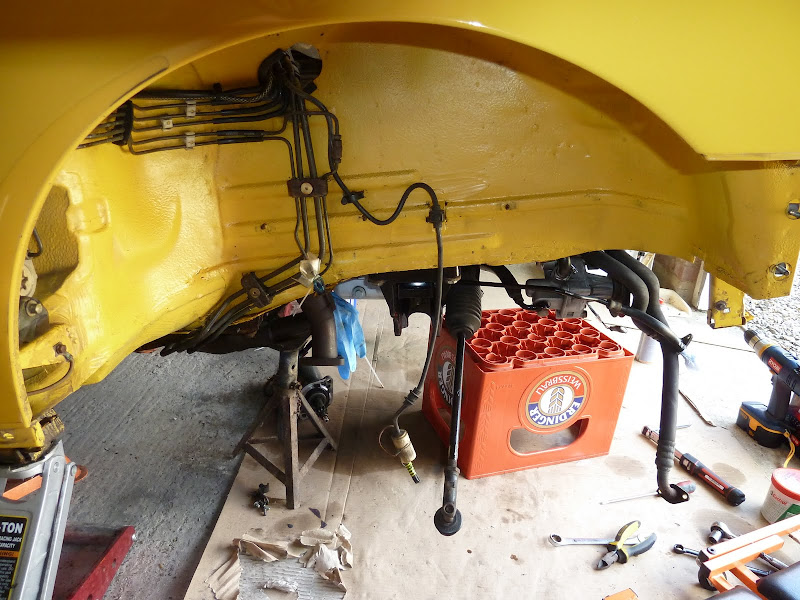
Oil pipes and power steering pump on. I was going to replace the oil pipe but they are something stupid like Ă‚ÂŁ300!
P1010770.JPG
Alternator has been rebuilt
P1010771.JPG
Horns have come up well with a little bit of hammerite
P1010772.JPG
Cleaned up inside wings before reinstalling headlights
P1010774.JPG
P1010775.JPG
Clear waxed the wheel arches with Bilt Hamber Dynax UC
P1010777.JPG
P1010778.JPG
Calipers looking rather good
P1010780.JPG
P1010781.JPG
Gave power steering cooler a bit of a spruce up
P1010782.JPG
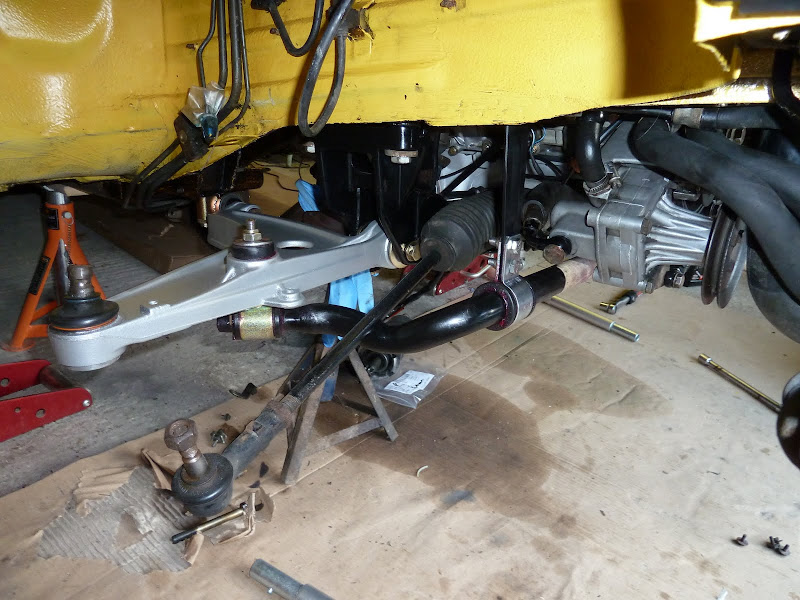
Wishbones and steering knuckles looking good as well
P1010784.JPG
P1010785.JPG
First headlight back in - remember, this is the reason all this started in the first place so slightly symbolic!
P1010788.JPG
P1010789.JPG
P1010790.JPG
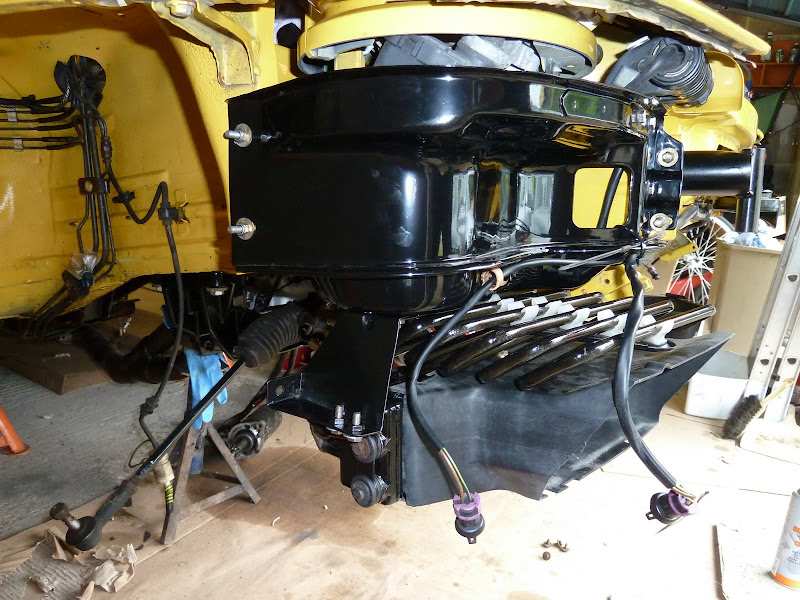
Oil cooler and power steering cooler
P1010798.JPG
P1010799.JPG
P1010800.JPG
Wishbone and ARB back on - lots of lovely red grease courtesy of SuperMarv
P1010801.JPG
P1010802.JPG
P1010803.JPG
P1010804.JPG
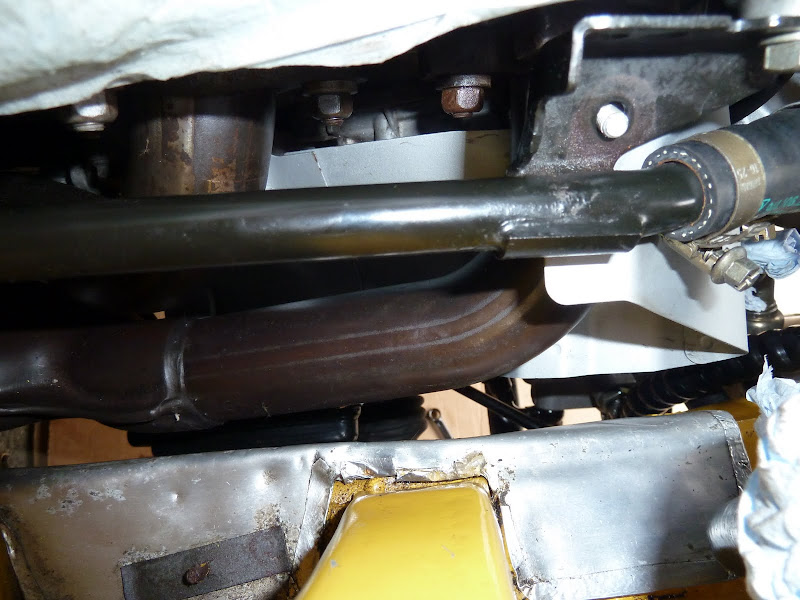
And final one of the front and all the cooling pipes which have been test fitted
P1010805.JPG
P1010806.JPG
 
oooohhhhh blooming lovely ........ just had a most enjoyable 10 minutes drooling over the photos !! well done Jake
 
Looking great Jake, some painstaking attention to detail. You get quite a buzz when you start putting it back together. Re things like oil pipes, you can have items such as these replated, or as a 'in the garage' solution, dip the ends in a solution of something like Bilt Hammer Deox-C: http://www.bilthamber.com/corrosion-treatments/deox-c Works very well, then Halfords etch primer and hand paint on some 2 pack black paint (or if you are particularly anal air brush a thinned down solution) Keep it coming. JP edited to add - Jake, have you seen this thread re a 205: http://www.pistonheads.com/gassing/topic.asp?h=0&f=47&t=1093997&mid=28907&nmt=My+1988+205+1%2E9+GTI+Resotration+thread
 
thanks guys some pics of stuff that has gone right..... new exhaust gaskets
P1010812.JPG
lots of shiney stuff included my refurbed heat shield - I used silver bbq paint!
P1010816.JPG
Another shot of heat shield
P1010818.JPG
Almost got wheels
P1010821.JPG
Suspension stuff - freed off height adjusters and bottom adjuster (quite a rare modification to M030)
P1010823.JPG
P1010824.JPG
I was going to repaint the dampers but the RAL paint i got is no where near a match so just did a bit of hammerite yellow touch up to get them through to the next rebuild. No I havent got over excited on the adjusters, thats white silicon grease!!
P1010827.JPG
P1010828.JPG
P1010829.JPG
P1010831.JPG
Debated elsewhere but this is the difference between after market bolt and the porsche one - its the bolt that holds the wheel to the car
P1010839.JPG
P1010840.JPG
Dampers sent to Ian Gardiner at IG Racing for a check over as something didnt feel quite right with one of them. Belts all on an tensioned although I did note in the manual it talks about the balance belt being positioned the correct way round with the coloured tooth facing the front of the car?
 
Looking sweeeeet jake.... The bottom adjust on your front struts, does that adjust the bump or rebound. ??
 

Posts made and opinions expressed are those of the individual forum members

Use of the Forum is subject to the Terms and Conditions

Disclaimer

The opinions expressed on this site are not necessarily those of the Club, who shall have no liability in respect of them or the accuracy of the content. The Club assumes no responsibility for any effects arising from errors or omissions.

Porsche Club Great Britain gives no warranties, guarantees or assurances and makes no representations or recommendations regarding any goods or services advertised on this site. It is the responsibility of visitors to satisfy themselves that goods and/or services supplied by any advertiser are bona fide and in no instance can the Porsche Club Great Britain be held responsible.

When responding to advertisements please ensure that you satisfy yourself of any applicable call charges on numbers not prefixed by usual "landline" STD Codes. Information can be obtained from the operator or the white pages. Before giving out ANY information regarding cars, or any other items for sale, please satisfy yourself that any potential purchaser is bona fide.

Directors of the Board of Porsche Club GB, Club Office Staff, Register Secretaries and Regional Organisers are often requested by Club members to provide information on matters connected with their cars and other matters referred to in the Club Rules. Such information, advice and assistance provided by such persons is given in good faith and is based on the personal experience and knowledge of the individual concerned.

Neither Porsche Club GB, nor any of the aforementioned, shall be under any liability in respect of any such information, advice or assistance given to members. Members are advised to consult qualified specialists for information, advice and assistance on matters connected with their cars at all times.

Back
Top