Menu toggle

Engine tin....i must be mad!!

tim_haskins

New member
hi guys,

Just thought I would share some info on what I have been upto to the last few days!!!

After reading an eairlier post regarding replacing the engine tinware I thought I would have a look at mine....I must be mad!

I found the the cover by the cat part no 964 106 229 03 was pretty rusty and required replacement.
The other side RHS if looking from rear of car was rusty but saveable, as per steves in a previous post.

These two bits are easy to change I found. just a few 10mm bolts holding them.

This is when I got carried away!!!

I proceded to look at the rear tin as well the part that has the tube for the heater above the rear primary silencer. Mine was not in bad shape but because I wanted to powder coat the tin it had to come out! To remove this tin was not that bad either....if all the bolts come undone..but does require that you remove the rear primary silencer and tube and the reflective panels that sit behind the exhaust in front of the timing chain covers. All in all it took about 2 hrs to get this bit out. Although I did have both the side tins out at this time.

Next on the list were the rear engine tins that go over the bellhousing.....what a nightmare. the lhs was really bad but the rhs was ok so i had to get the lhs out

I had to remove the cat bypass,heat exchangers so i could get to the screws holding it on and also to give me enough room to get the old bit out. The heat exchanger nuts came of ok ish besides the number 3 cylinder nut which did take about 1hr to undo due to the rusty nut and lack of space but I did it in the end!. Once the exhaust was of then I could easily get to the 2 allen screws holding the tin to the block and also the 2 10mm bolts by the sensors.There are 2 other screws holding the tin on top of the bell housing that were a bit more difficult to remove and required the removal of the rear blower to get to them. Once these were undone then the next thing was to undo the throttle cable from the engine and also the 2 plugs from the side of the engine green and white one and remove the sockets from the holder. This allowed me to push the grommts through the tinware and get the wire free from the tin. After a bit of a wiggle the tin finally came out...


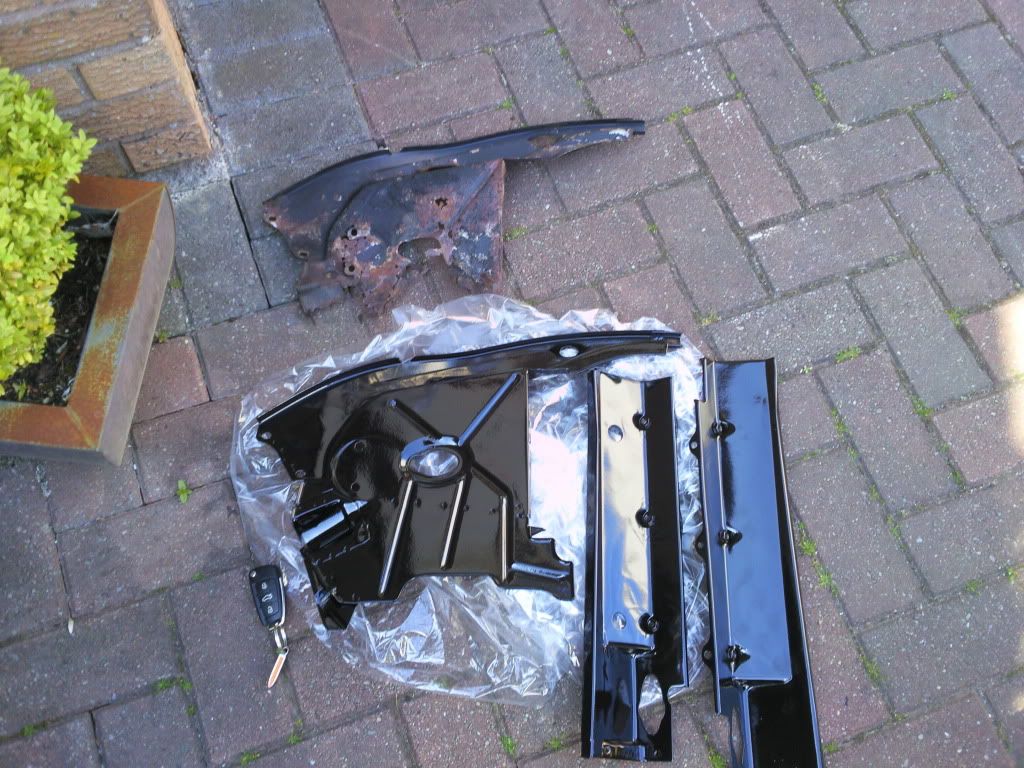
It was in really bad shape so I have ordered a new on from porsche part 964 106 283 08 at an eye watering 167.66 + vat inc discount. I really wanted a genuine piece to give me a fighting chance it will fit 100% as it would be difficult to modify the tin to align with the holes in the engine due to not being able to see most of them.

So in conclusion it is possible to remove all the tin without removing the engine but it will take a good few hours.still waiting on the rear tin then all the parts are going to the powder coaters along with the valve covers. I have ordered all new exhaust bolts/nuts/gaskets and new stainless screws to put it all back together.

Whilst the car is in 1000 parts!! I it makes it very easy to change the plugs and do the valve clearances so that next on the list. I am also contempalating changing the clutch as with all this stuff removed it makes getting to the bolts alot easier and with my car being a C2 It is possible to do it without removing the engine. We will see!!!!

Will post a few pics later.

Tim
 
Good work Tim. I had a feeling that rear tin at the bell housing would be the really difficult one but it's good to hear that it's possible. Sounds like you were lucky with the hear exchangers as it's known for at least one stud to break in the manifold.

I have to replace that one myself and the one across the bumper which is unfortunately over ÂŁ300!

Looking forward to the pics [:)]
 
ORIGINAL: Steve Brookes

Good work Tim. I had a feeling that rear tin at the bell housing would be the really difficult one but it's good to hear that it's possible. Sounds like you were lucky with the hear exchangers as it's known for at least one stud to break in the manifold.

I have to replace that one myself and the one across the bumper which is unfortunately over ÂŁ300!

Looking forward to the pics [:)]
Well,I was expecting an engine out job to my tinwork,as I would want to clean up all the attachment points & then have any good,&any new tin galvanised,then powder coated.If it can be done without removing the engine,then I don't need to leave it until an engine overhaul is necessary-thanks for the post Tim-but I've only got little arms.[&o].
 
little arms does not matter as long as you can reach your pocket!!!

I really thought it was an engine out job too but as I said it is possible without all be it a bit harder.

steve good news!!!!!!!!!!! try FVD for the rear tin they have offer on at the moment part number 964 106 014 02AM 184 euro plus postage and tax still a rip off but not as painful.

Off to sunny london in the morning but will post pics asap....glad you enjoyed the post and hopefully it will give others the urge!....

Tim
 
just to clarify...

1) you need to remove the side tin first in which you need to remove the secondary silencer and cat pipe
2)Remove rear primary silencer and heater blower tube.
3)remove mount for rear primary silencer
4)remove reflective panels covering timing chain housing
5)undo rear tinware making sure you undo the bolts behind engine mount (they bolt through the tin) I will post pic
6) remove rear blower tube
7)the rear tin should now be free and a bit of a wiggle and its out
The rear tin is harder....but if you have managed the above then its not that hard

remove heat exchangers
remover 2off allen screw holding tin to engine block
remove 2 off 10mm screws by rear camshaft (one holds p clip....the other just secures tin)
remove blower fan
remove green and white plug behind fan
remove 10mm screw holding the electrical sockets in place and slide out white ang green plugs
remove throtle cable (I did it from engine) by pushing cable forward and removing black plastic piece
push out grommet in mounting bracket and push grommet through engine tin pull out cable.
undo 2 off 10mm screws from bell housing and the tin should come out.....

it sounds easier than it is but still not that hard if it all comes apart easy....

Not sure how easy it will be to get rear tin back in but I will let you know.......not expecting too many problems but my rear tin was in really bad shape so it could of helped with the removal....we will see....worst case is I drop the engine and box.....dont want to but I will let you know the outcome but I am 99% happy it will go back in no probs.

Tim

 
ORIGINAL: tim_haskins

little arms does not matter as long as you can reach your pocket!!!

I really thought it was an engine out job too but as I said it is possible without all be it a bit harder.

steve good news!!!!!!!!!!! try FVD for the rear tin they have offer on at the moment part number 964 106 014 02AM 184 euro plus postage and tax still a rip off but not as painful.

Off to sunny london in the morning but will post pics asap....glad you enjoyed the post and hopefully it will give others the urge!....

Tim

Thanks Tim, I'm guessing that AM means it's aftermarket but it looks good in the pics. It comes to about half price including post and VAT so decided I'd better get it while it's available. [;)]
 
Right....

The new tinware has all now been powder coated in gloss black and looks great....I had the old side parts powder coated too and they came out very good only a couple of very small holes on the one by the cat pipe. The other pretty much perfect. I am changing them anyway for the new ones I bought. So If anyone wants a pair then make me an offer new they cost ÂŁ100 inc discount!.I decided not to get the rocker covers powder coated in the end as I am going to order billet ones from the states.

I will be reassembling tomorrow and will then post the pics. I was suprised that the new rear left side bell housing cover has a plate welded horizontally on the rear. On my old one is not there at all!!. Not sure yet if this may make things more difficult but at first glance I dont think so.

I have decided to leave the clutch for now.........

But I have bought a pair of new 993 turbo big reds for the front......still need discs,pad,mountings so this is next on my list. Will probably change the rear calipers also to 993 N/A at the same time.

Pics to follow.....watch this space!

Tim
 
Hi Guys...

The engine tin has all been reinstalled and there are a few pics above.

The real nightmare tin was defo the bell housing one. It came out not too bad but putting it back proved to be fairly tricky. The main problem I had I think was because I had the new part powder coated. This changed the thickness and therefore it proved difficult to get the LHS and RHS to join together.This one piece of tin took me at least 2hrs to fit. If anyone wants to change this piece then I would defo only get a geniune porsche part as its not easy to see the screw holes to know what has to be done to modify the tin to fit.

On reflection the job was not too bad but I am a mechanical engineer. Difficulty rating I would say 6-7 out of 10 this is due to the amount of things that need to be removed to fit the tin.

I am well pleased with the outcome and now my engine bay looks mint. Not a cheap job though... I have spent over 400 pounds on tin,bolts,screws,clips etc.

A job not for the faint hearted but I have proved that it is possible to do without removing the engine.[;)]


Tim

Will post a few pics of the finished engine bay asap[:D][:D][:D][:D]
 
Thanks for continuing to post information about this job. My big rear tin has now arrived and I'm going to order a genuine bell housing tin and do that at the same time. As lots of stuff has to come off, I've also decided to put a set of new spark plugs in and change the weeping valve cover gaskets while I'm in there. And an oil change of course.

When I fitted the two side tins I decided to just touch up blemishes in the paint and not get them powder coated. From your experience it sounds like that was a good thing to do and if they last another 20 years, I'll more than happy. [:)]
 
Tim,
Thanks for the update-not for the fainthearted obviously-when Nick & I went down last week to look at the C2 he bought at RPM,I made a special point of studying the engine tinware whilst it was on the lift-couldn't see any tin at the front (bellhousing) end,which I commented on-I think on mine this is the one in worst condition-which is the photo of it-is it the 2nd one in with the curved shape?All my others seem relatively OK.
Cheers,
Colin.
 
Colin you can see Tim's new and old bell housing tin in the first pic (linked below). Mine is very much like Tim's and it sounds like Nick's is much the same - i.e. it's difficult to see if there is anything still there!

Photo021.jpg
 
thanks for posting the pic steve...

I would still get the parts powder coated if i had my chance again. Yes it was difficult to get the rear bell housing engine tin mated together but what I should of done was to not get the tongue part coated or sanded that part down and painted with hammerite. I found the paint on the new part supplied by porsche to be wafer thin and I didnt want the new stuff looking rusty in a few months time so hence the coating. I didnt fancy having to remove it all later if it began to rust!!. The side and rear piece fitted fine even after the coating i just left everything loose and used allen keys to pull it where it need to be.

As you can see on my bell housing tin there was not alot left. On the rear of that part there is a bracket that sticks out horizontally(on my original it was missing compleatly!!)I was worried that the tin might not fit because of it, but it was fine it just make the screws holding the tin to the engine more difficult to get at!!!.

One thing i found that removing the accerlerator cable from the engine was a piece of cake. Some people seem to have problems getting the rubber grommet back into the bracket. My rubber grommet had like a tube pushed up the center. Once i slide the grommet off the tube it fitted easily into the support bracket. I then just pushed the tube back into the center to lock it in postion.

I did not remove any of the sensors from the cylinder head ,I undone them from the socket bracket and feed them through....you can see them dangling in on of the pics.

overall I am chuffed with the job but it was quite a bit of work.

Your right to change the plugs steve as its easy when the car is stripped as much as this....I did my valve clearance too as access is ok when all the stuff is removed.

Tim
 
ORIGINAL: tim_haskins

Steve...

Does the part from FVD look ok??? I would hate to think I recommended it and it was bad!!!!

Tim

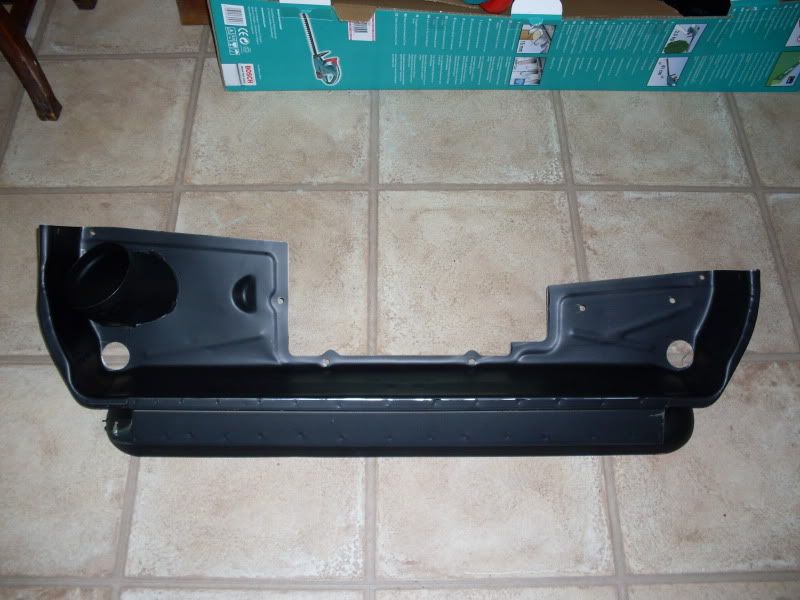
It looks like it'll be a couple of weeks before I get the chance to fit it but at the moment (mostly because of the price) I'm very pleased with it. The heat exchanger duct is not as well fabricated and has been tack welded in place. And the two holes you can see on the right don't have nuts welded on so I'll need a little helper when attaching the silver shield.

SDC10556.jpg


It'll certainly do a better job of cooling than my current tin:

SDC10285.jpg

SDC10186.jpg
 
Doesnt look bad steve at the price! Shame they never put the nuts on but still not a huge issue. You tin does look pretty rough!!. Mine was alot better than that although it did end up with a few small holes after blasting on the exaust cover part.


glad your happy with it.....let us know how you get on with the fitting!!

Tim
 
steve,

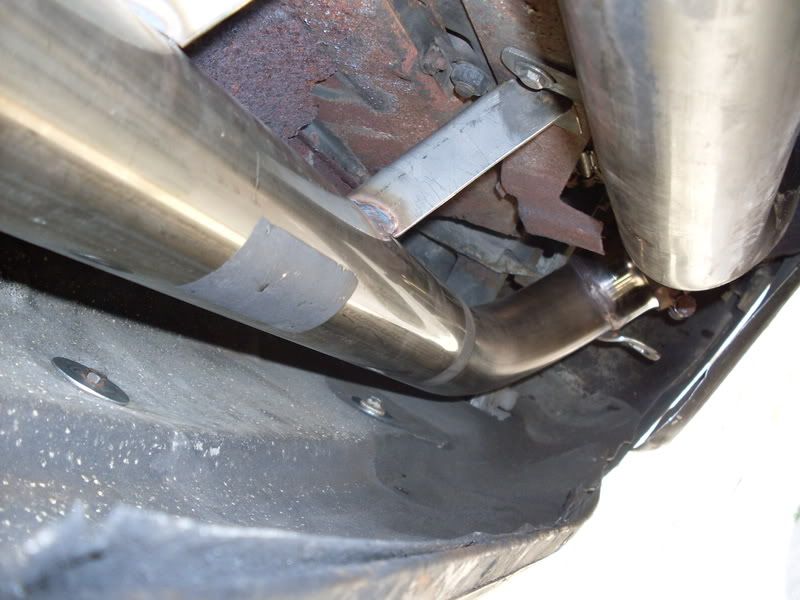
In your pics is that the old or new engine mounts??? also what primary bypass is that and where did you get it from??


Thanks

Tim
 
ORIGINAL: tim_haskins

steve,

In your pics is that the old or new engine mounts??? also what primary bypass is that and where did you get it from??


Thanks

Tim

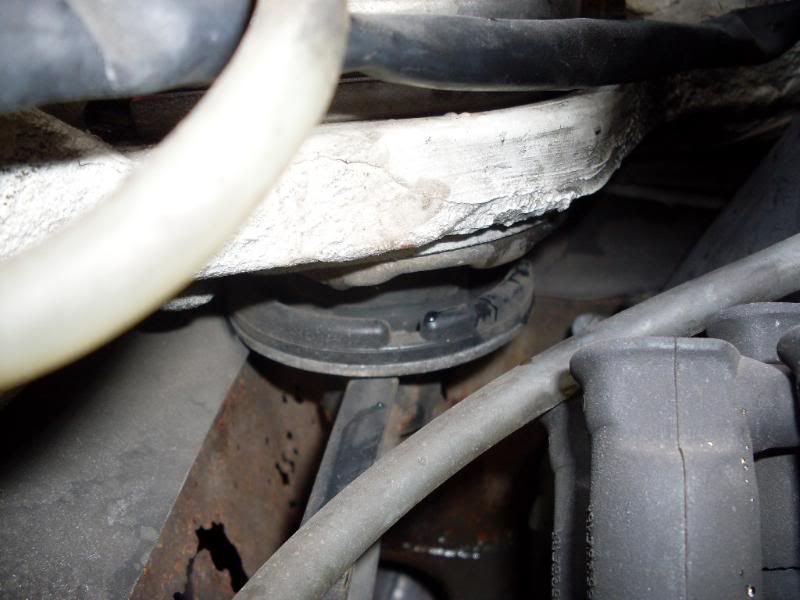
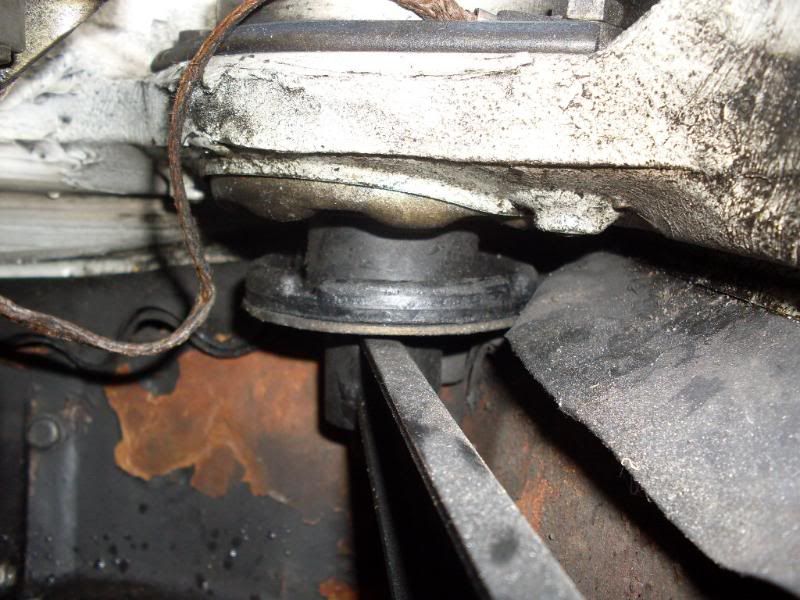
That's an old engine mount. The one on the other side was even worse:

SDC10286.jpg


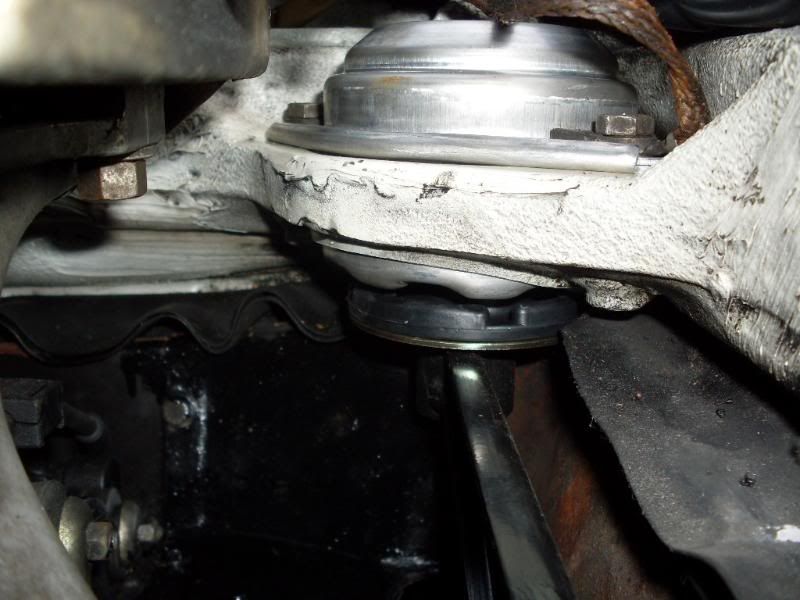
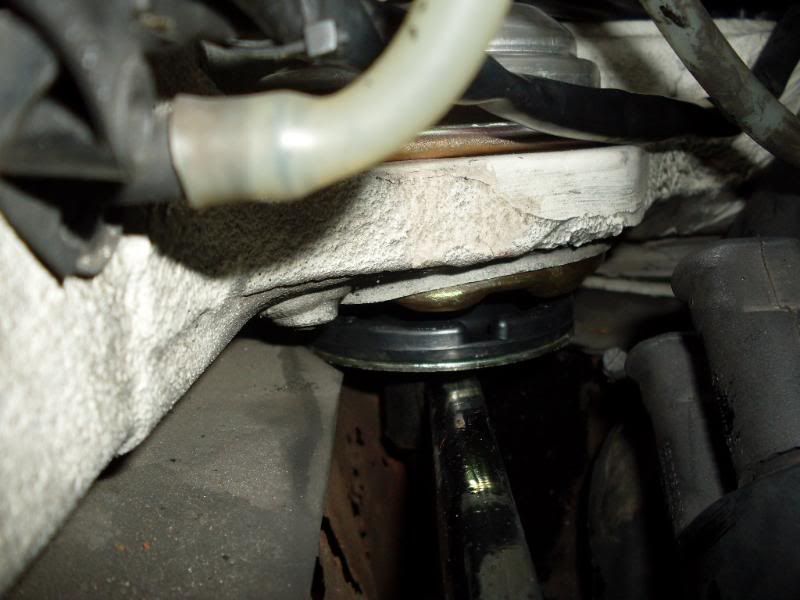
Here are the new ones:

SDC10297.jpg

SDC10298.jpg


They were over 300 quid for the pair! Quite a few guys have recently fitted 993 mounts which are about half the price. Fitting mounts is pretty straight forward - put car on stands, jack up the engine to take the slack, undo the 19 mm nuts underneath (through the tin holes and you'll need a breaker bar) and then undo the 13 mm bolts on each mount to remove them.

The cup pipe I bought used from a guy on 911UK. I've no idea what make it is and it seems quite unique because it bolts directly to the engine rather than using straps. Sounds marvellous and with the whole system being around 102 db, I've had no track day rejections yet. [:D]
 
Steve,
thanks for that-I have to admit that I am still not up to speed with or properly familiar with the various sections-I haven.t even looked up the details in PET but this thread is what I think a good forum should be containing.ie, I'm at the research stage.
Cheers,
Colin.
 

Posts made and opinions expressed are those of the individual forum members

Use of the Forum is subject to the Terms and Conditions

Disclaimer

The opinions expressed on this site are not necessarily those of the Club, who shall have no liability in respect of them or the accuracy of the content. The Club assumes no responsibility for any effects arising from errors or omissions.

Porsche Club Great Britain gives no warranties, guarantees or assurances and makes no representations or recommendations regarding any goods or services advertised on this site. It is the responsibility of visitors to satisfy themselves that goods and/or services supplied by any advertiser are bona fide and in no instance can the Porsche Club Great Britain be held responsible.

When responding to advertisements please ensure that you satisfy yourself of any applicable call charges on numbers not prefixed by usual "landline" STD Codes. Information can be obtained from the operator or the white pages. Before giving out ANY information regarding cars, or any other items for sale, please satisfy yourself that any potential purchaser is bona fide.

Directors of the Board of Porsche Club GB, Club Office Staff, Register Secretaries and Regional Organisers are often requested by Club members to provide information on matters connected with their cars and other matters referred to in the Club Rules. Such information, advice and assistance provided by such persons is given in good faith and is based on the personal experience and knowledge of the individual concerned.

Neither Porsche Club GB, nor any of the aforementioned, shall be under any liability in respect of any such information, advice or assistance given to members. Members are advised to consult qualified specialists for information, advice and assistance on matters connected with their cars at all times.

Back
Top