Menu toggle

Hurrah my sills are better than I thought

Diver944

Active member
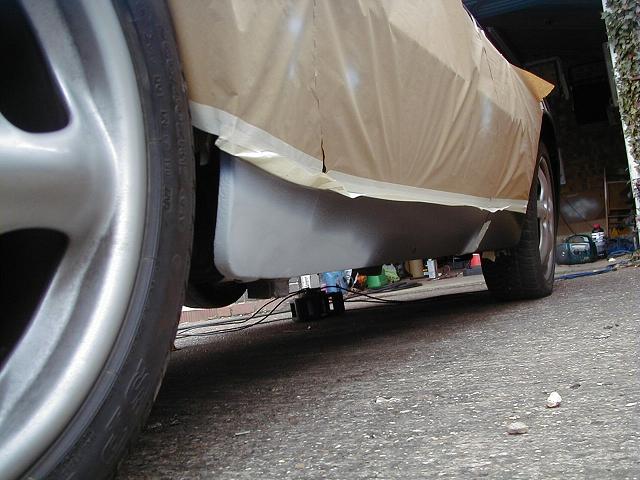
Easter weekend to me, means that I'll be underneath my car sorting out a few worrying bubbles in the stoneguard paint along my sills. As a few of us have been talking about this recently I think its a perfect opportunity to photo document the results as I go along (what it really means is that if I'm spending all weekend sweating under my car then you lot are blummin well gonna share it with me [:D])

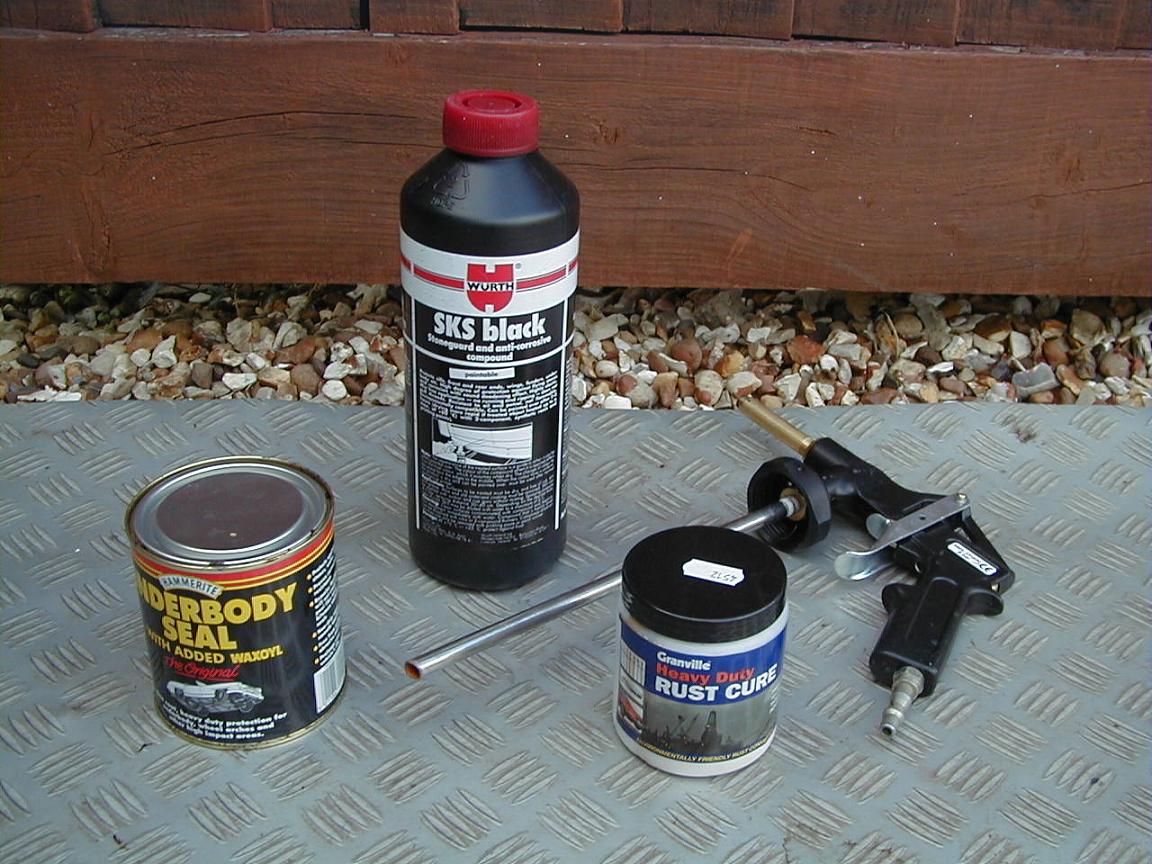
Today I will be removing the stoneguard paint and treating the rust that I find beneath. Tomorrow I shall be priming the sills and applying the Wurth SKS stoneguard paint. On Sunday I shall be completing the top coat of body coloured paint and clearcoat gloss over the stoneguard.

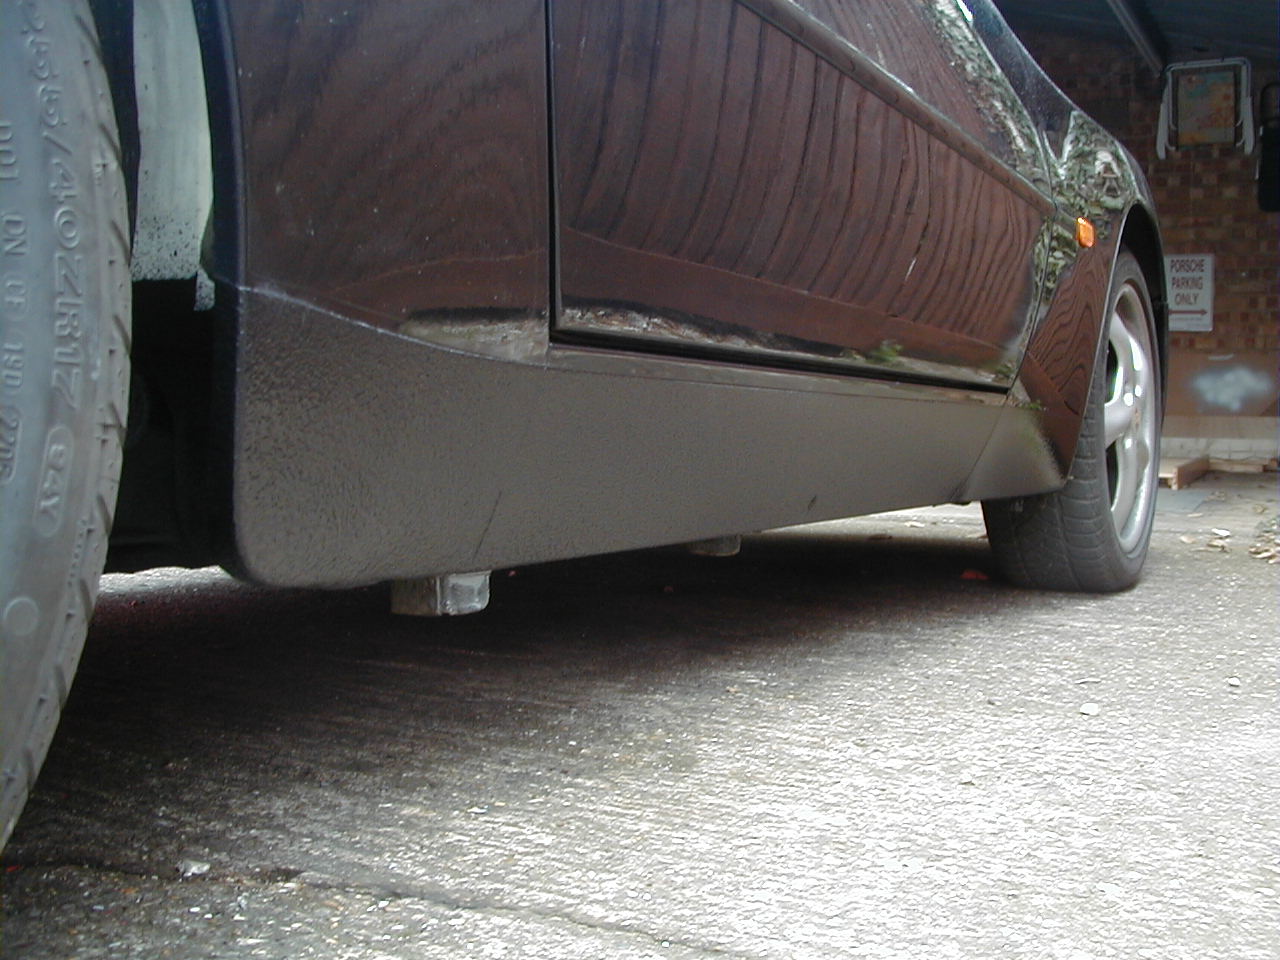
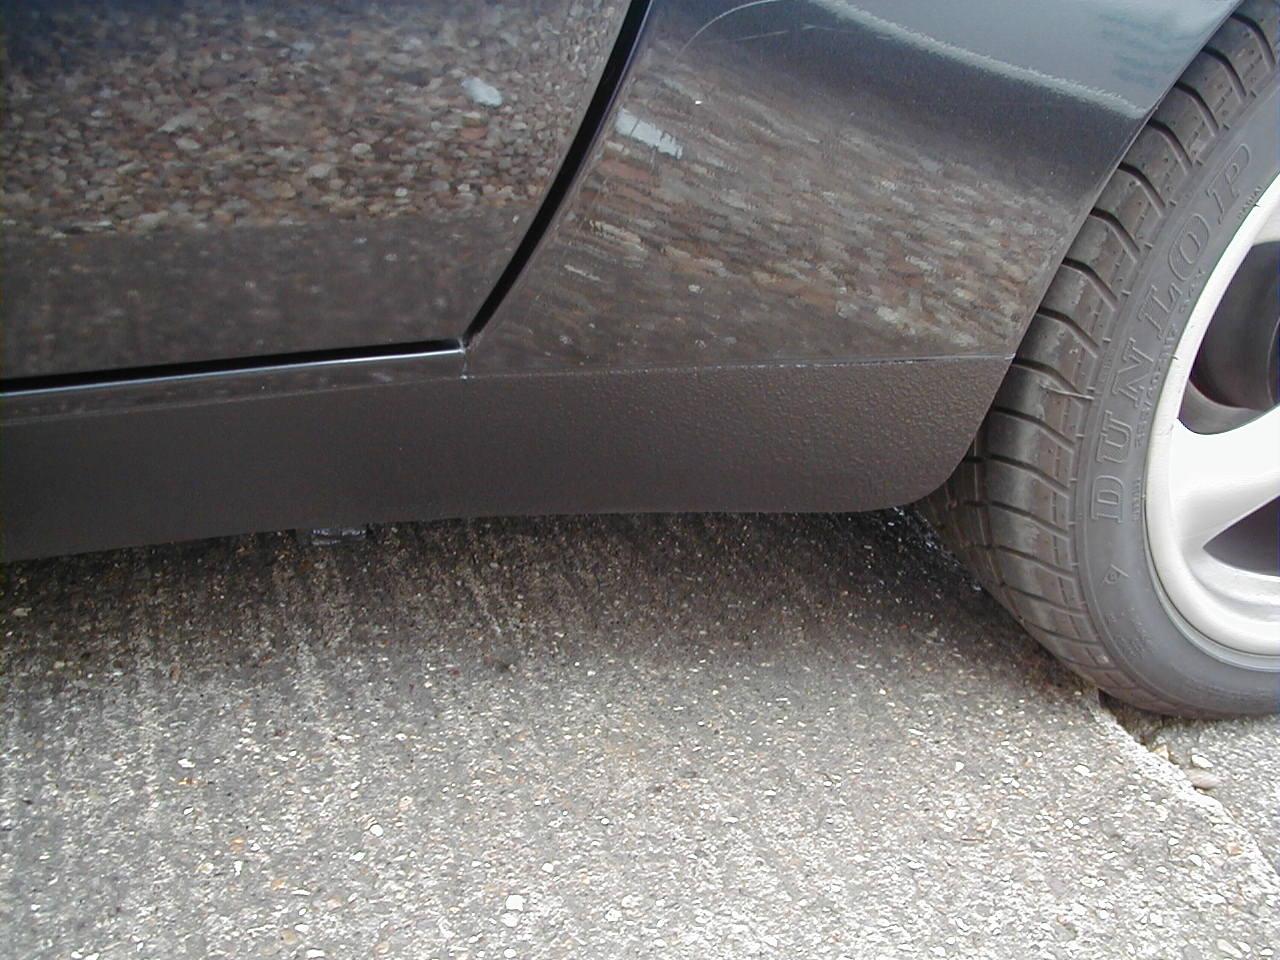
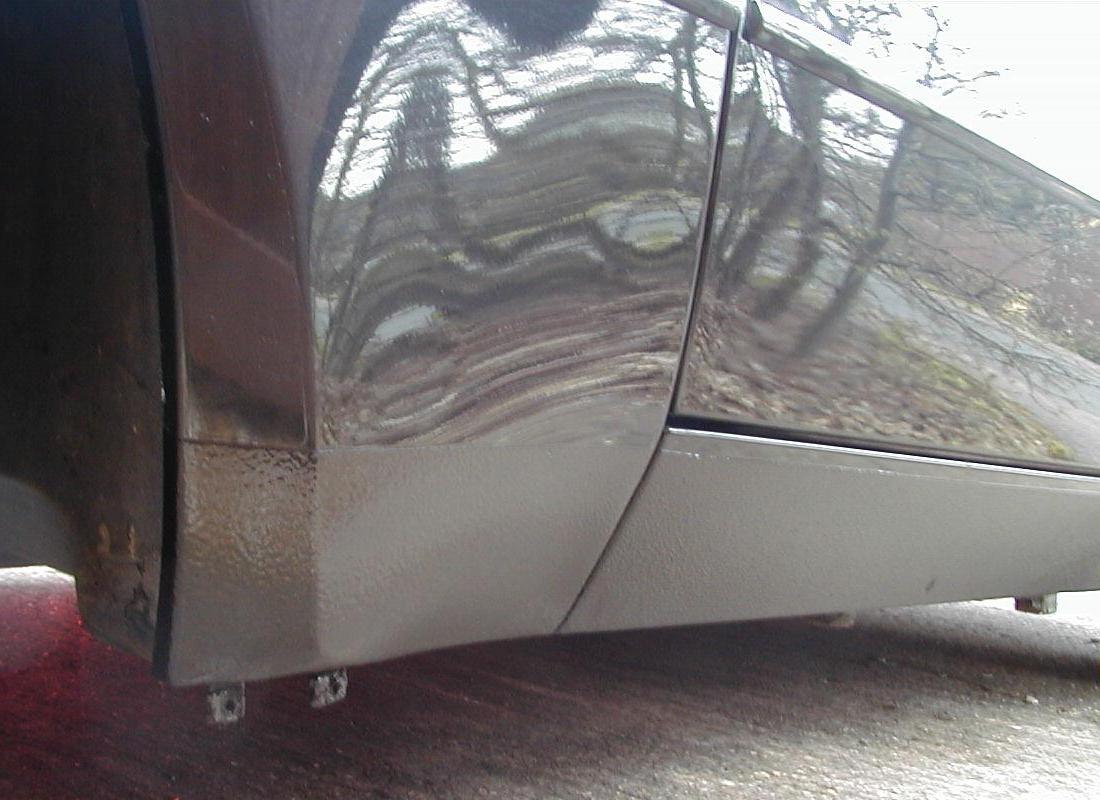
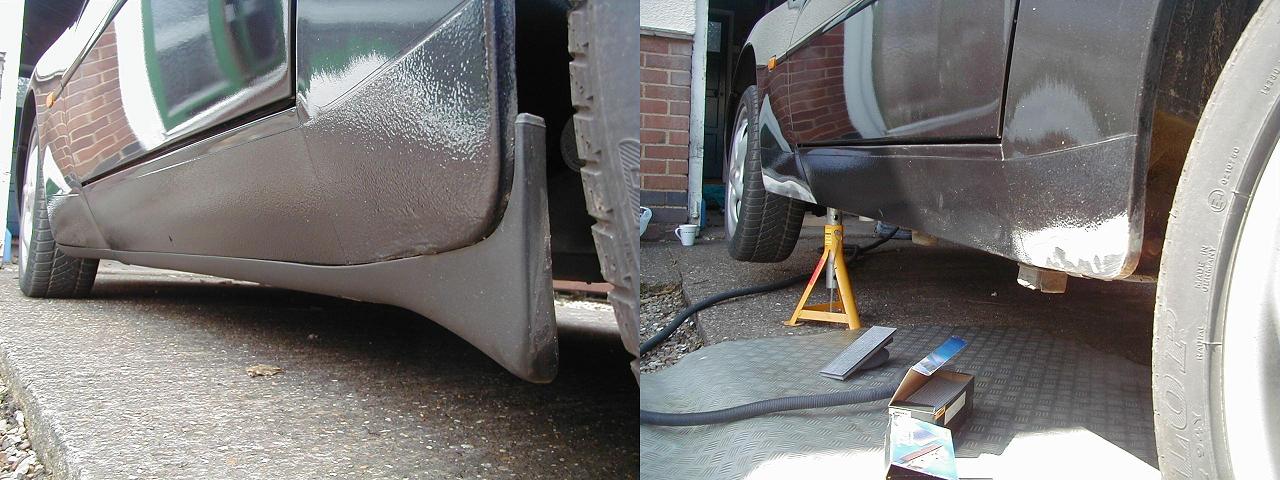
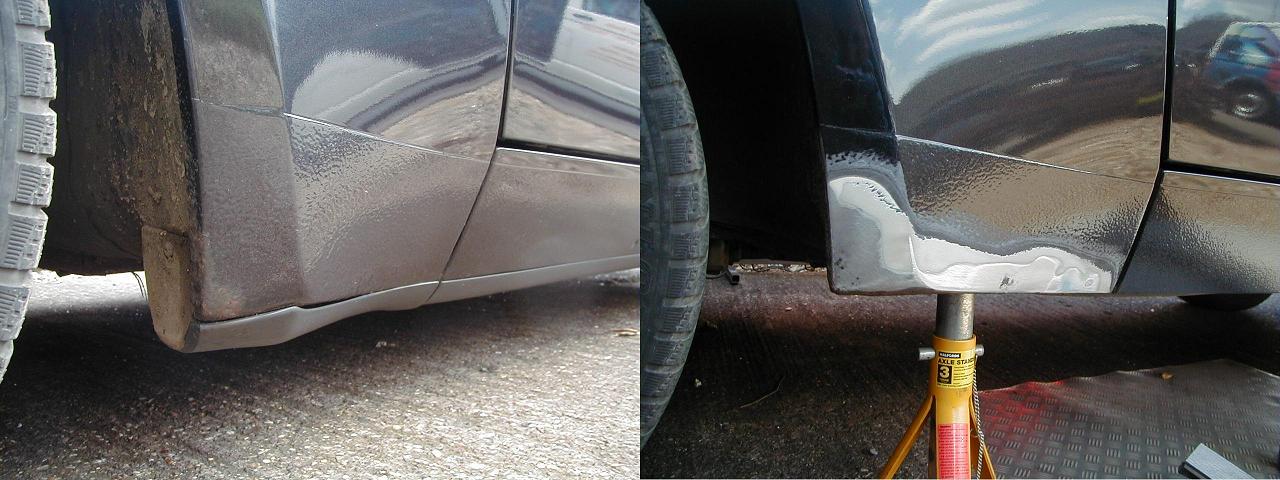
These worrying bubbles have occurred because the sills were painted by a local OPC a few years ago and the paint has just started to peel off, revealing the stoneguard beneath. The stoneguard is porous and has allowed water to pass through and become trapped against the galvanised sills.

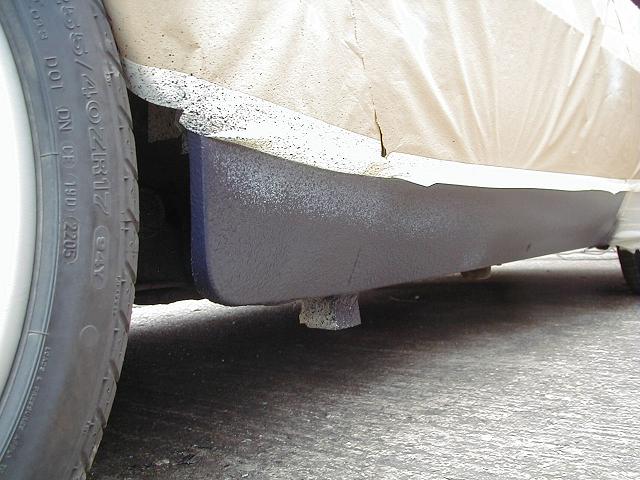
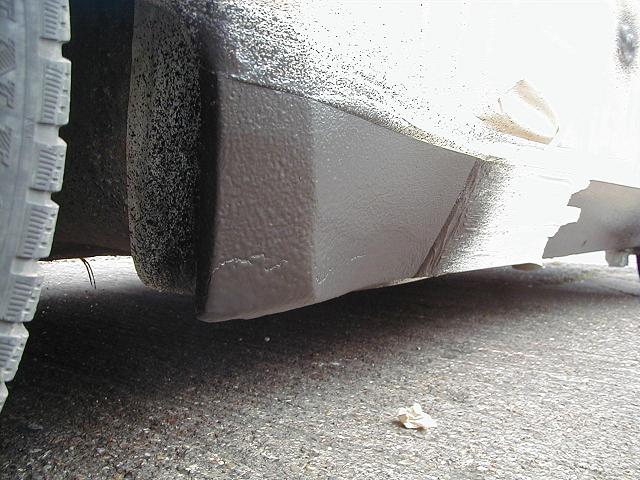
The first pic shows the offside rear sill with paint peeling on the left, and with the stoneguard removed on the right. The good news is there is very little actual corrosion, and it is all very light on the surface of the sill - hurrah for galvanising

C9B65E8C7EB74C19B6C0E33E622A2BD4.jpg
 
The next pic shows the rear nearside sill. Once again the actual corrosion is very light, though the whole area was very damp behind the stoneguard.

1C7939410988431C8A966A423F9BC5CB.jpg
 
I had a new offside front wing when thesills were painted because the bottom of the wing was very badly corroded. Since then the new paint peeled from the nearside wing and if you look at these bubbles and staining here I was expecting this wing to be very rotten indeed. Again it is not bad at all, and I am very happy [:D]

C7E5B6204BF544F5B215342B0E5E0FA4.jpg
 
....and this final pic shows how the plastic 'undersill' guards are attached. A plastic nut around a welded in bolt.

Tomorrow I'll post pics of the Wurth SKS stoneguard paint being applied to the sills - I think it will be messy [8D]

DC8EF281E3514D6B95DBDBEB30701A22.jpg
 
Looks like it's pretty solid - very similar to mine when I took a wire brush to it last year.[FONT=verdana,geneva"] [FONT=verdana,geneva"]It's worth everyone clearing the crud from behind the plastic trims in the last pics to make sure the drain holes aren't blocked.[FONT=verdana,geneva"] [FONT=verdana,geneva"]I've been outside today maiking sure the MX5 has no blocked drains as they are prone to corrosion if they choke up also.[FONT=verdana,geneva"]
 
Interesting Pics Paul - looks like you're underseal is in good nick also.

The underseal / general condition of the underneath of mine is excellent, but I intend to stick it on stands next winter and blast off the rust from the jacking points, and anywhere else I might find.
Have went halfers with my pops on a 50ltr 2HP Compressor which should make the mini-sand blasting and a suspension rebuild a bit easier!!
 
Looking good, Paul!

Just as a thought, am I the only one who thinks that the plastic trims always look poorly fitted, and the cars are better without them?

I know that my Luxury model doesn't have them anyway [;)]


When I cleaned the crud from behind the plastic trim I replaced all of the plastic bolts on the sills with a metal bolts and washers. I had to cut off several of the plastic bolts as the thread was not clear enough to spin them off and they are easy to round off.

Doug
 
ORIGINAL: pauljmcnulty

Looking good, Paul!

Just as a thought, am I the only one who thinks that the plastic trims always look poorly fitted, and the cars are better without them?

I know that my Luxury model doesn't have them anyway [;)]

No you're not. It's a big bug bear of mine. On mine the long under sill trims look fine, they fit neatly and are straight but both of my under wing trims look like they don't even fit.

Paul - Nice 'little' project and you are certainly making it look easy!! I am very jelous that your underwing trims actually look like they are properly attached to your wings. If it's convenient to you at any stage please can you take a pic from under one of your wings with the sill trim removed to show your trim mounting points so I can compare with mine? I suspect that one or two of the lugs that the trim attach to have come off on my car which is why the trims dont fit well.

Thanks.
 
Overnight the small patches of corrosion have turned black and been neutralised with Grenville Rust Converter (bought from www.frost.co.uk - I'll detail all the products ued at the end), so the first thing to do is prime the prepared areas and cover up that exposed metal. I use infra red lamps to dry the primer in 8 minutes, but air drying would be no more than an hour or so.

0C4000621BF9412EA91BE07BAA654A1A.jpg
 
Finally its time to apply the Wurth SKS Stoneguard with the Shutz gun they also supplied. This stuff spatters everywhere so I masked virtually the entire side of the car. I still found some spots on the bonnet after I was spraying straight up under the sill, but luckily it is water soluble when wet and wipes straight off.

It is supposed to be applied at 4-5 bar of pressure from a compressor at a distance of 30-40cm. I practised and varied the distance and pressure on an old bonnet until I found the closest match to our sills. I settled on 4bar at 30cm and it looks pretty good so far.

82EF1CE9154445A781688967AF2C9728.jpg
 
It is dry and paintable after 2-3 hours, but I will wait until tomorrow before applying the body colour just in case there are any reactionary problems by going at it too quickly.

Here is a quick pic showing how to get it wrong when you think 'I know I'll just put another coat over the top now because it doesnt quite look perfect' [:-] I should have waited 3 hours to put a 2nd coat on, but luckily it is water soluble so a big bucket of water and an old towel will wipe it off.

70FE7BA83AF142608C3A2592A4BAE574.jpg
 
Scott, I'll take better pics of the under sill lugs tomorrow. The photo should also clearly show the sill drains that Fen has mentioned, there are about four on each side and I think will be perfect for people to spray Waxoyl cavity wax through as we've mentioned in the other thread. In fact I'll pop down to Halfords and get some whilst I'm at it this weekend [:D]

I don't know if the 'Lux'ury cars are different but if you remove the under sill trims then the jack points hang down about 3 inches on the Turbo and S2 and look really unsightly IMHO. You can see them on the stoneguard picture I've just posted above.
 
I'm looking forward to seeing the finished results.

Have you done the full length or just the affected area?

I'm thinking of doing the same in the winter as my drivers wings needs a touch of TLC around the edge.
 
All finished [:)]

Today I sprayed over the Stoneguard with the body colour and clearcoat lacquer, and when that had all dried I painted the inner underside of the sills with some fresh Waxoyl based underseal paint, being careful not to block up the sill drains.

Here is the offside rear:

AD30AB22DF5D48FAAA561D321AF7DDF1.jpg
 
I did a patch repair, only rubbing down and re-stoneguarding the areas that had flaky paint and bubbles, but afterwards painted the entire sill with body paint and clearcoat. On reflection I think it would be much better to re-stoneguard the entire legth of the sill, but getting the old stuff off is a right pain and very time consuming by hand. Maybe some chemical stripper could speed this up [&:]

I used:

Grenville Heavy Duty rust cure to treat any surface corrosion www.frost.co.uk

Standard grey primer to cover any exposed metal

Wurth SKS Stoneguard to cover the primed area www.wurth.co.uk

A Wurth Shutz gun to apply the Stoneguard (they do an aerosol can too)

Hammerite underbody seal with Waxoyl to protect the back of the sills

Anyone is welcome to borrow the Shutz gun if they want to do this themselves (it needs 4 bar of air pressure) and I have half a canister of the SKS stoneguard left that you can have [:)]


42F0E6EA4C944CA792047374247634D2.jpg
 

Posts made and opinions expressed are those of the individual forum members

Use of the Forum is subject to the Terms and Conditions

Disclaimer

The opinions expressed on this site are not necessarily those of the Club, who shall have no liability in respect of them or the accuracy of the content. The Club assumes no responsibility for any effects arising from errors or omissions.

Porsche Club Great Britain gives no warranties, guarantees or assurances and makes no representations or recommendations regarding any goods or services advertised on this site. It is the responsibility of visitors to satisfy themselves that goods and/or services supplied by any advertiser are bona fide and in no instance can the Porsche Club Great Britain be held responsible.

When responding to advertisements please ensure that you satisfy yourself of any applicable call charges on numbers not prefixed by usual "landline" STD Codes. Information can be obtained from the operator or the white pages. Before giving out ANY information regarding cars, or any other items for sale, please satisfy yourself that any potential purchaser is bona fide.

Directors of the Board of Porsche Club GB, Club Office Staff, Register Secretaries and Regional Organisers are often requested by Club members to provide information on matters connected with their cars and other matters referred to in the Club Rules. Such information, advice and assistance provided by such persons is given in good faith and is based on the personal experience and knowledge of the individual concerned.

Neither Porsche Club GB, nor any of the aforementioned, shall be under any liability in respect of any such information, advice or assistance given to members. Members are advised to consult qualified specialists for information, advice and assistance on matters connected with their cars at all times.

Back
Top