Never heard of clecos before! Can I justify another tool for this project? I have a big pot of seam sealer. What is the merit of sealing both sides of the weld vs having bilt hamber cavity wax creep into the flange from the inside? Previously I've only sealed the outside and filled up the flange with wax.
You are using an out of date browser. It may not display this or other websites correctly.
You should upgrade or use an alternative browser.
You should upgrade or use an alternative browser.
oh my god help
- Thread starter robdimond
- Start date
Hairyarse
New member
Great work Rob [8D]
One tip, if you're leaving a while before having painted I'd spray some zinc rich primer over first on the bare metal. Whilst I'm very much stuck in to getting my MK1 Golf finished now, I started the resto over 6 years ago ([ ]) at which time I did the inner sill repair and left it in zinc primer. 6 years on, not a spot of rust has come through and whilst the car's in a garage, it is a cold and dampish environment. I use the U-pol stuff in a green can that you can get from Halfrauds.
You could then prime over the top. I used to hear that primer is porous? Not sure if that's true but worth bearing in mind
Keep up the good work [ ]
]
One tip, if you're leaving a while before having painted I'd spray some zinc rich primer over first on the bare metal. Whilst I'm very much stuck in to getting my MK1 Golf finished now, I started the resto over 6 years ago ([
You could then prime over the top. I used to hear that primer is porous? Not sure if that's true but worth bearing in mind
Keep up the good work [
http://www.ebay.co.uk/itm/Temporary-Fasteners-Kit-CLECO-SKIN-PINS-Pack-Of-20-1-8-fasteners-/261211327379?pt=UK_Hand_Tools_Equipment&hash=item3cd1688b93
These are clecos they are a temporary fastener for panels etc. I can't honestly answer the seam sealer v's wax question. All I can say is that I've always been told to seam seal the weld especially on the inside and especially if using a joggled edge. I cant see why wax wouldn't work and I've used Bilt Hamber products before and I think they are really good.So it's up to you. Sorry I can't help more.[&o]
Plus one on zinc primmer though. I prefer zinc 182 but u-pol stuff is also good.
Spent a lot of time making not much progress.
Ended up re-doing the inner rear quarter section because I was not happy with it. I recreated the shape of the previous bodge (which had loads of filler on top) and as a result the wheel arch repair section did not line up.
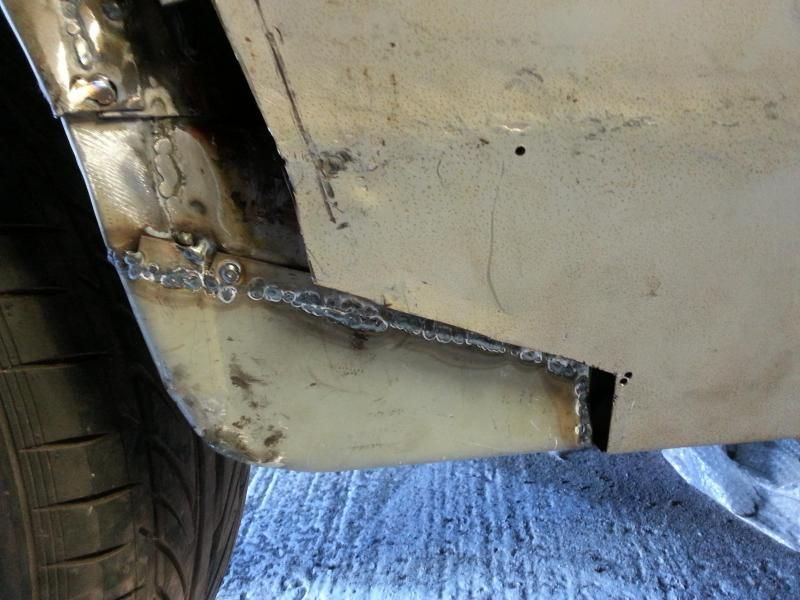
New outer section. Had to fabricate this as the repair panel turned out to be rusty beyond use, but it was usable as a template.
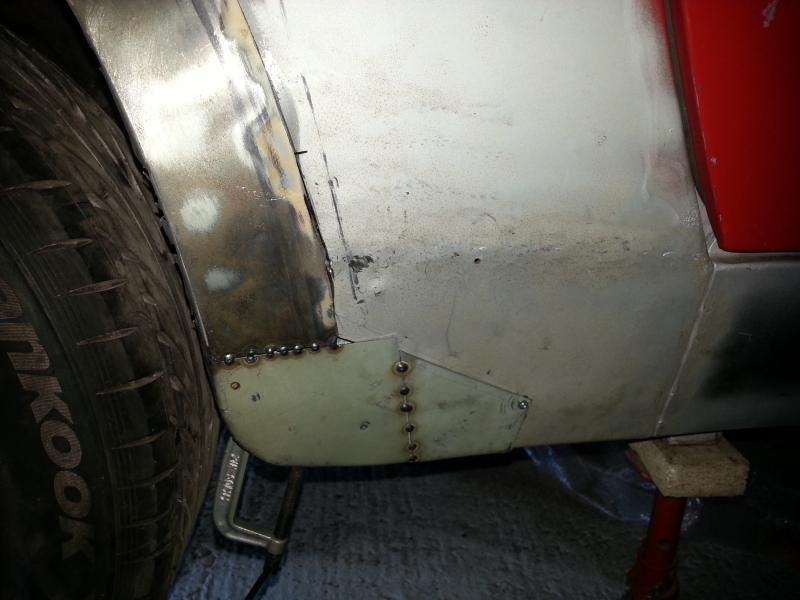
Tantalisingly close, but looks like I'll be driving a less interesting car to Rutland [ ]
]
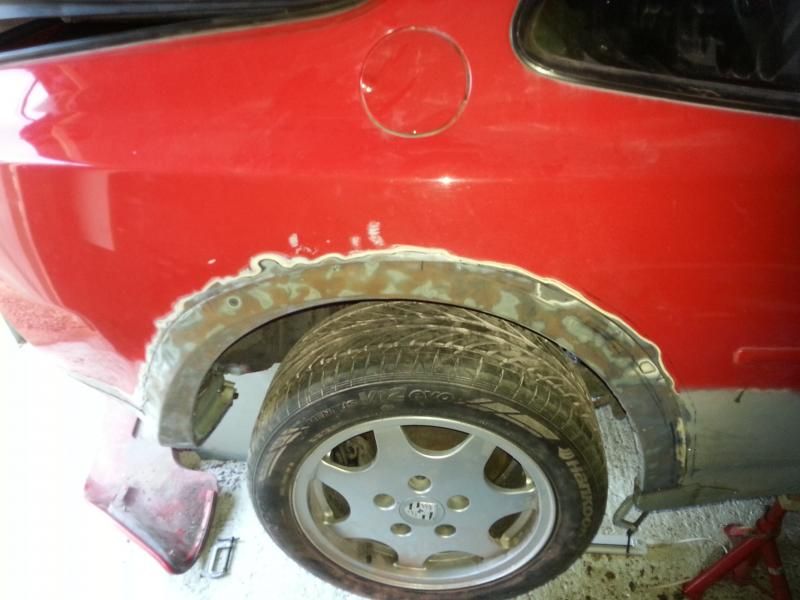
Ended up re-doing the inner rear quarter section because I was not happy with it. I recreated the shape of the previous bodge (which had loads of filler on top) and as a result the wheel arch repair section did not line up.

New outer section. Had to fabricate this as the repair panel turned out to be rusty beyond use, but it was usable as a template.

Tantalisingly close, but looks like I'll be driving a less interesting car to Rutland [

Was great to see so many forum members at Rutland last week. Best yet! Managed to spend a full day today, so here is another update...
Lots of fettling the repair panel and fully welded the inner arch section. Whole thing covered in weld through primer and ready for welding. The end is in sight!

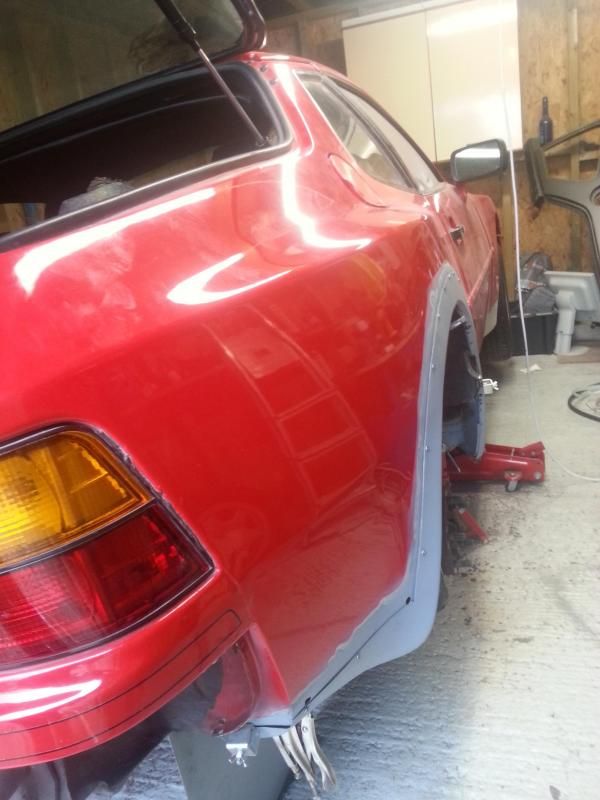
Lots of fettling the repair panel and fully welded the inner arch section. Whole thing covered in weld through primer and ready for welding. The end is in sight!


Monkeythree
New member
Looking good Rob. The Intergrips have been put to good use straight away!
ORIGINAL: robdimond
I wish I'd had the benefit of a training montage!
https://www.youtube.com/watch?v=DP3MFBzMH2o
your wish is my command Sir [
Hairyarse
New member
Great work Rob, that's looking fantastic! [8D] How are you getting on with those little square clamps? I bought some a while back - thought a great idea but felt it made too big a gap between the panels and really struggled with welding without blowing holes.
One tip I was given recently by a couple of welders much more 'pro' than me, is only paint with weld through primer the areas that aren't accessible after welding. Then only when you're done, zinc prime the rest. They said you get better welds this way, despite it being weld through primer. I tried it and I'd tend to agree.
One tip I was given recently by a couple of welders much more 'pro' than me, is only paint with weld through primer the areas that aren't accessible after welding. Then only when you're done, zinc prime the rest. They said you get better welds this way, despite it being weld through primer. I tried it and I'd tend to agree.
Andy,
I've not actually tried welding with the clamps yet, but they are pretty thin (0.4mm) so we'll see how it goes. There are just a couple of short runs where I couldn't get the joddler in. I will try the usual trick of clamping a copper water pipe behind which works as a heat sink and won't stick to the weld. I've been able to fill some big holes with that trick before!
Sounds like good advice on the weld-through primer. I had noticed the welds were more spattery and the arc less stable. Before doing the big weld (or 'fight', in Colin's terminology), I will grind off the primer just in the stripe where the weld is going.
Rob
Hairyarse
New member
I think mine must be thicker than 0.4mm - could explain the issue. Yes that copper trick is brilliant, have used it a few times myself [ ]
]
Oh another tip, if you haven't bought any of these yet - http://www.ebay.co.uk/itm/111029769381 - then get some!! I've only recently been educated in them. They're great for cleaning up metal before welding or painting as they don't take any metal away
Oh another tip, if you haven't bought any of these yet - http://www.ebay.co.uk/itm/111029769381 - then get some!! I've only recently been educated in them. They're great for cleaning up metal before welding or painting as they don't take any metal away
I've bought so many of those clean and strip discs that I'm considering buying shares in the company that makes them! [ ]
]
I've started buying them direct from 3M because I'm a big fan of 3M stuff. I find they work much better than a wire brush for removing paint and thick 944 underseal, but they tend to wear out pretty quickly (especially chewing through the underseal).
I'm considering buying a power file so I can dress down welds that are hard to get to with the angle grinder. I find the dremel and air die grinder too slow...
Hairyarse
New member
lol - yes they do get used up quite quickly! I hadn't tried them on underseal yet, may have to try that!
I bought one of these for dressing up welds in hard to reach areas -

It's not the cheapest tool at about £90 but if ever you were to get turned on by an air tool it would be this one ] Such a nice tool (LOL) It works quite quickly too
I bought one of these for dressing up welds in hard to reach areas -

It's not the cheapest tool at about £90 but if ever you were to get turned on by an air tool it would be this one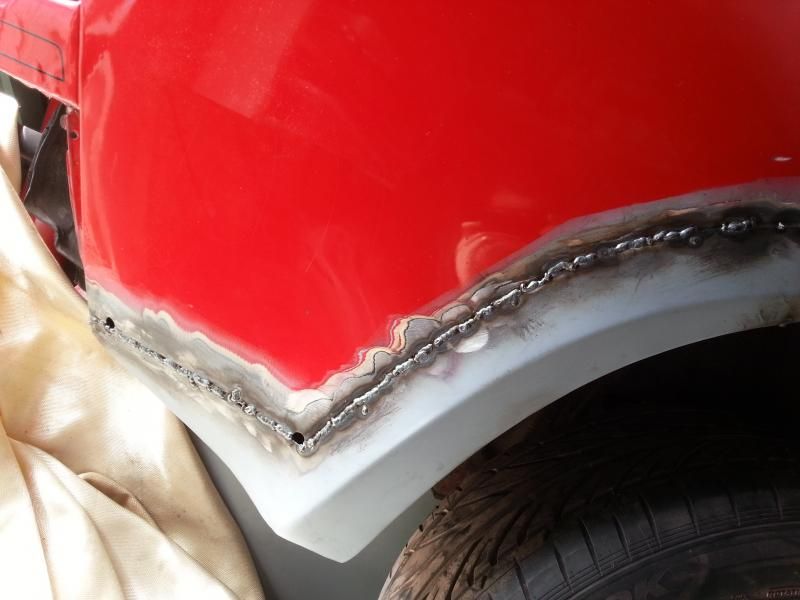
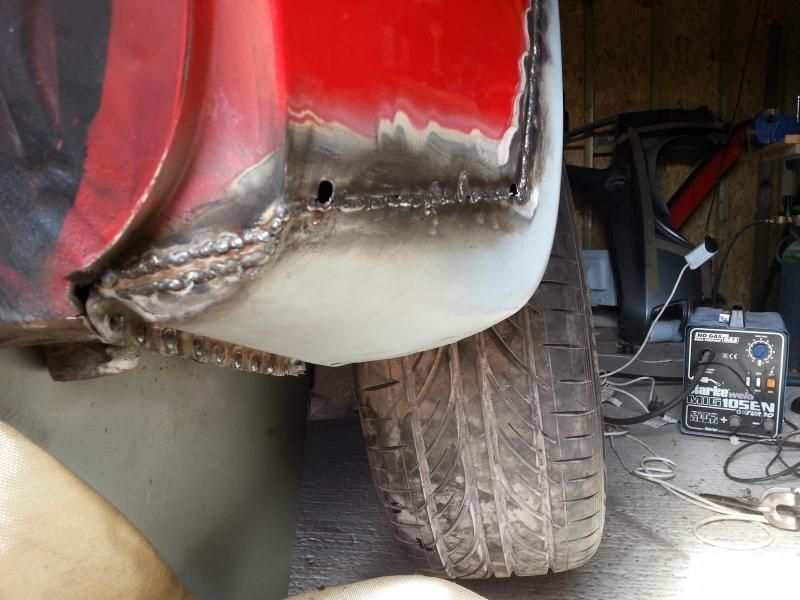
Can no longer see my feet through the boot floor!!!
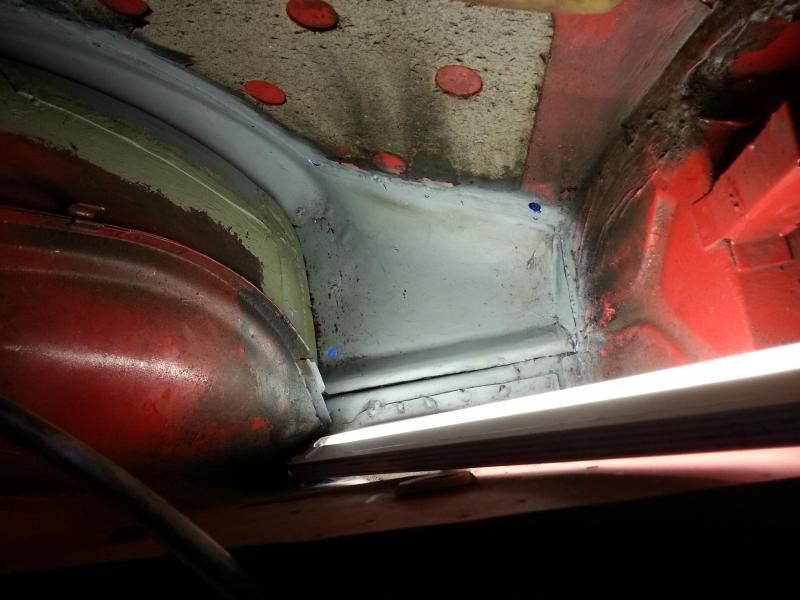
Still more welding to do... hopefully spend the whole day on Friday.
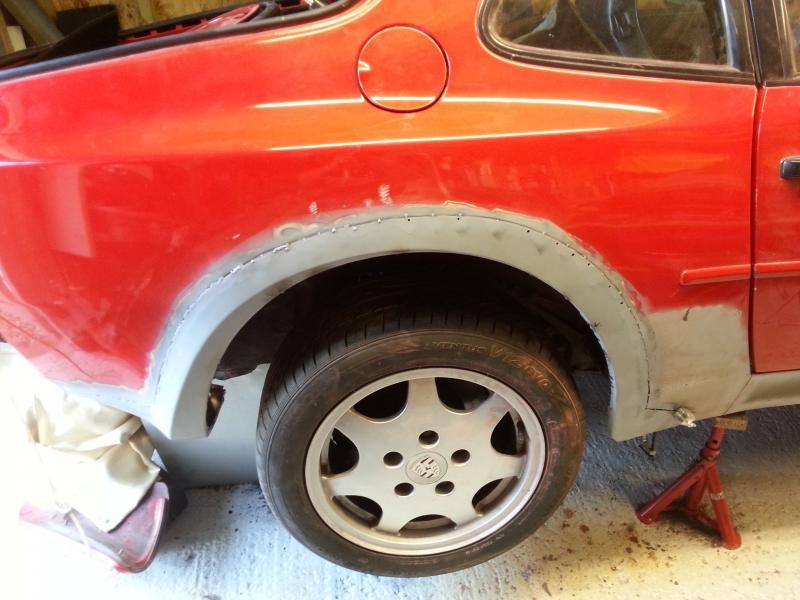
Need to weld in the vague area of the filler neck. Should I leave it in place or disconnect? Thought it would be better to leave in place. I am covering the back side of the weld in 'cold front' a special putty that stops heat and prevents any flare ups. I weld in 10-20mm bursts, letting everything cool down and checking for any flare ups. I have a big CO2 fire extinguisher in my exit route and squirty water bottle in hand. Am I being cautious enough, any advice?
Tack welded all the way along (no self tappers any more!) and fully seam welded the back section...


Can no longer see my feet through the boot floor!!!

Still more welding to do... hopefully spend the whole day on Friday.

Need to weld in the vague area of the filler neck. Should I leave it in place or disconnect? Thought it would be better to leave in place. I am covering the back side of the weld in 'cold front' a special putty that stops heat and prevents any flare ups. I weld in 10-20mm bursts, letting everything cool down and checking for any flare ups. I have a big CO2 fire extinguisher in my exit route and squirty water bottle in hand. Am I being cautious enough, any advice?
Long time without an update... I promise I have been busy! Got the engine started today and moved her 12 feet out of the garage!
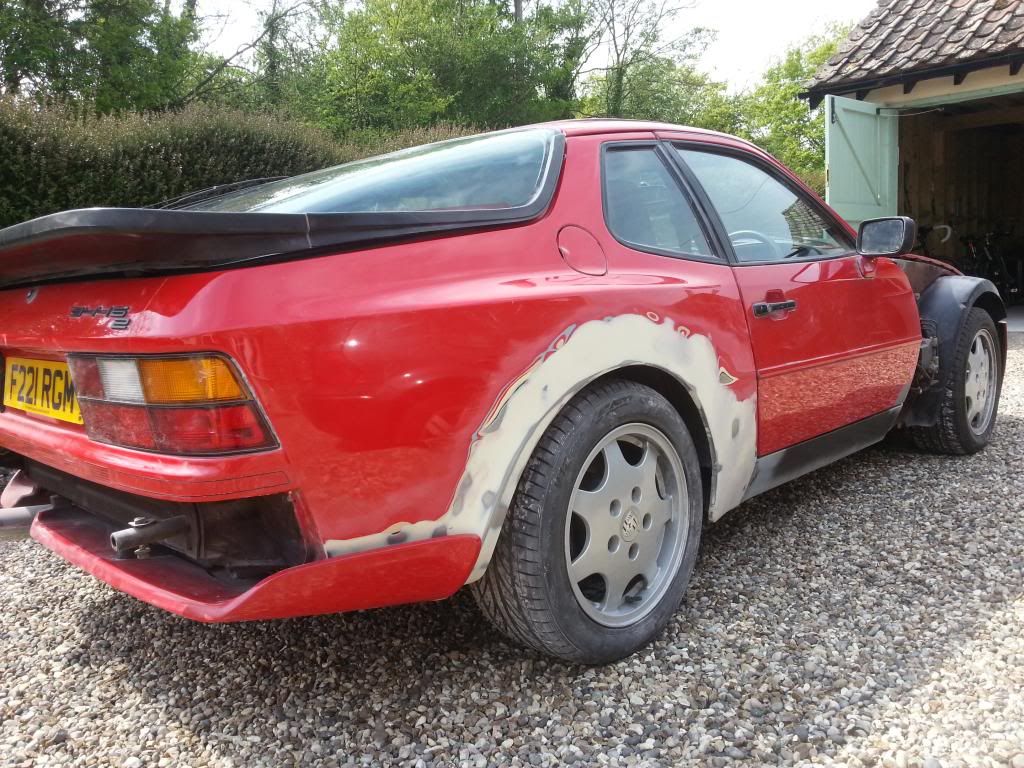
All the welding is done now, lots of seam sealer and filler still to do. There was a bit of distortion in the rear quarter, not surprising given the amount of welding, so needed 2-3mm of filler in places. Used some big 'dura block' sanding blocks bought in the US which are really fantastic... managed to get it pretty straight after a lot of work.
2 full days of filling and sanding...
Bit of primer to stop it rusting...
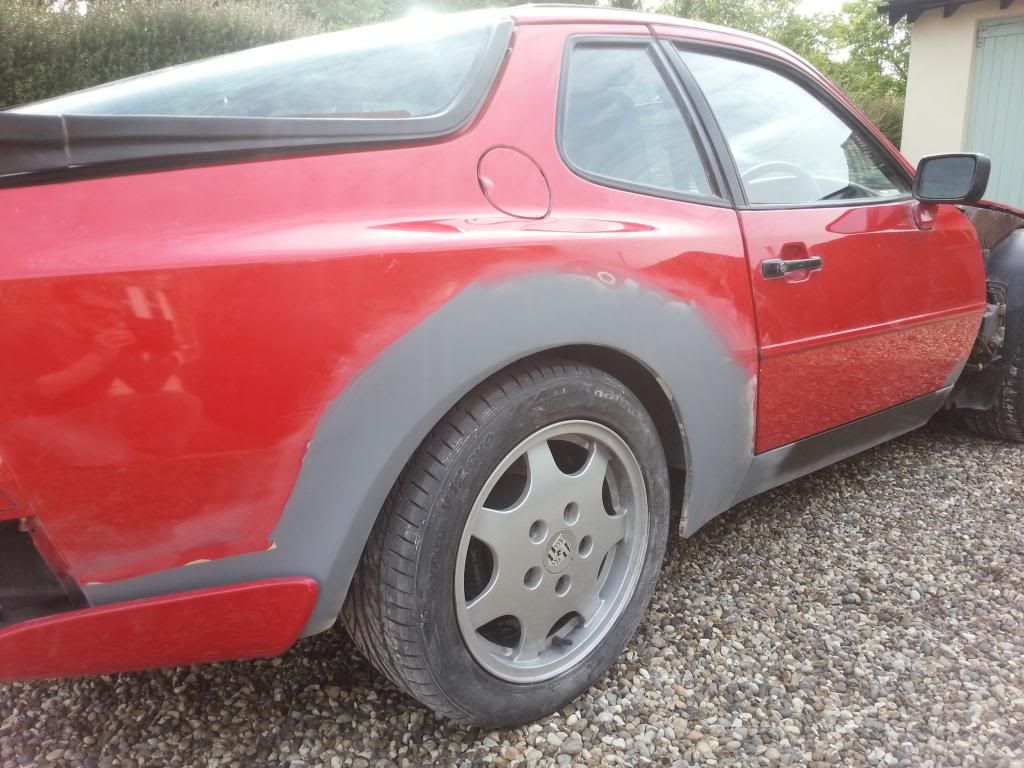
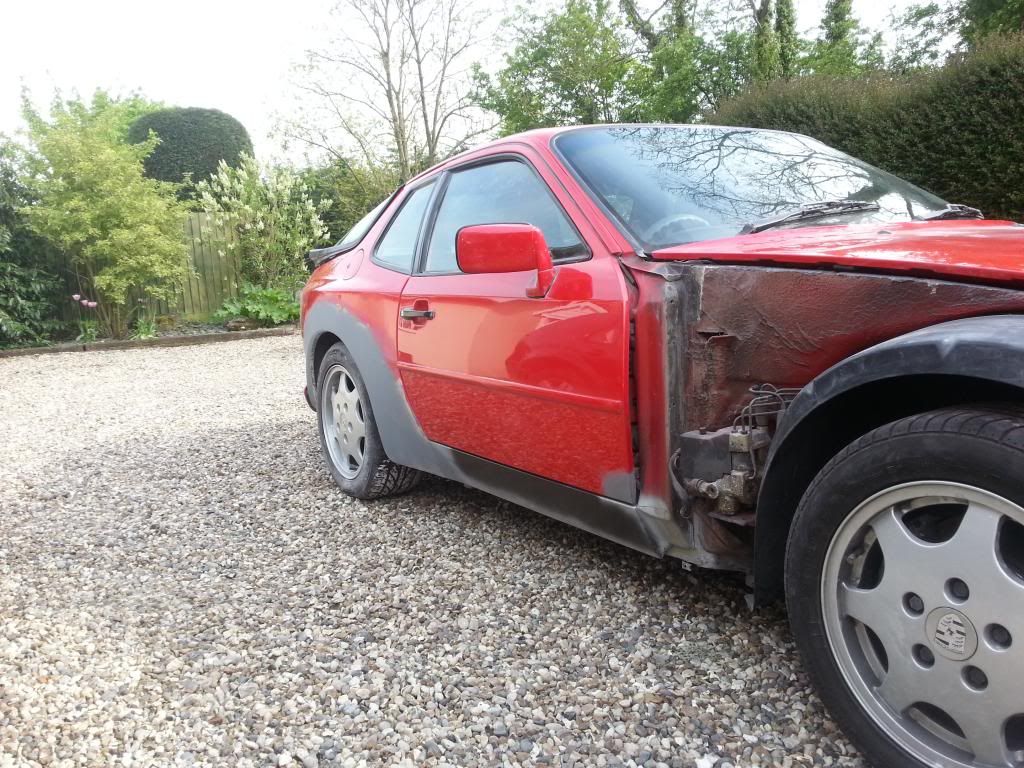
All the welding is done now, lots of seam sealer and filler still to do. There was a bit of distortion in the rear quarter, not surprising given the amount of welding, so needed 2-3mm of filler in places. Used some big 'dura block' sanding blocks bought in the US which are really fantastic... managed to get it pretty straight after a lot of work.
2 full days of filling and sanding...

Bit of primer to stop it rusting...


Posts made and opinions expressed are those of the individual forum members
Use of the Forum is subject to the Terms and Conditions
Disclaimer
The opinions expressed on this site are not necessarily those of the Club, who shall have no liability in respect of them or the accuracy of the content. The Club assumes no responsibility for any effects arising from errors or omissions.
Porsche Club Great Britain gives no warranties, guarantees or assurances and makes no representations or recommendations regarding any goods or services advertised on this site. It is the responsibility of visitors to satisfy themselves that goods and/or services supplied by any advertiser are bona fide and in no instance can the Porsche Club Great Britain be held responsible.
When responding to advertisements please ensure that you satisfy yourself of any applicable call charges on numbers not prefixed by usual "landline" STD Codes. Information can be obtained from the operator or the white pages. Before giving out ANY information regarding cars, or any other items for sale, please satisfy yourself that any potential purchaser is bona fide.
Directors of the Board of Porsche Club GB, Club Office Staff, Register Secretaries and Regional Organisers are often requested by Club members to provide information on matters connected with their cars and other matters referred to in the Club Rules. Such information, advice and assistance provided by such persons is given in good faith and is based on the personal experience and knowledge of the individual concerned.
Neither Porsche Club GB, nor any of the aforementioned, shall be under any liability in respect of any such information, advice or assistance given to members. Members are advised to consult qualified specialists for information, advice and assistance on matters connected with their cars at all times.


