Menu toggle

Toms S2 restoration thread

Monkeythree

New member
Been posting on here for around a year now and thought it was about time I properly introduced myself and pulled together my ramblings into a coherent thread following the restoration of my S2.

About me:

I am a 40yr old car enthusiast with a degree in automotive engineering and I have been in the automotive industry working in the OEM supply chain for 15yrs. I was born in England, grew up in Scotland, spent my working life in England and now I live in Sweden (courtesy of my wife's International Assignment with AstraZeneca). I'm in the fortunate position that I don't have to work during the 2 yrs that I'm here so I've brought my 944 with me and I am going to restore it while I am here.

About the car:

Its an 1992 S2 on a J plate. Alpine white with a blue logo interior. Had a few extras specced from new but nothing too fancy. It's done 126,000 miles (I think probably genuine) and has only 4 previous owners. The guy I bought it from had since 1997. The service book has lots of stamps in it but on closer inspection, I realised that the service book does not belong to my car! I'm still not sure whether it was mistakenly switched with another cars book when two similar cars where in for servicing at the same time or if there is something more sinister.... I gave the VIN from my (someone else's) service book to my OPC in Wilmslow and they were able to confirm the registration date of the car and that it is black but did not have a record of the registration. Some detective work for the future.....

The story so far:

Fancied a 944 for a while. I sold my track day 205 Gti and a kit car early last year and had a few quid to spend on one. Did a fair bit of research and decided that it was very easy to buy a bad one but with my budget, I couldn't afford a minter. So I decided to buy a cheap one and restore. Cue ebay after a few beers and my car turns up with a really poor description, badly taken photos and BIN of £1750. I fetched it back from Stoke and started to assess what I had bought. It barely ran on 2 cylinders, it had rusty patches on the sills, drivers door and roof and the tyres wouldn't hold air. After getting it up on the ramps, I assessed the underside and found seriously rusty fuel and brake lines - a definite MOT failure. I had a further look and made a list of all the other things that were wrong with it:
- handbrake doesn't work
- dampers ****ed
- headlights and indicator lenses cracked
- sunroof doesn't work
- electric windows don't work
- play in front wheel bearings/ball joints
- bald rear tyres
- brake discs worn out
- OS hockey stick missing
- NS hockey stick broken
- steering wheel in tatters
It was touch and go whether it was actually worth restoring at all and for a while I contemplated breaking it for spares and trying to recover my money. But I decided it was fundementally solid enough to be worth doing and I started working on it. I gave the engine a service and replaced a (Toyota) plug lead with a Beru one (thanks Oli). Fitting a washer on the sump plug solved the oil leak but was a worrying indication of how poor the previous servicing had been. With the engine oil tight and running properly, I was able to get it up to temperature and see if the tappets would quieten down - they did! I then turned my attention to the wheels - not usually the first thing to be done in a restoration job but mine were so corroded that they wouldn't hold air and not being able to roll the car around was a PITA. So I had them refurbed and painted in the closest silver match I could find.

Then I took a deep breath and started shopping for parts.

 
Sounds like quite a project you have there, at least you now have a couple of years to fully concentrate on it.

How are you finding the parts supply in Sweden? I know there is a healthy interest in 944's in the Scandinavian countries but I cannot imagine there are too many around
 
So you're stuck in Sweden with a slightly crusty S2 with all the time in the world while your wife works to keep the household running? Nice position to be in! [;)]

That list doesn't look too daunting, presuming (as Smiffy said) that you can get parts. Do you have a garage? Does it have a lift? If the answer to the last two questions is "Yes" then it would almost be my idea of heaven ...


Oli.
 
I anticipated that parts might be hard to find and/or expensive so i bought a full set of fuel lines and hose and the drivers side sill panel from my OPC before i left. I also bought a full set of belts and rollers from Frazerpart, bushes, caster blocks, wheel bearings and loads of other bits and pieces before I left the UK.
I'm glad I did because when i went to the Gothenburg OPC to price up the rear brake lines and hoses (6 items in total), he rather apologetically told me it would be £500. He also told me that another 944 owner had called him that morning to get a price for a rear screen and that was £5,000!!
Anyway, I digress. I' ve since made the rear brake lines myself and bought the hoses along with a bunch of other stuff from Design911. I've had them shipped to a friends house in the UK and will pick them up next time I'm over. So basically, if your name is Mr Abramovich, parts supply isn't a problem. If not, you have to be a bit more creative.

Yes i have a double garage but no pit or ramps. The car is up as high as i can get it on 4 axle stands which gives pretty good access. Unfortunately, my days are not 100% devoted to working on the car. There are kids to ferry to and from school, a dog to be walked every day and Mrs M3 expects washing, ironing, shopping, cooking and cleaning to be taken care of! I'm managing about 10 hours a week on the car which I suppose is probably more than most so I do count myself lucky.

Next thrilling installment and lots of photos to follow soon.
 
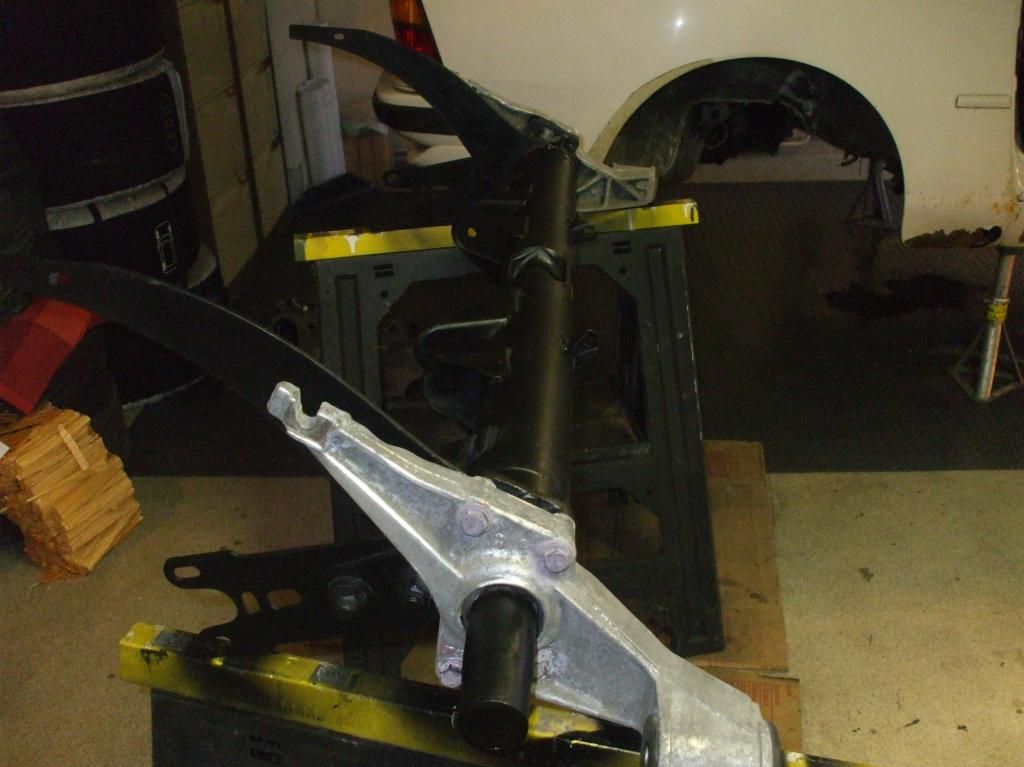
First job when I started working on the car was to drop the rear beam. I needed access to the crusty fuel lines and I figured it could probably do with some TLC anyway. I stripped it back with the exception of the spring plates because the bushes seem good and I don't fancy the pallaver of re-indexing the torsion bars. After a blast with the wire cup brush and some paint, it now looks like this:
Rearbeampainted.jpg

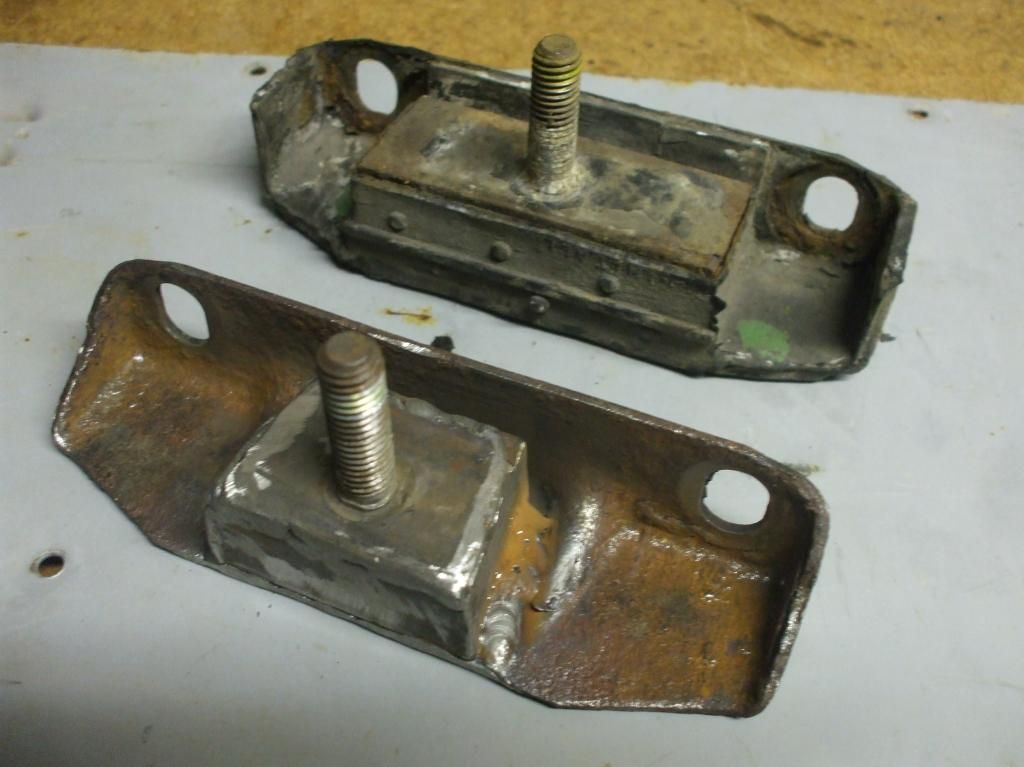
The torsion beam carrier mounts fell apart in my hands during removal so I've converted them to solid ones:
003-Copy.jpg

Those are away with a few other bits getting shot blasted at the moment and when I get them back and pick up a bunch of bits from the UK (discs, pads, handbrake shoes, brake hoses) I will be able to build the rear beam back up again and then stash it away ready for re-installation.
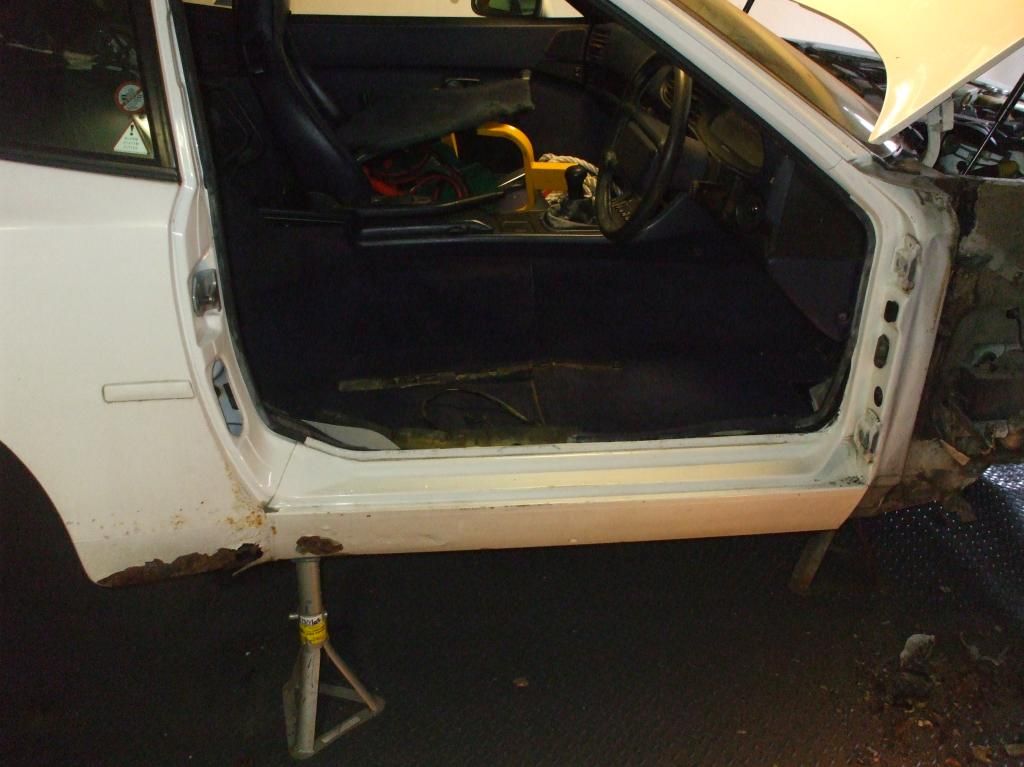
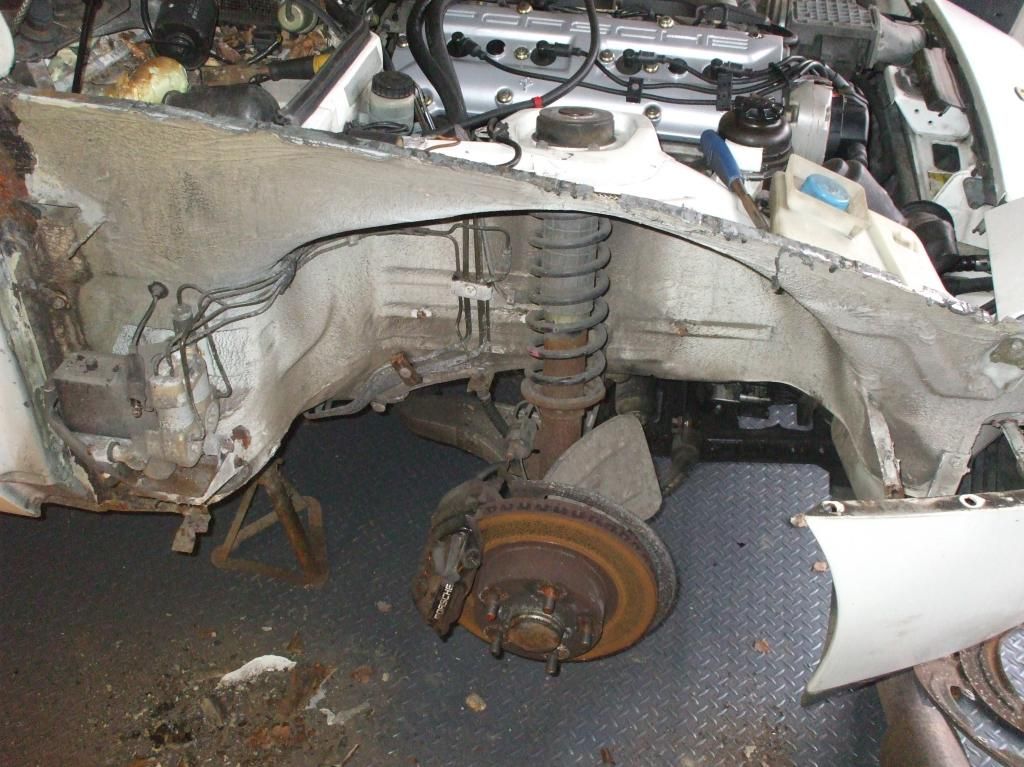
I then turned my attention to the sill which necessitates removing the door and the front wing. Tada:
Driversdoorremoved.jpg

OSfrontwingremoved.jpg

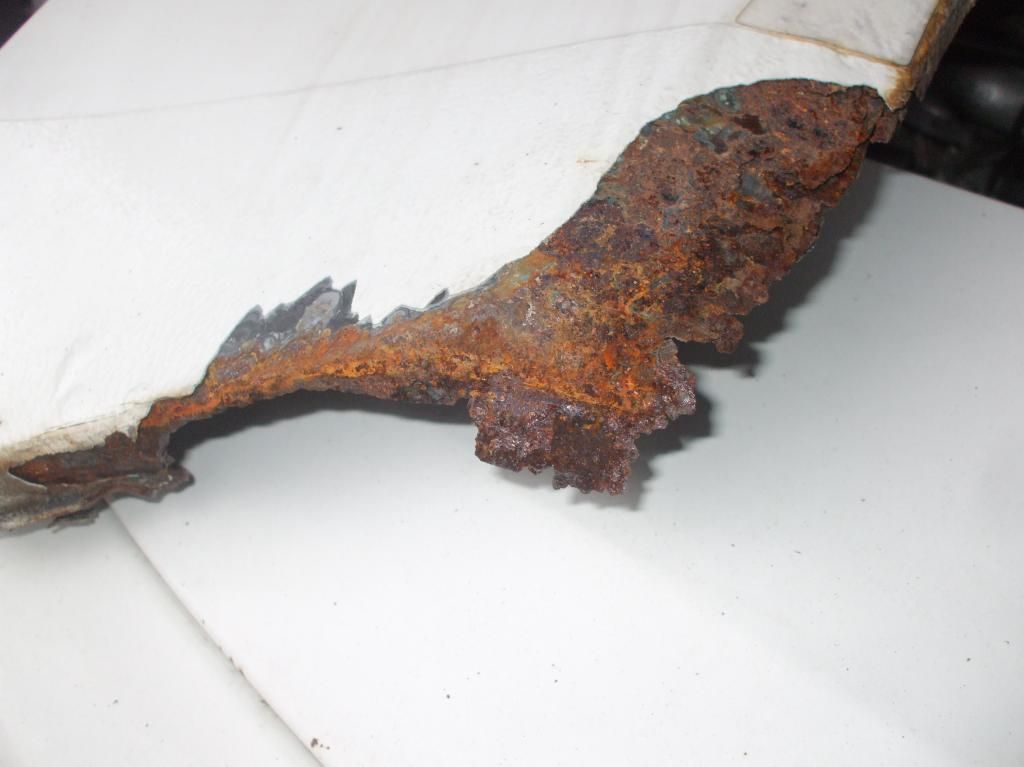
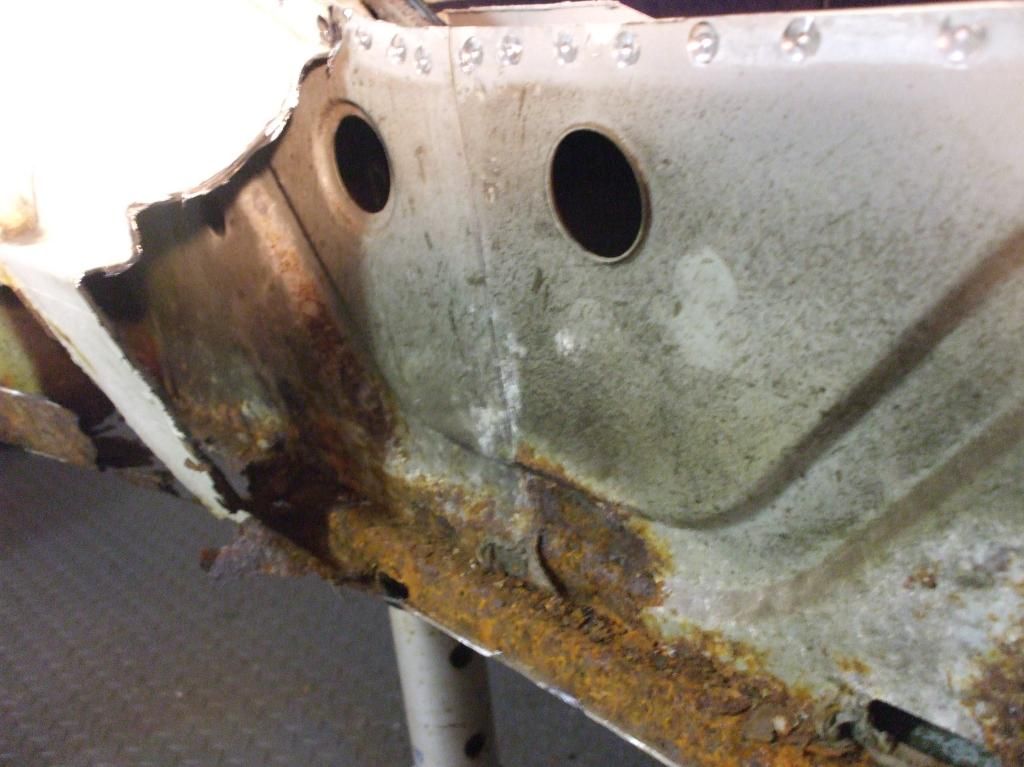
Here is the extent of the corrosion to the bottom corner of the wing:
OSfrontwingcornerrust.jpg

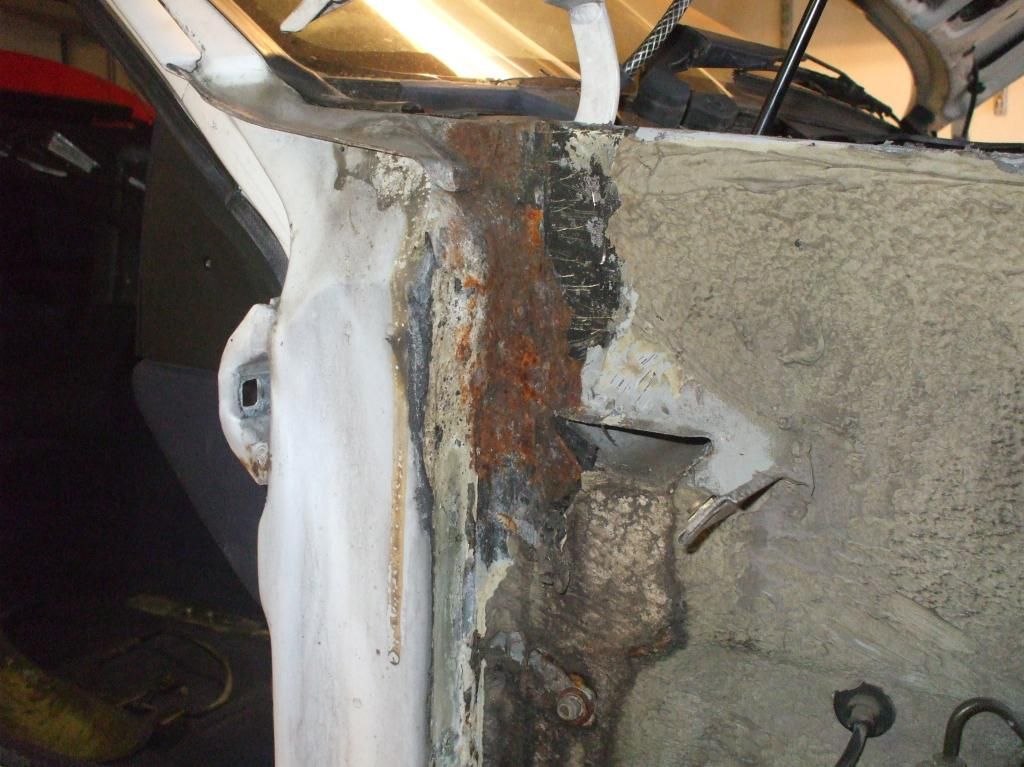
Removing the wing also revealed a wee bit of surface rust at the top of the A pillar which I will need to strip back and protect:
Aposttop.jpg

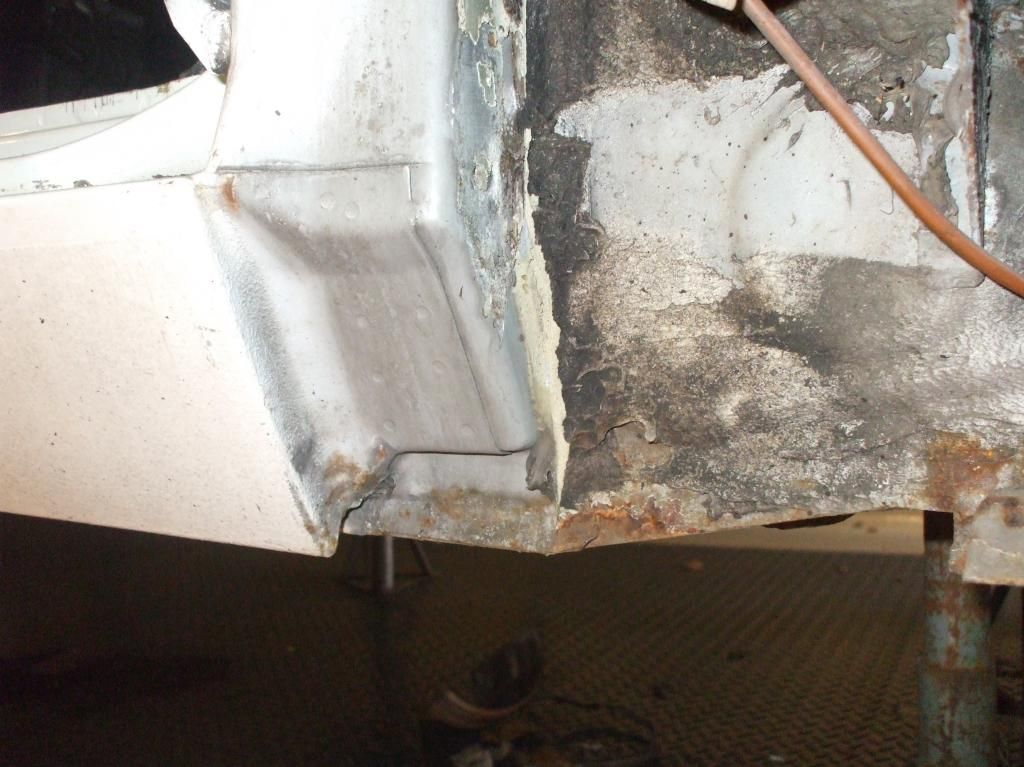
But the bottom of the A pillar is solid as a rock:
Apostbottom.jpg

Having the wings off will certainly make the access to the front suspension a lot easier so I will be doing that job before a refit the wings. But before that, it's time to get that sill off.....
 
All looking very very familiar at this point!! [:D]

The tricky bit getting the sill off is up by the door hinges where there is no obvious seam (on my car it looked like it was filled with braze which looked original). I see lots of drilling spot welds in your future!
 
I thought that looked to be the trickiest bit so i started there this morning with the the dremel. I used the new sill panel as a guide as to where to aim my cuts but even the dremel couldn't get right into the tight corner. Going to start the spot weld drilling tomorrow. I've bought a party pack of 6mm spot weld drill bits to keep me going. Was tempted to count the spot welds today but might save that for when i have drilled them all.
How did you remove the long run of the lower side of the sill panel? Did you go looking for spot welds and drill or did you just fire in with the angle grinder? I was thinking to run the angle grinder along the very bottom (the lowest point of the panel) first and then deal with the residue second.
By the way I have PM'd you too.
 
Tom,

Yes, I replied to your email earlier today (ntlworld address?), did you not get it?
I did exactly the same as you and went in with a dremel but couldn't get in under the lower door hinge, so I cut a tiny bit off the corner of the new sill panel and welded it in. I cut off most of the sill with the angle grinder (right across the top and bottom), so just the flanges remained and then I could easily drill out the spot welds without damaging the intermediate panel, exactly as you describe.
Good luck with it!

Rob


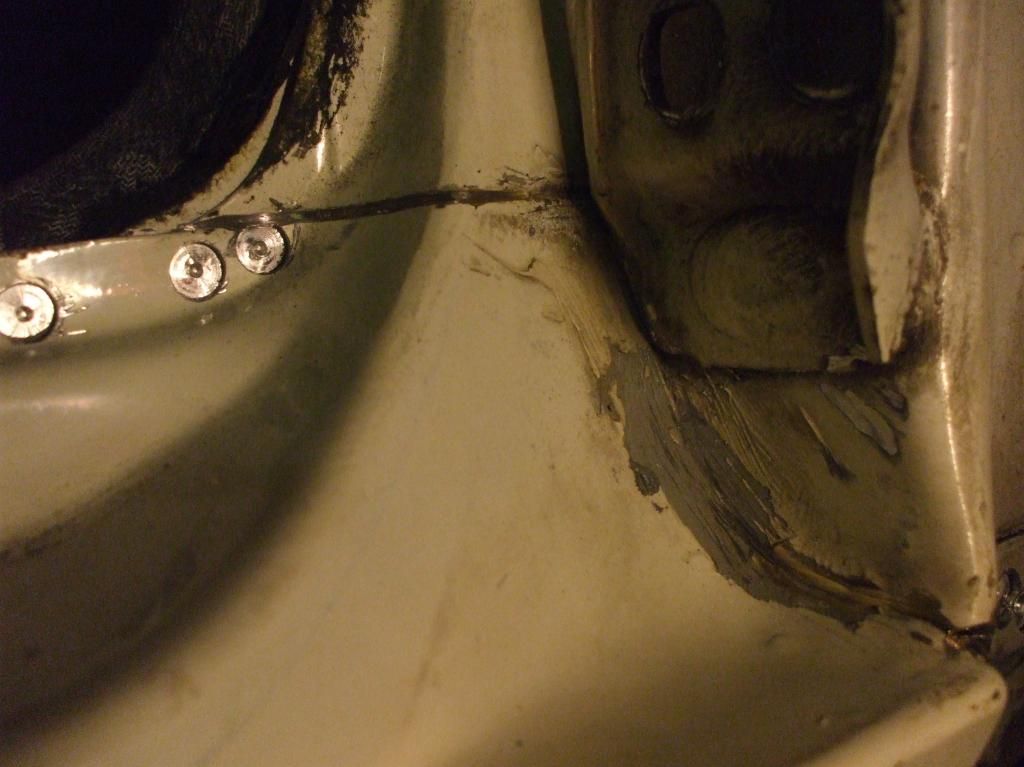
Took most of the outer sill off this morning. Ninja Dremelling skills needed to get into that tight corner under the door hinge bracket:
OSsilltoApostjoin.jpg

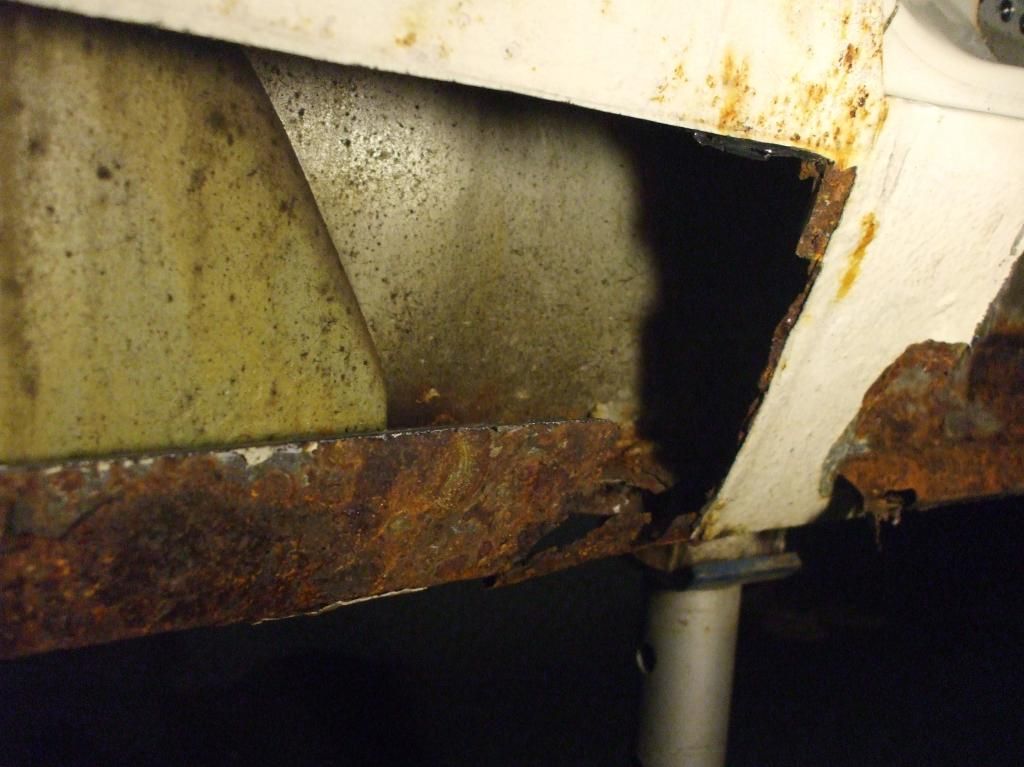
With the major part of the outer sill removed, I got my first look at the intermediate sill panel and was relieved to find it has only small areas of superficial rust:
OSoutersillremoved.jpg

I cut an inspection hole into the rear quarter but have left a "bridge" of the outer sill in place while I make up cardboard templates. Keeping some good datum points at this stage feels like a good idea:
InspectionholeinOSrearquarter.jpg

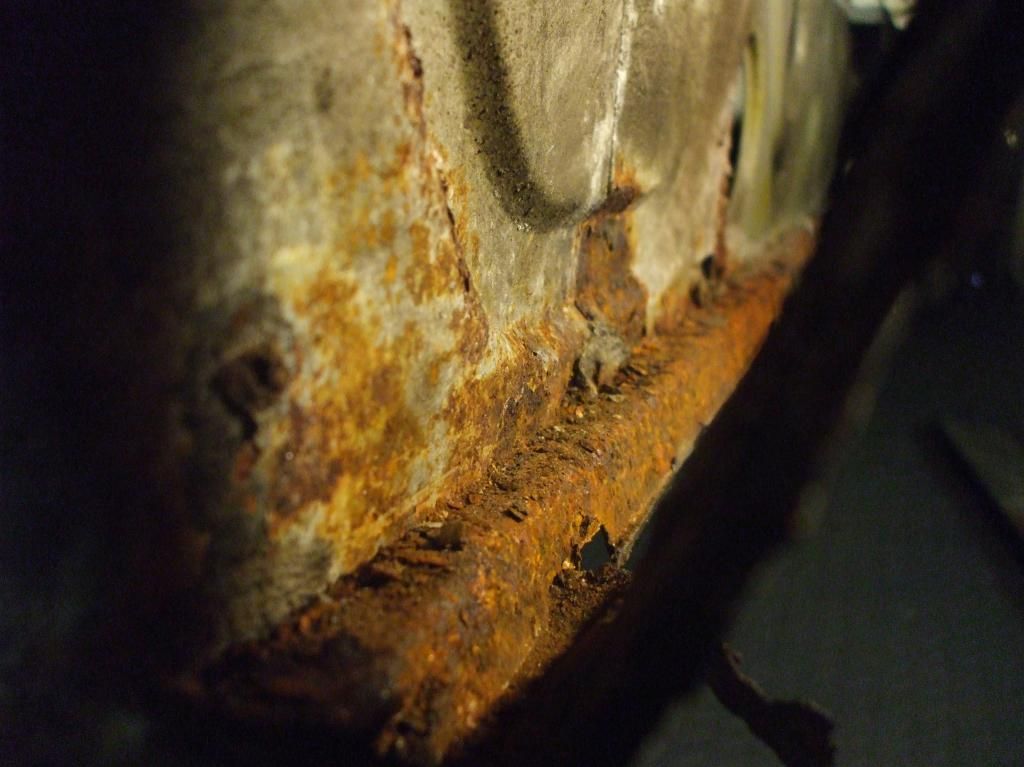
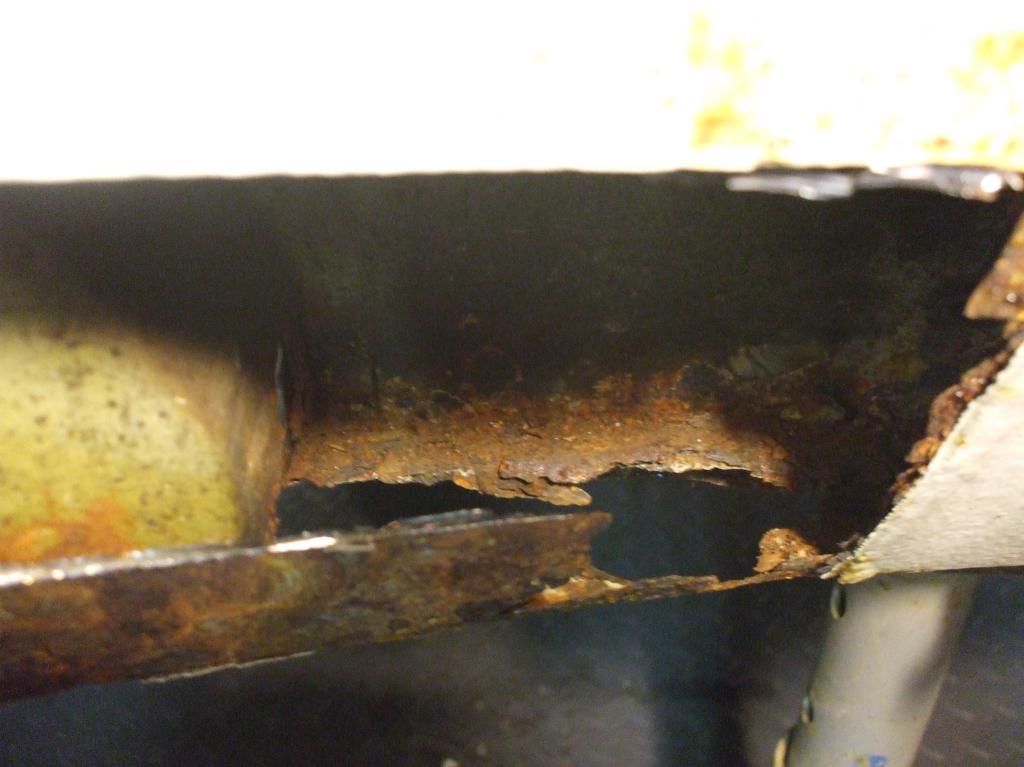
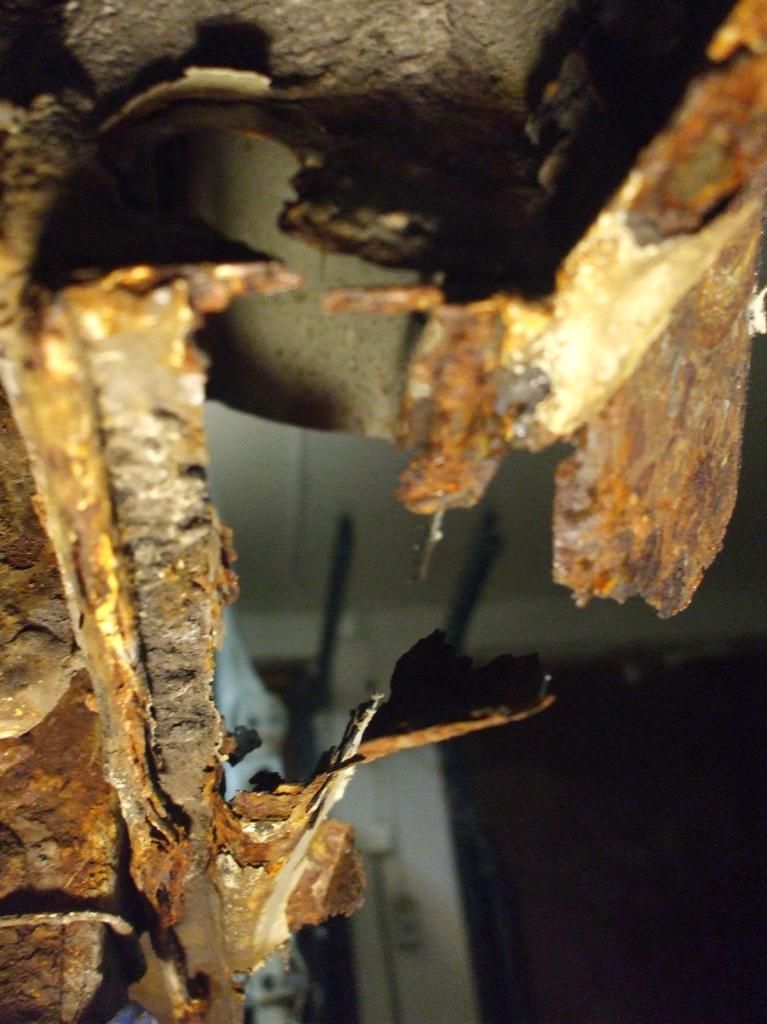
With the camera in the inspection hole looking back towards the front of the car. The really rusty metal at the bottom of the shot is the lower channel of the outer sill which I haven't removed yet. A bit more angle grinding and spot weld drilling needed but then the intermediate sill panel should clean up nicely.
Insidethesill.jpg

I will need to fabricate a wedge shaped panel to recreate this area where the rear quarter panel fold under and joins the sill and also a small repair where the inner wheel arch also runs into this point.
Insidetherearquarter.jpg

Overall I'm feeling pretty fortunate right now as I think I've caught it just in time. The real corrosion is mostly confined to the outer panels and the repairs I will need to make to the structural areas are pretty minimal. Time to find some empty cereal boxes and start making some cardboard templates!
 
Very impressive ninja dremel skills. Pattern of corrosion is very, very similar to mine. You are in luck that the intermediate panel and the inner rear quarter bits are in good shape! Keep up the great work and keep the pictures coming!
 
Always drill out the spot welds and remove the panel in as big a piece as you can. Cutting big bits off and then drilling the welds also works. You can also buff the spot welds out.you also want to get as much of the interior out as you can. Get the seats and the carpet out along with the center console and the steering wheel. You don't want to get welding splatter or grinding sparks on them. And get a wire wheel and run it along the floor where the inner sill joins it. Do this all the way along to make sure the floor hasn't rotted out. Don't trust the fact that it looks solid and feels solid as the sealer etc can fool you into a false sense of security. Its worth having a look when your there.
 
I think setting fire to my steering wheel would be too good for it Colin!

Bit of a slow week on the car this week as the school kindly sprang an inset day on us so I had the kids at home all day on Wednesday which is my prime spannering time. Still, I managed to get the last remnants of my drivers side sill off, sealed up between the plates and the caliper bodies on my rear calipers and primed and painted numerous bits and bobs from the rear beam which I had sent away for blasting.

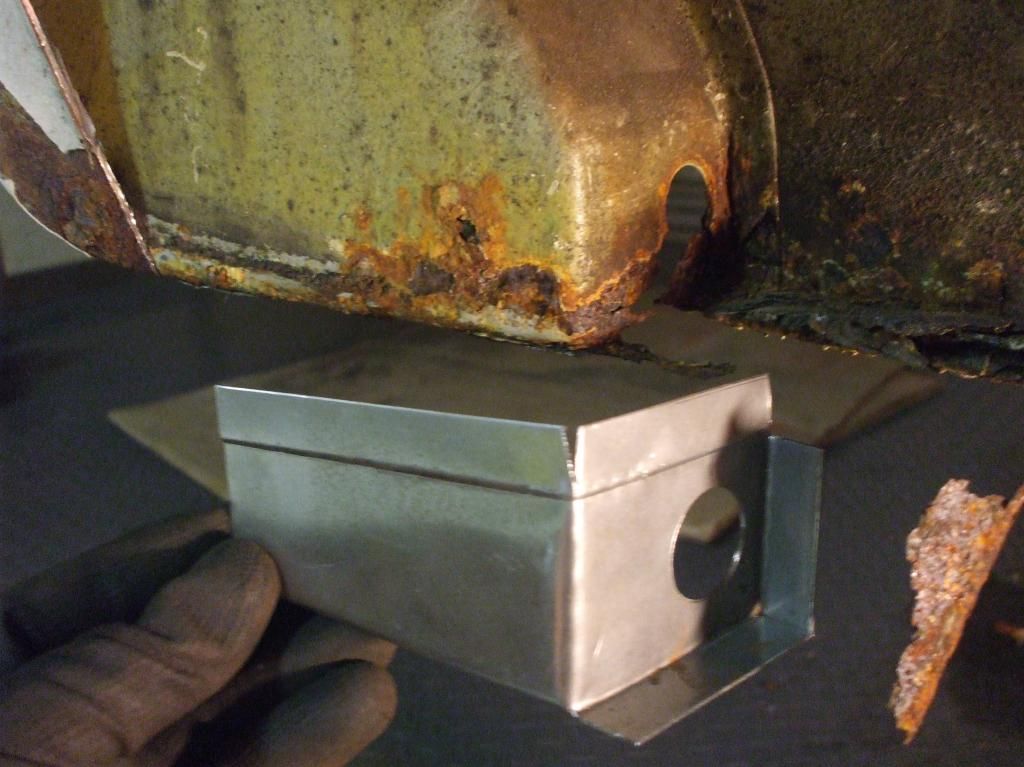
Today I've made up the first repair panel for the reconstruction of the area where the inner sills join the rear arch. The inner sill seems pretty solid but I will replace a small section anyway to give me a solid foundation for the build up of the weld in repair sections. My hole is a little too big but that was the smallest hole cutter I could find in the tool box. We're gonna need a bigger grommet!
Cornerrepairpanel.jpg

I am struggling a little bit to visualise how the rear quarter outer panel rolls under and joins the inner sill. It looks like the "n" shaped channel of the sill continues right back but runs out? Does anyone have a good picture of what this area:
Rustedoutcorner.jpg

is supposed to look like?
 
Nice repair panel. But you should as a rule cut the rusty bit out 2 inches from the edge of the rust. So you should make that piece a bit taller and wider.Paint your repair panels with weld through galvanised paint before you weld them on.Also get a wire wheel on your grinder and take all the rust etc off the inner sill and do that with Vactan and weld through galvy before you weld the new bit on. I'll give you a link to Vactan

http://www.ebay.co.uk/itm/VACTAN-RUST-CONVERTER-AND-PRIMER-1LITRE-RUST-TREATMENT-/110979887906?pt=UK_Car_Accessories_Car_Care_Cleaning&hash=item19d6eab322

and a wire wheel

http://www.ebay.co.uk/itm/4-100mm-Twist-Knot-Wire-Wheel-Brush-Angle-Grinder-1100-RPM-Twisted-Weld-Clean-/400667817460?pt=UK_Home_Garden_PowerTools_SM&hash=item5d49a9b5f4

use these and you wont go wrong
 
Photo heavy update for all you rusty sill fetishists:

Colin, you were right about that repair panel. When I stripped off the underseal from the inside I found the rust had gone further than I thought so I had to remake it a bit bigger. I was getting the OCD shivers from the hole being the wrong size anyway so I'm much happier having drilled it 13mm and then filed it out to 15mm!
Biggerrepairpanel.jpg

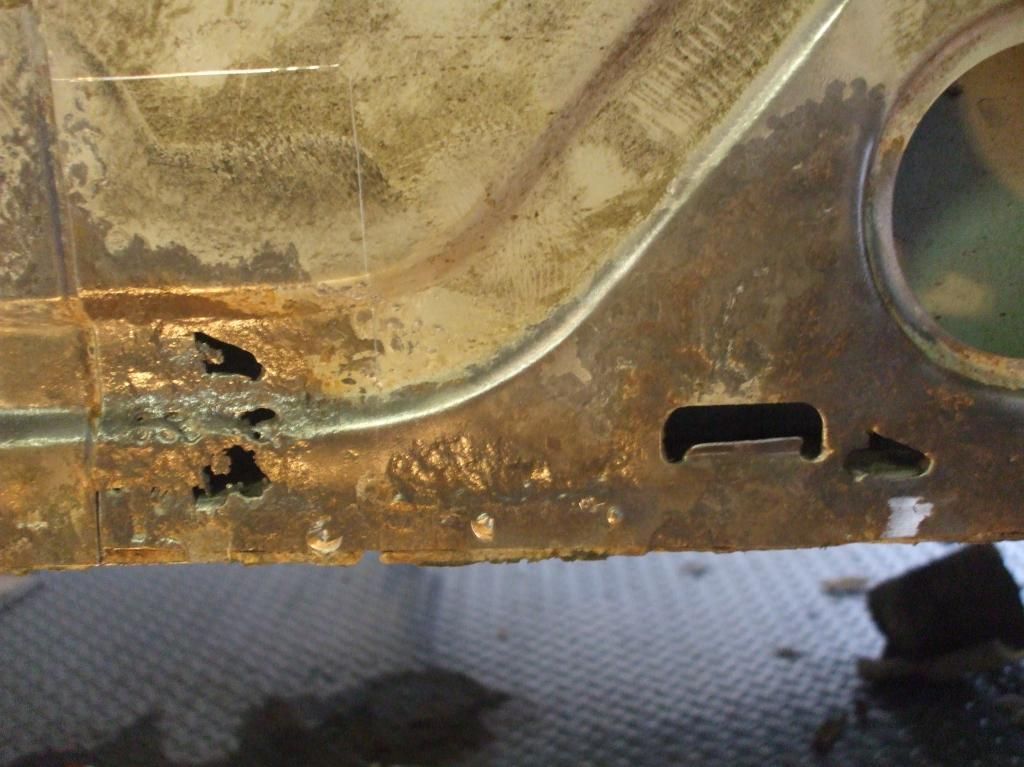
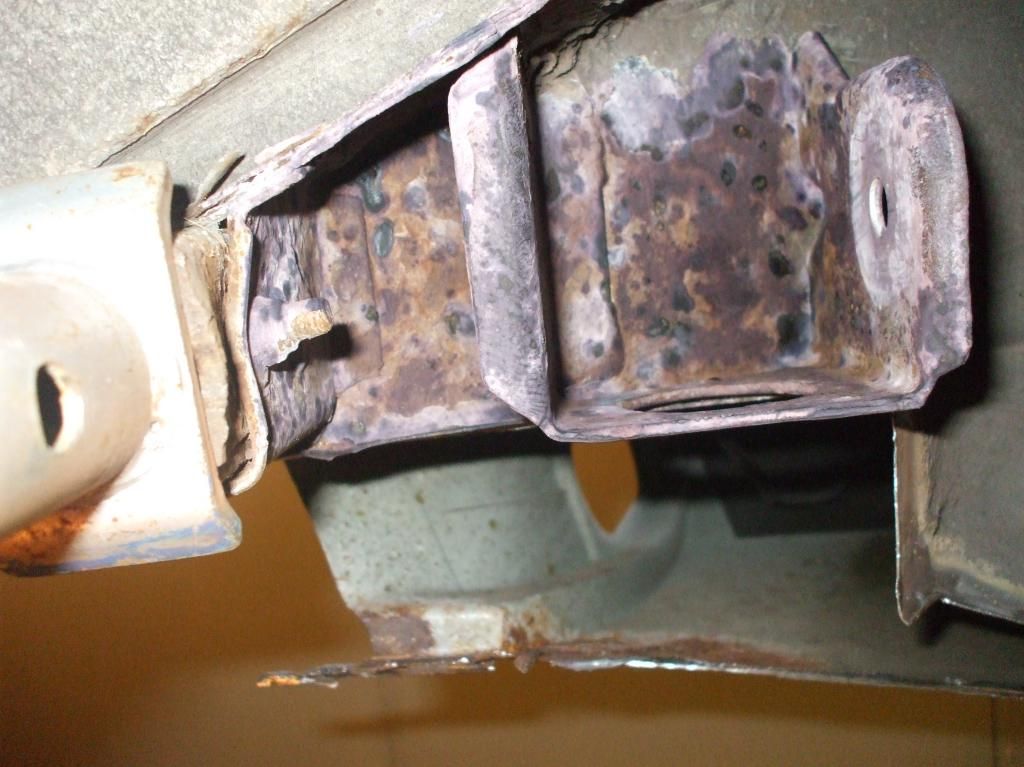
Cleaning up the "surface rust" from the intermediate sill panel revealed a few holes and soon to be holes:
OSintermediatesillholes.jpg

After an hour of attacking with a variety of spinning wire brush attachments and a liberal application of rust convertor, the rear axle carrier mounts look much better:
Rearaxlemountsrustconverted1.jpg

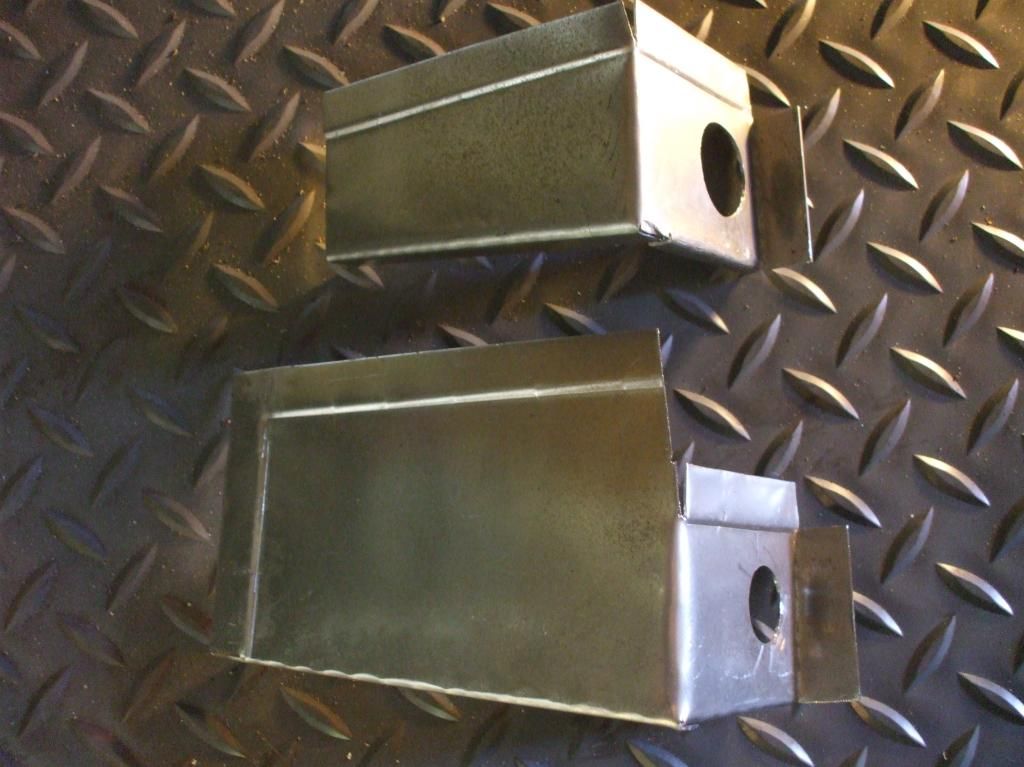
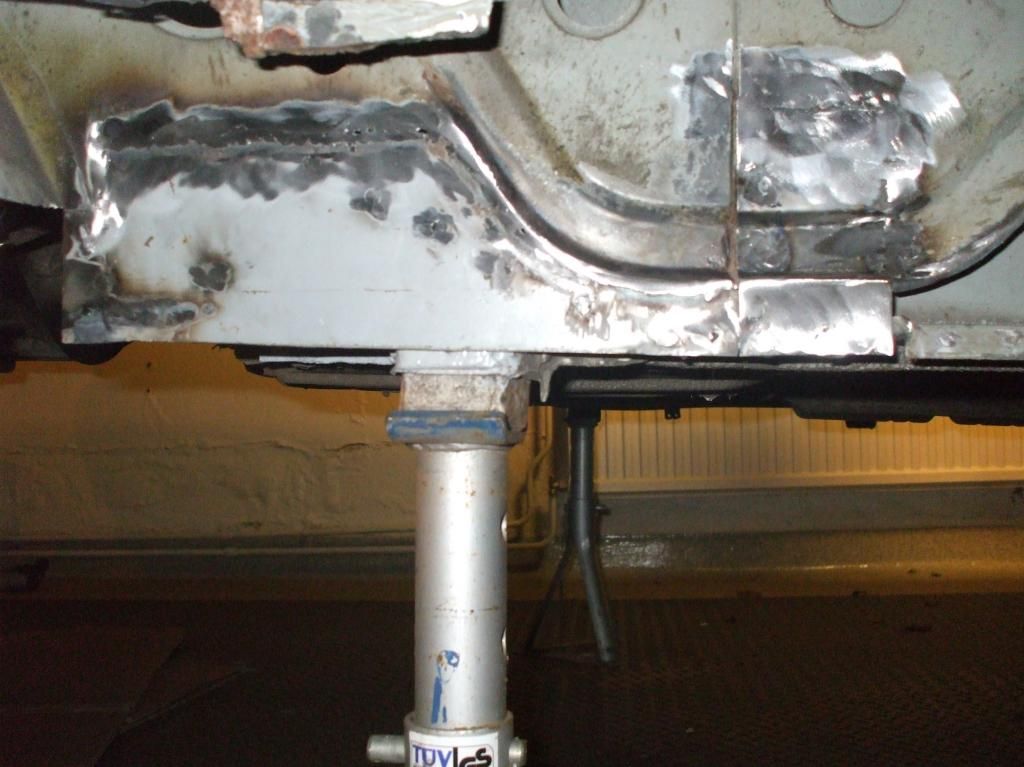
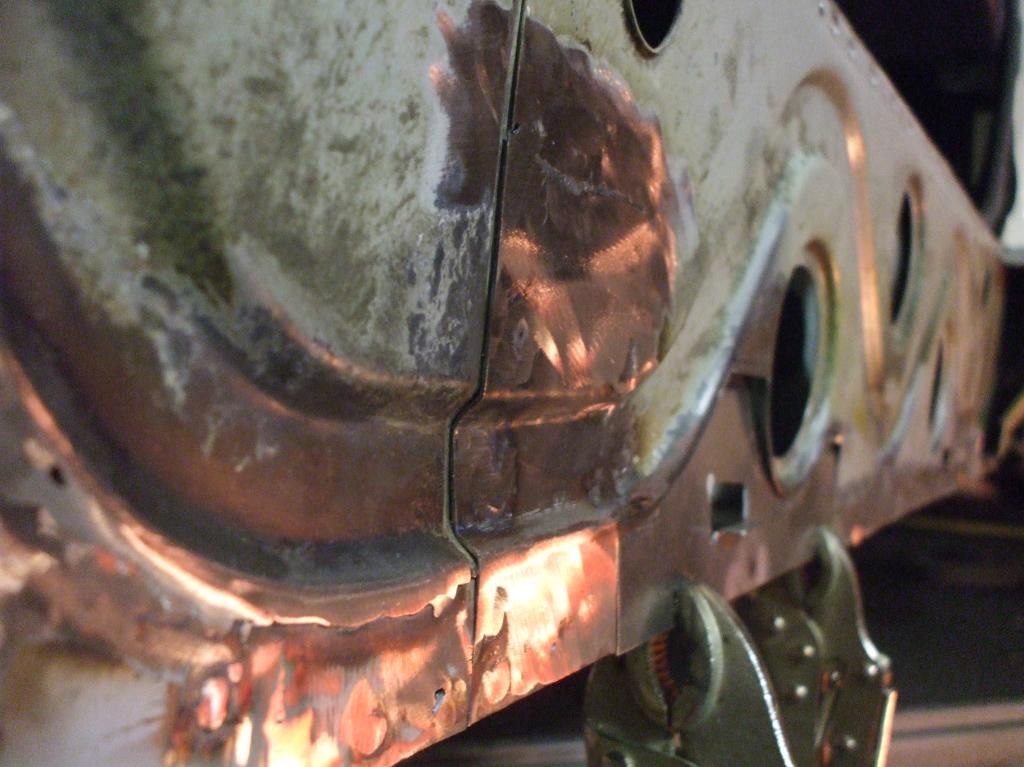
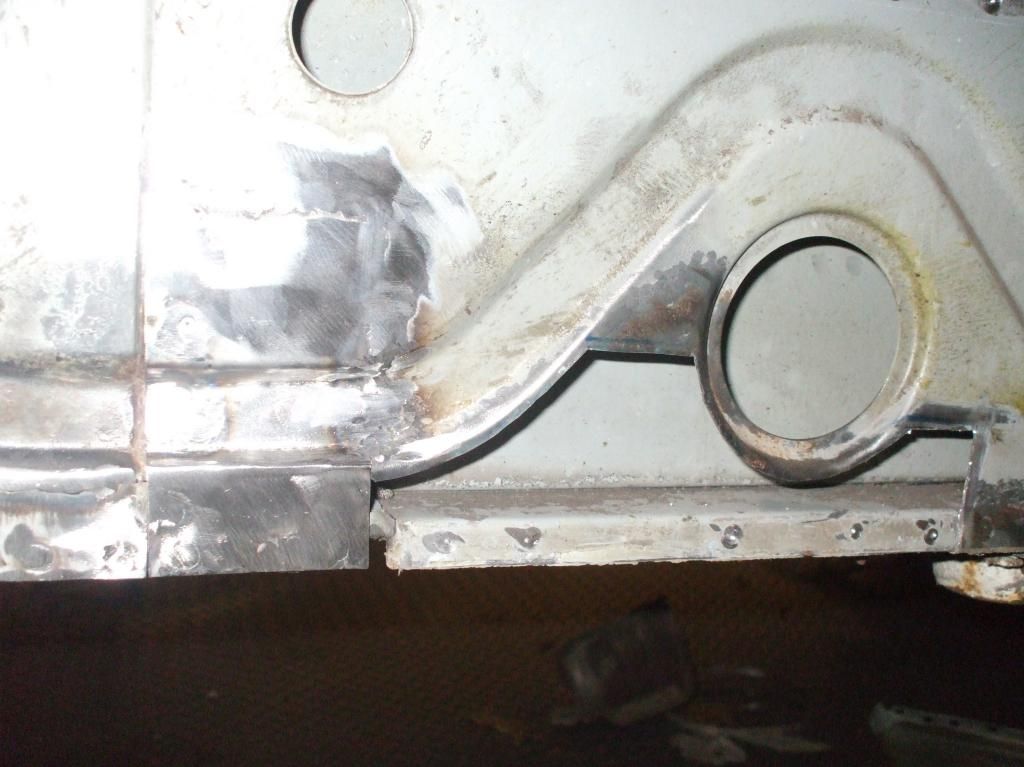
I fabricated and welded in a couple of repair panels to which recreate the rear section of the intermediate sill:
Intermediatesillrepairpanel2weldedin.jpg

Intermediatesillrepairpanelsweldedinviewalongsill.jpg

Just need to fill this hole in now:
OSintermediaterepairsinprogress.jpg

and then I have one more panel to fabricate which will hopefully replicate the triangular section where the rear quarter rolls under. Thanks to Rob I have a photo to work from but i think I may have to apply some creative thinking to get it all to close up neatly.
 
Nice work, I am at the very same stage with sill replacement on my turbo, mine had been bodged for it's last MOT so I don't have a clue how the channel ends either, didn't realise there was a hole in the repair section you made either (what's it for?).
Unfortunately I broke my collar bone last week so I know have a forced six week lay off.
On a more positive note L/H sills are now available from Porsche again (and £40 cheaper than I was quoted on a well known specialist website)[:)]
 
Good work. Never be scared to get the wire wheel into the corners of you car. Paint and under-seal is cheap compared to the hassle of having to do the job twice.Keep up the good work..[:D]
 
Absolutely lovely job on that inner sill. Who's getting to the paint shop first? You are catching me up fast!!
 

Posts made and opinions expressed are those of the individual forum members

Use of the Forum is subject to the Terms and Conditions

Disclaimer

The opinions expressed on this site are not necessarily those of the Club, who shall have no liability in respect of them or the accuracy of the content. The Club assumes no responsibility for any effects arising from errors or omissions.

Porsche Club Great Britain gives no warranties, guarantees or assurances and makes no representations or recommendations regarding any goods or services advertised on this site. It is the responsibility of visitors to satisfy themselves that goods and/or services supplied by any advertiser are bona fide and in no instance can the Porsche Club Great Britain be held responsible.

When responding to advertisements please ensure that you satisfy yourself of any applicable call charges on numbers not prefixed by usual "landline" STD Codes. Information can be obtained from the operator or the white pages. Before giving out ANY information regarding cars, or any other items for sale, please satisfy yourself that any potential purchaser is bona fide.

Directors of the Board of Porsche Club GB, Club Office Staff, Register Secretaries and Regional Organisers are often requested by Club members to provide information on matters connected with their cars and other matters referred to in the Club Rules. Such information, advice and assistance provided by such persons is given in good faith and is based on the personal experience and knowledge of the individual concerned.

Neither Porsche Club GB, nor any of the aforementioned, shall be under any liability in respect of any such information, advice or assistance given to members. Members are advised to consult qualified specialists for information, advice and assistance on matters connected with their cars at all times.

Back
Top