You should upgrade or use an alternative browser.
Toms S2 restoration thread
- Thread starter Monkeythree
- Start date
Monkeythree
New member
I got a good used pair of M030 rear dampers from Mr Simkin and after a bit of a fettle with the wire cup brush and a couple of coats of paint they came up nice. Fitting them means I can now call the back end of the car finished. Well, a bit of scrubbing up needed but all the mechanical bits are done!
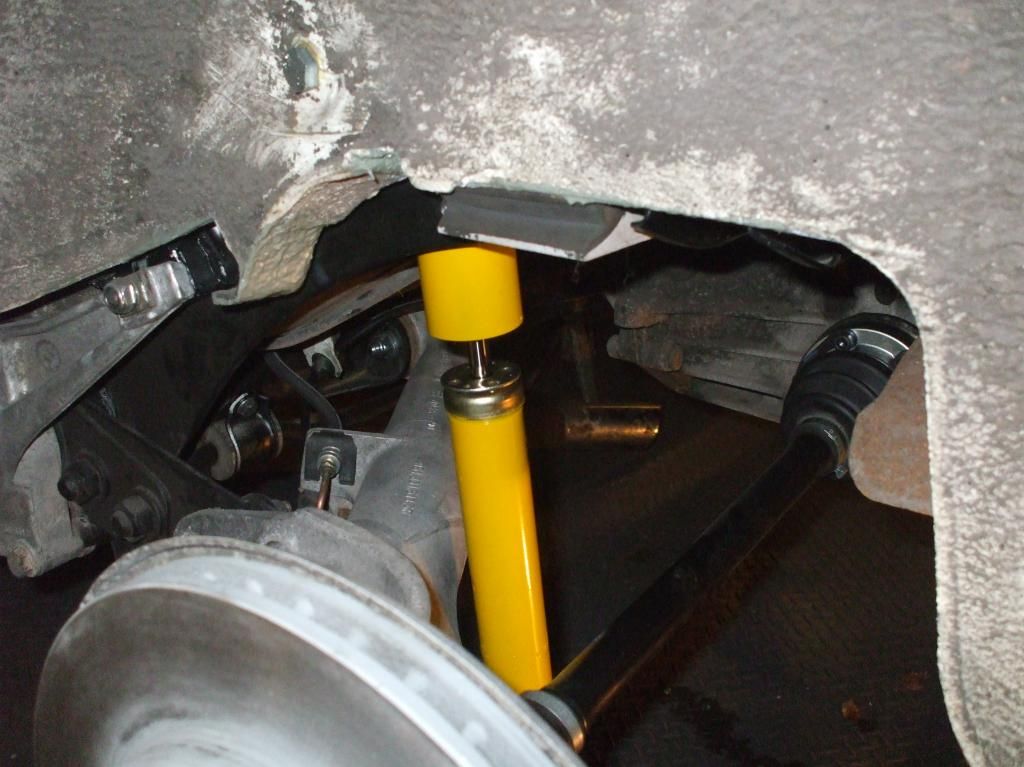
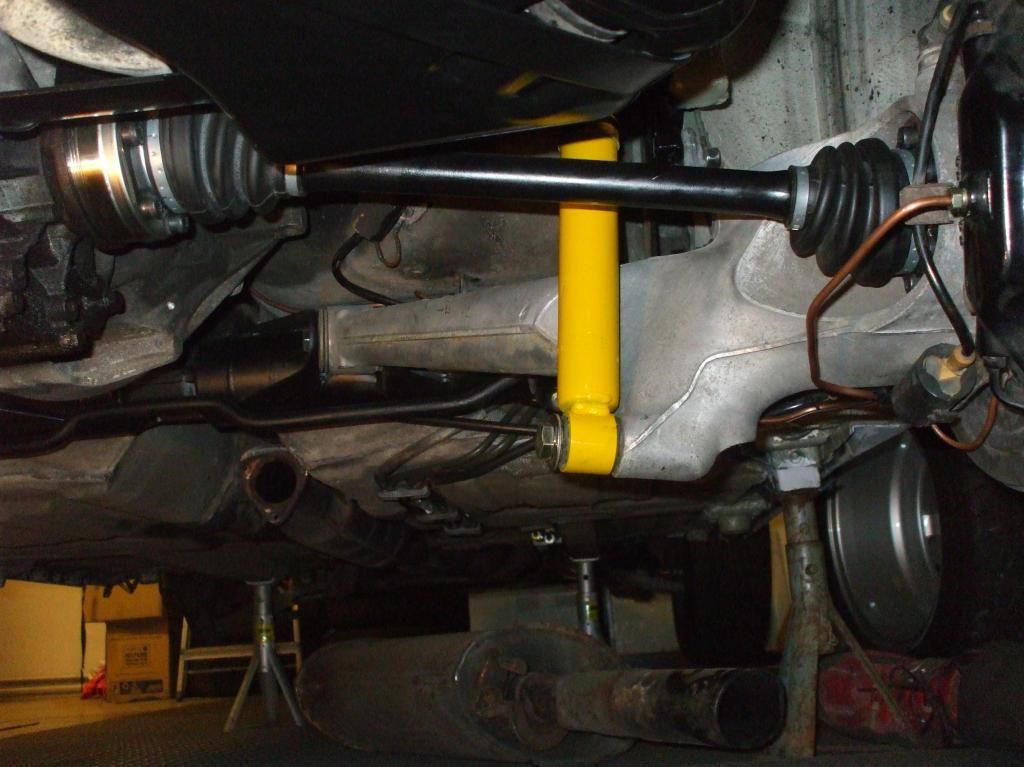
I've been removing bits in preparation for the respray as I've been going along so here's how it looks right now:
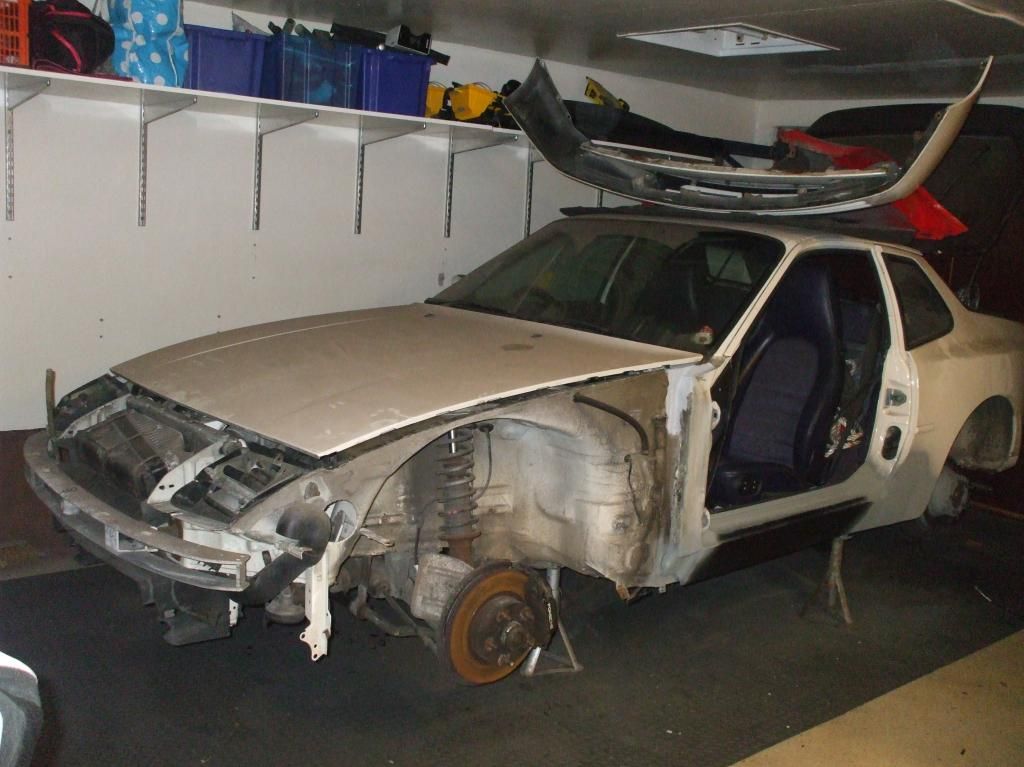
Next job is to strip down and refurb all of the front suspension and brakes. Should be nice easy nut and bolt stuff - a nice break from all the welding!
Sandspider
New member
Thinking of treating my car to a wash, that's as close to this as I can get right now!!
Only one thing i don't like that much is copper brake lines.....
I would use oem style piping. If you would like to go to oem look, use original ATE pipe. 5 meters of oem style 4,75mm can be found under part number 24.8134-0547.1
Your local parts store can order it for you.
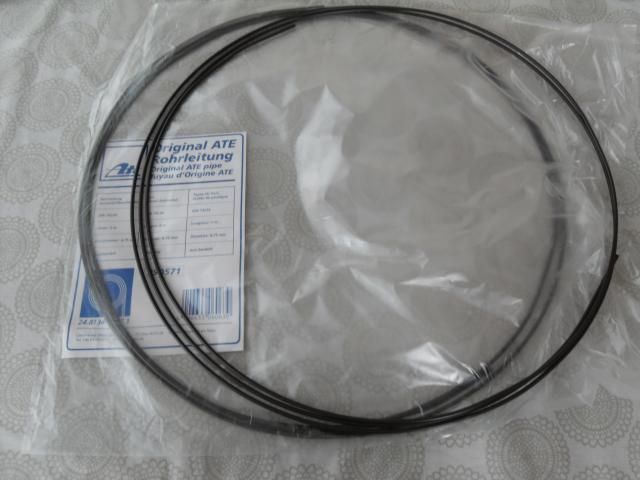
That stuff is also available on various sizes like 6mm & 8mm, so also fuel lines can be made easily if expensive Porsche fuel lines are not an option.
Monkeythree
New member
Seriously it looks like it's coming together fast and yes I agree working with nuts and bolts is relief after grinding, welding and hammering. After a full respray it's going to look fantastic...
I also need to do rear brake lines (MOT advisory) and was going to use cunifer because it's easy to work with... I assume an expensive tool is needed to flare that ATE line? Probably another tool to bend the pipe without kinking it?
Kongsodoken
Active member
Monkeythree
New member
Anyway, it's all in bits now and nearly ready to go to the blasters. Just waiting for new strut inserts to arrive from UK before I cut the old struts down and hopefully Olli is conjuring up a 944 RH wishbone to give me a matching pair.
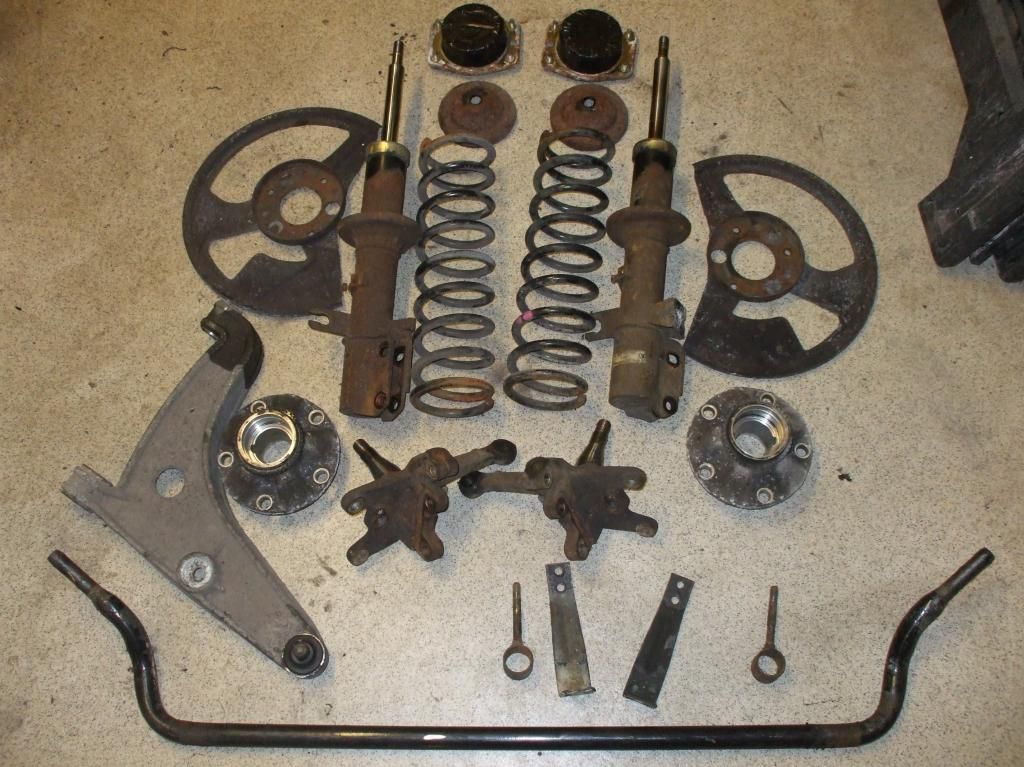
While that lot is off getting cleaned i'm going to change the engine mounts. I have got good access with all the front suspension out of the way so should hopefully be a straightforward job.
Monkeythree
New member
After a bit of researching and pondering, I decided that removing the engine mounts would be easier if I removed the steering rack and dropped the front crossmember. The front suspension is all off anyway so it was only a couple more bolts to get the whole lot off. I couldn't find any skyhooks so I supported the engine under the sump with a couple of axle stands and rubber spreaders while I worked. With that lot off I was able to survey the full extent of the Exxon Valdez oil spill which seems to have occurred under my exhaust manifolds:
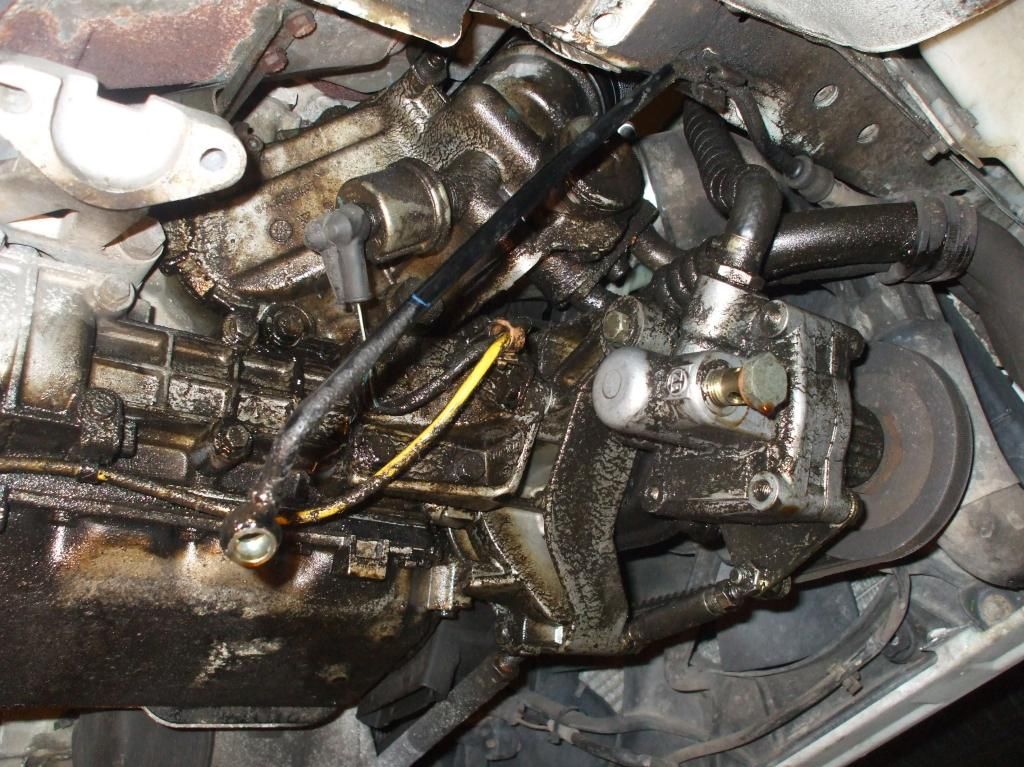
I'm not sure if it's a leak or just 22 years of previous owners not cleaning up after oil filter changes but I've given it a bit of a clean up so I can monitor things:
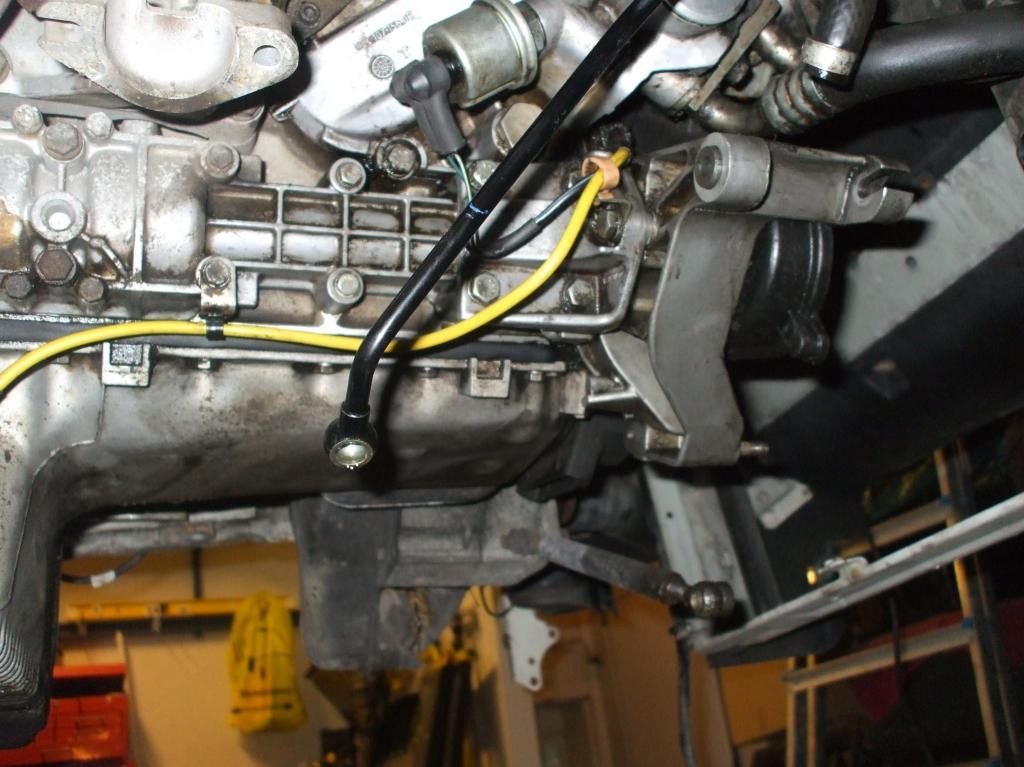
I added the crossmember and the steering link to the pile of bits for the media blasters so hopefully they will come back looking good as new.
While I waited for the bits to come back from the blasters, I turned my attention to the belts and rollers. With the front PU already off, it made sense to remove the radiator and give myself clear access. I did quite a bit of reading to familiarise myself with all the steps before I started. I had convinced myself that a flywheel locking tool wasn't necessary but when it came to it, I just wasn't happy with locking the flywheel with an allen key in one of the bolts so I made myself a tool:
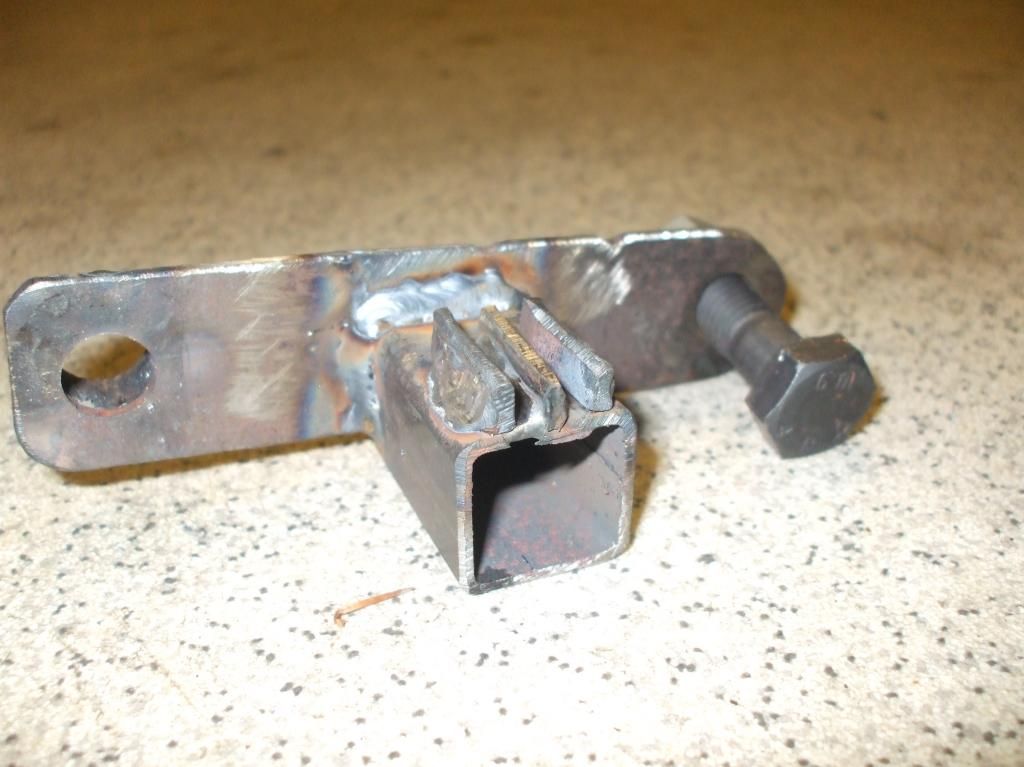
With the engine at TDC and the flywheel locked solid, my next problem was that with no crossmember or engine mounts, I had nothing for the torque on the crank bolt to react against. So another quick bit of fabrication was needed to make a temporary engine mount:
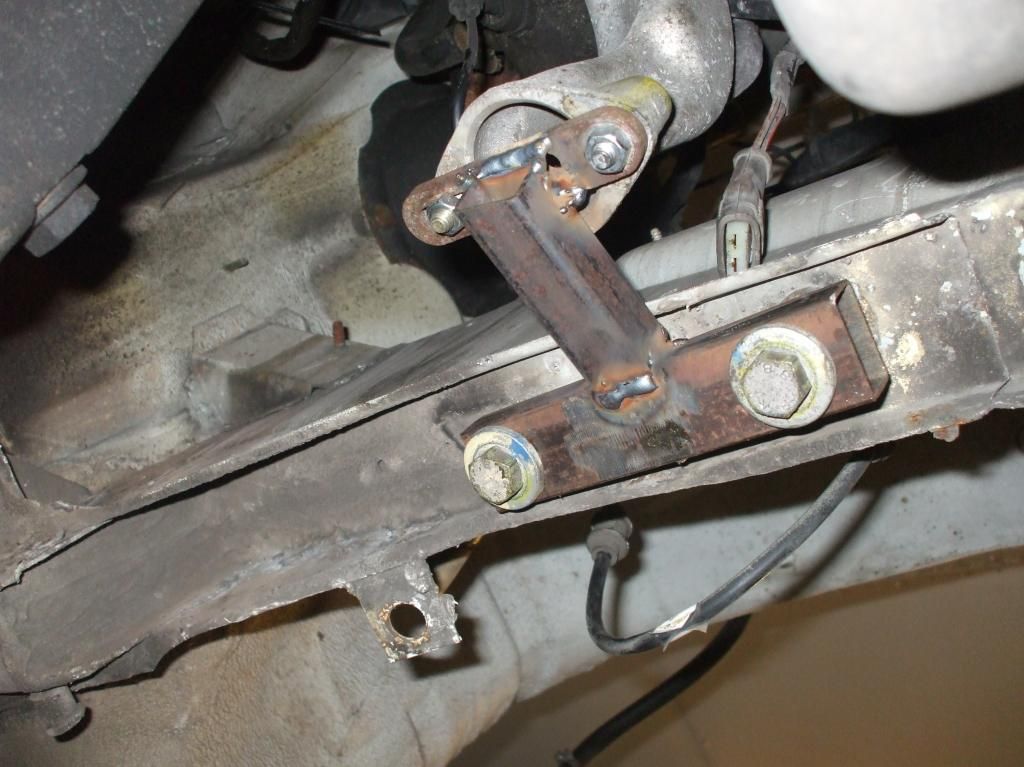
I needn't have worried because when I came to undo the crank bolt, it barely needed 50Nm, never mind 200Nm to release it!
With the crank bolt off, I was able to crack on with changing the belts and rollers. It was encouraging to find lots of tippex marks on all the important bits so the belts have obviously been done before at some point. But there was a lot of rubber debris inside the timing covers so I think they were pretty worn. Worse than that, I made the nice discovery that the upper balance shaft was timed incorrectly and was one tooth out! Not sure it will make a huge difference having corrected it but it's nice to know that it is right now.
All done:
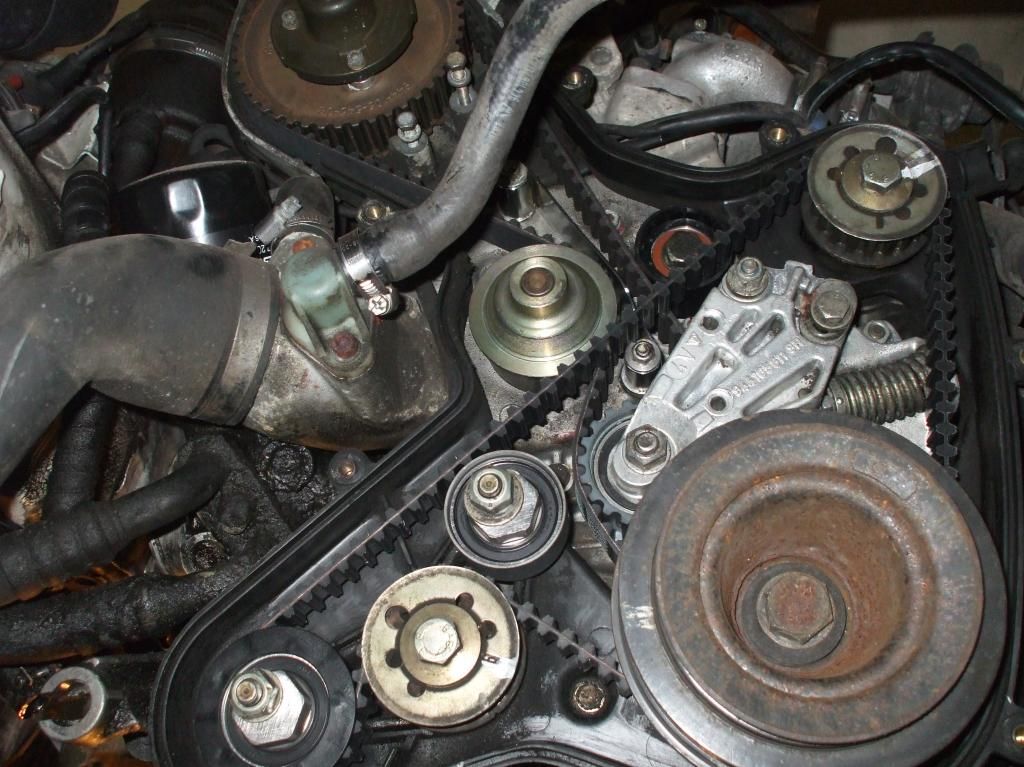
This afternoon, I've put the radiator back in and refitted the exhaust so on Monday it will be hot test time!
Monkeythree
New member
Monkeythree
New member
Total so far including outsourced services e.g. caliper overhaul, wheel refurb is £3950.
With the initial purchase price of the car being £1750 and allowing for consumable items e.g. paint, lubricants, wearing tools etc, my total outlay thus far is around six grand.
I think the respray will be ~£3k so that's me up to nine and then if it turns out that I need a clutch and a water pump there's another grand right there....
But I think if I can have it MOT'd and looking smart for a total outlay of £10k I will be pretty happy. It will have had a thorough going over and renewal of most moving/wearing parts that should see it right for the next 5 years with little or no further investment.
Feeling [
ORIGINAL: Monkeythree
All done:

Good work! Just one thing, your balance shaft tensioner is putting tension on the belt by turning clockwise - if you go anticlockwise instead, the belt has less of a turn to make.

Cheers,
Jim
Good work! Just one thing, your balance shaft tensioner is putting tension on the belt by turning clockwise - if you go anticlockwise instead, the belt has less of a turn to make.
I thought both tensioners were meant to tighten clockwise? Sure it's less of a turn on the belt but you have less contact with the lower balancer shaft pulley and so marginally more strain on the belt teeth?
What is the red stuff you have on all of the bolts? Some sort of threadlocker applied to the outside? Looks like a good insurance policy to stop these unwinding and all hell breaking loose...
Monkeythree
New member
http://www.pistonheads.com/gassing/topic.asp?t=767974
Nothing fancy, just paint.ORIGINAL: robdimond
What is the red stuff you have on all of the bolts? Some sort of threadlocker applied to the outside? Looks like a good insurance policy to stop these unwinding and all hell breaking loose...
Monkeythree
New member
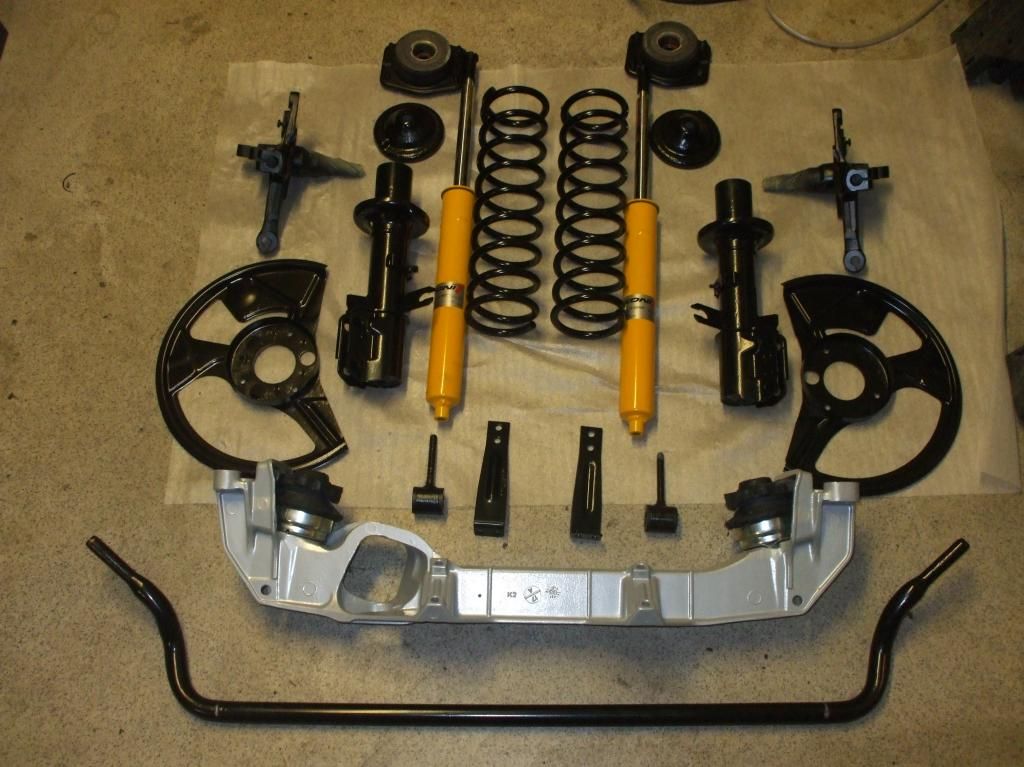
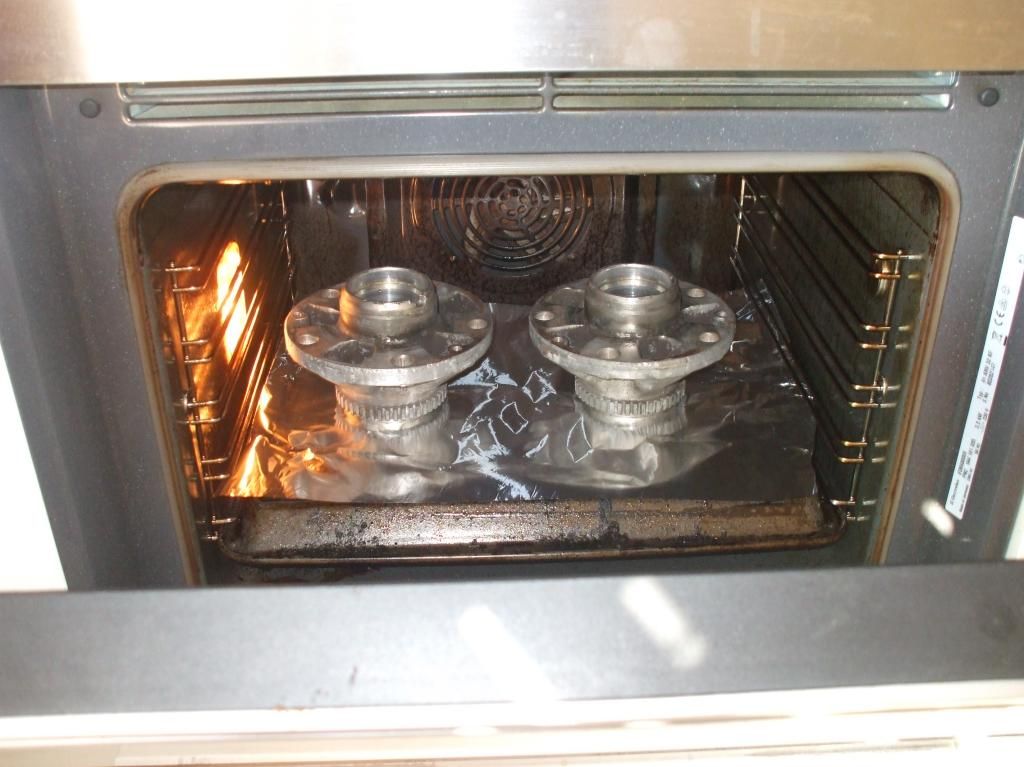
While I was waiting for that lot, I tackled a few jobs which I had been putting off. The front wheel bearings needed replacing (surprise, surprise). The pressed in bearing races drifted out relatively easily but getting the new ones into the hubs needed a bit of heat on the job (don't tell Mrs M3):
The other job I wasn't especially looking forward to was rebuilding the drivers side front wing bottom. I managed to pick up a good passenger side one here in Sweden but haven't had any luck locating a drivers side. But at least I had a good wing from which I could take patterns and then mirror onto the drivers side. Here's what it looked like before:
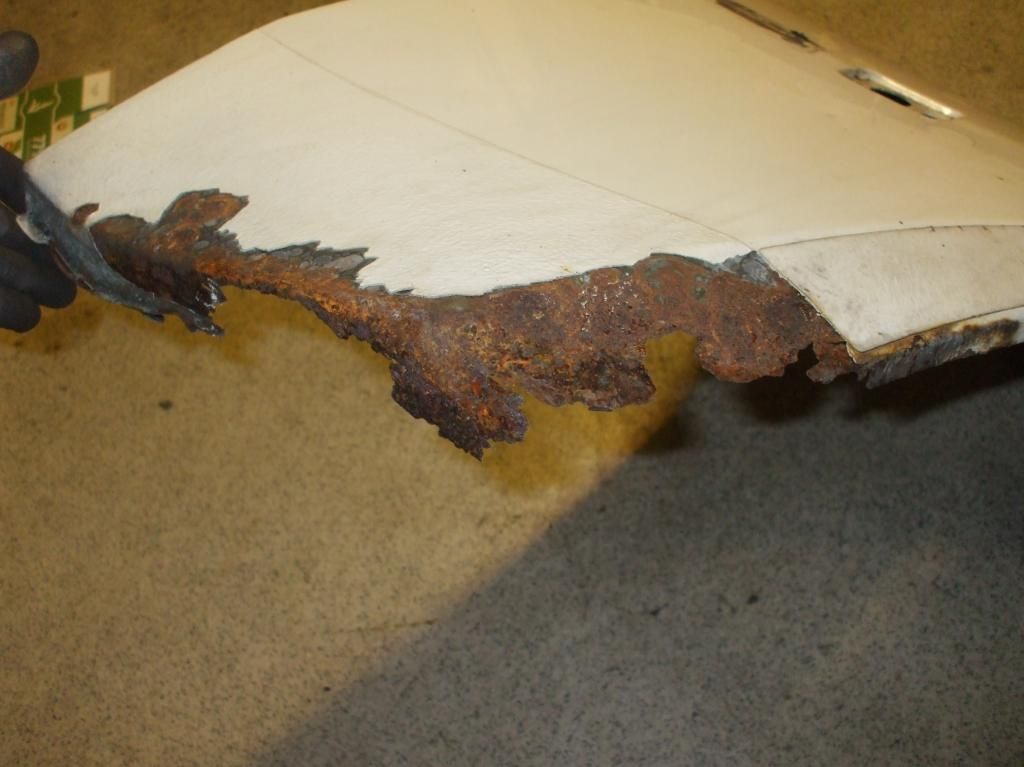
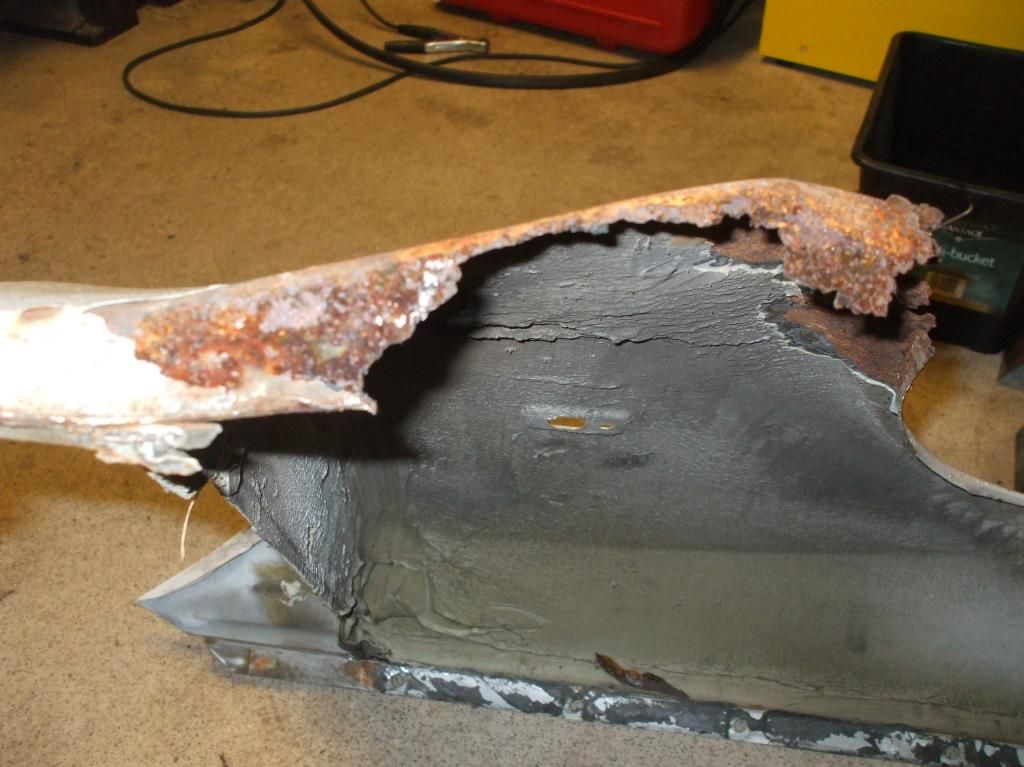
and after a couple of mornings of fabricating and welding:
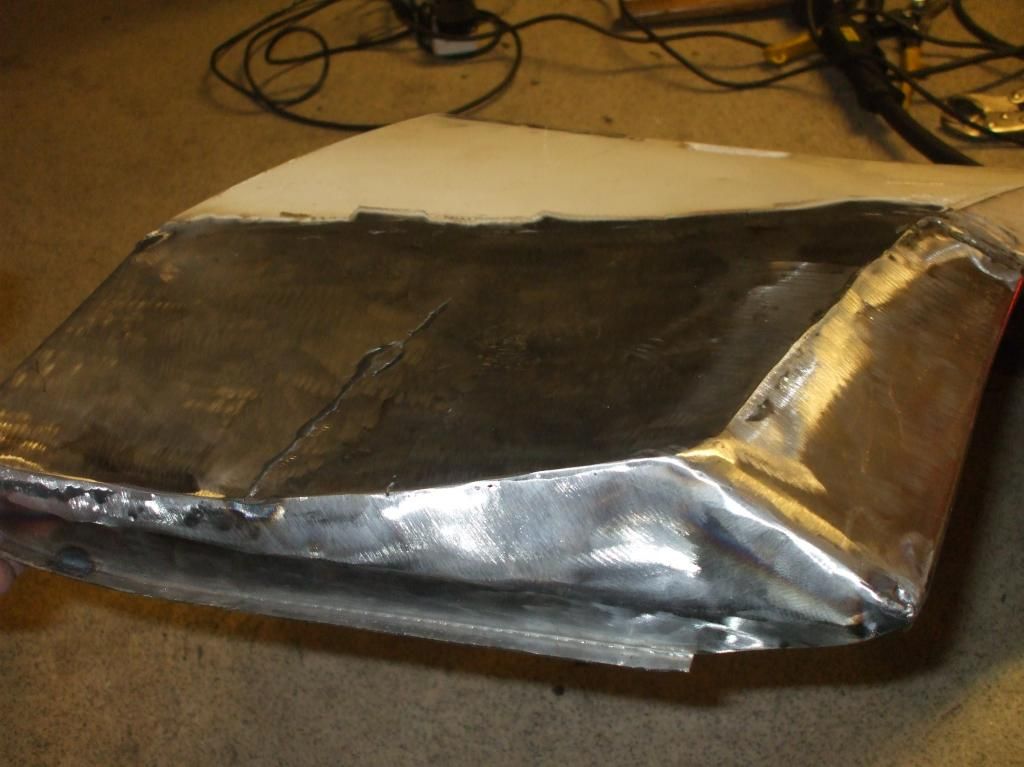
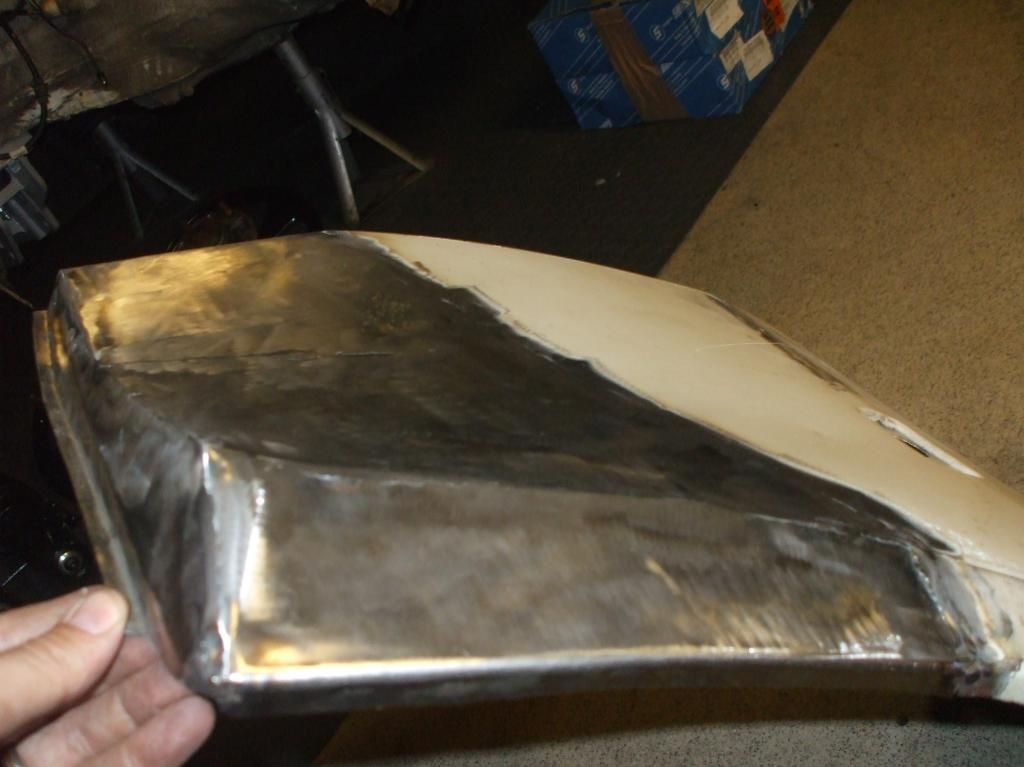
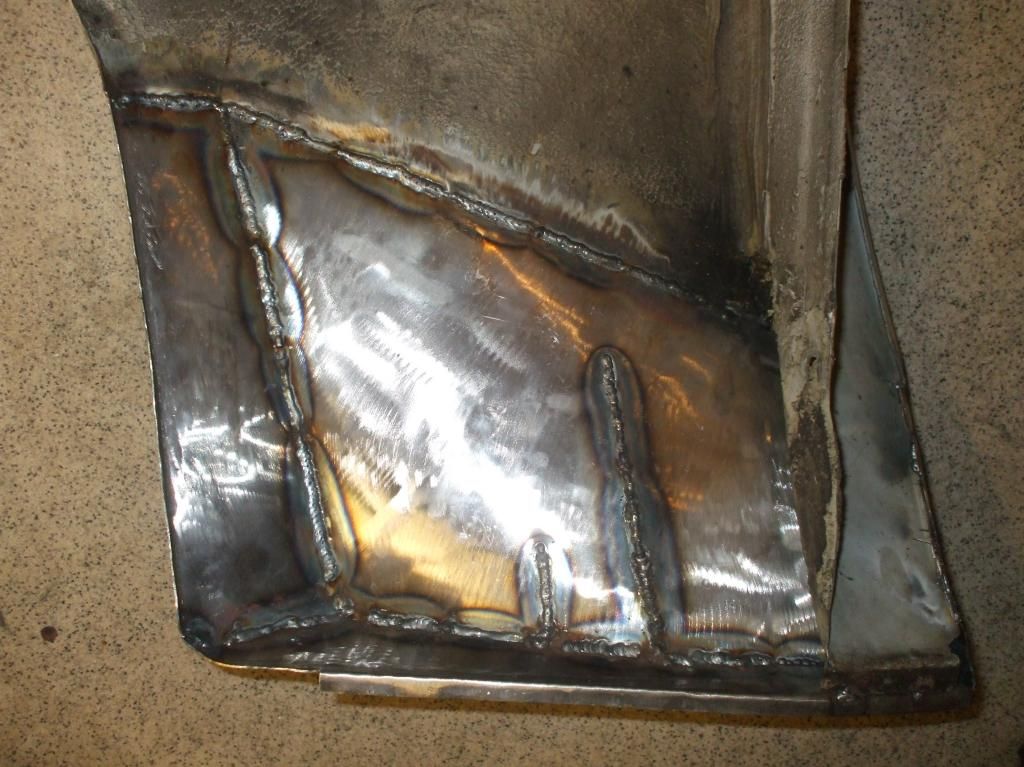
Getting the new metal to take up the correct curve was hard work. In the end I had to cut a couple of slits to give it a chance to find the best position. It will need a skim of filler but should be passable when painted.
Current state of play is that I have fitted the new engine mounts and re-fitted the front crossmember. The steering rack and link are back on and the power steering is connected up again. I've also changed the ball joint in the one good wishbone that I have and I've cut out the pressed in steel part of the OE bush in readiness for the new Powerflex bushes. The front struts have been re-assembled with the Koni inserts and the hubs are back on the uprights ready to go back in. Just waiting for the paint to dry on my wishbone then I can get the passenger side front suspension assembled back onto the car. The drivers side will have to wait until I can find a 944 wishbone here or get one shipped over from the UK. If anyone can help with this it would be very much appreciated.
Kongsodoken
Active member
Monkeythree
New member
I've also stripped all the rubber seals, removed the rear hatch and de-stickered it. I decided to leave the front screen in as I managed to get access to the rust on the roof just by removing the rubber seal. I was quite surprised by how extensive the rusty line was under the rubber seal. For anyone feeling brave pull your windscreen seal out and have a check round where the rear edge of the seal sits on the paint. I have a feeling that there is probably a tiny amount of movement between the seal and the paint surface due to body flex and this eventually wears through the paint and lets the rust get started.
Stripping the doors down was a lengthy process. Took about 2 hours each to get all the gubbins out of them. I did at least find the reason for my inoperative window on the drivers side - the centre bearing of the driven cog has worn enough for the cog to ride up and off the edge of the driving cog and the two are now locked together with teeth overlapping. So it will be a new motor and regulator that goes in when I do the re-fit.
Here are some up to date photos to keep the photo fetishists happy:-
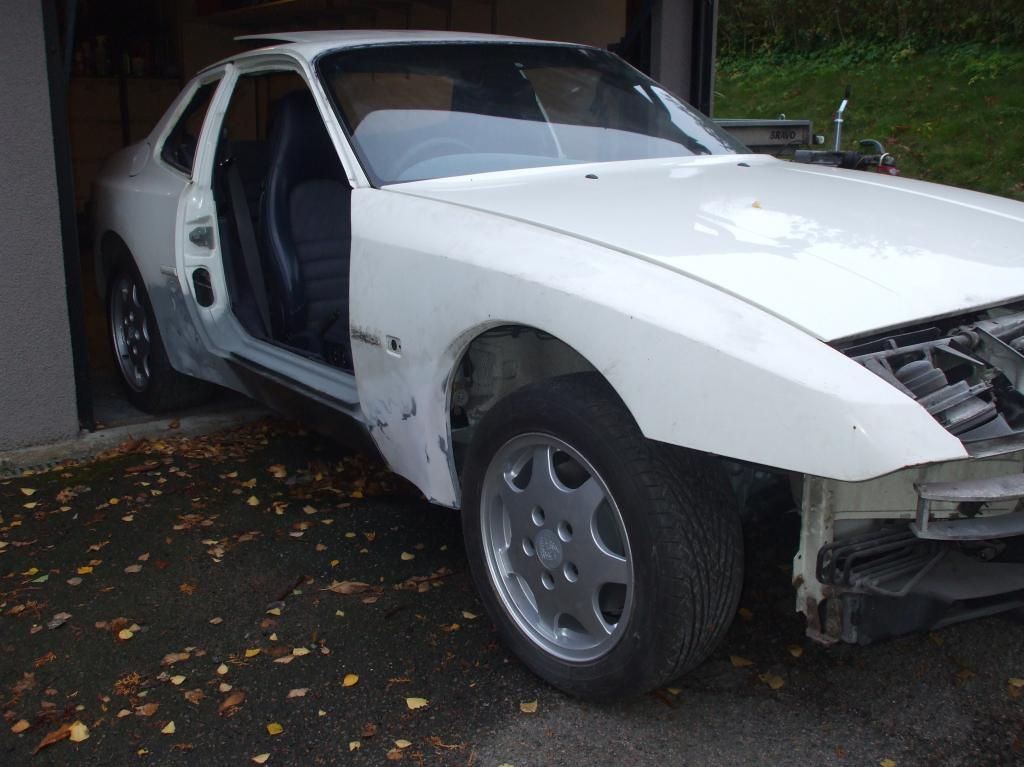
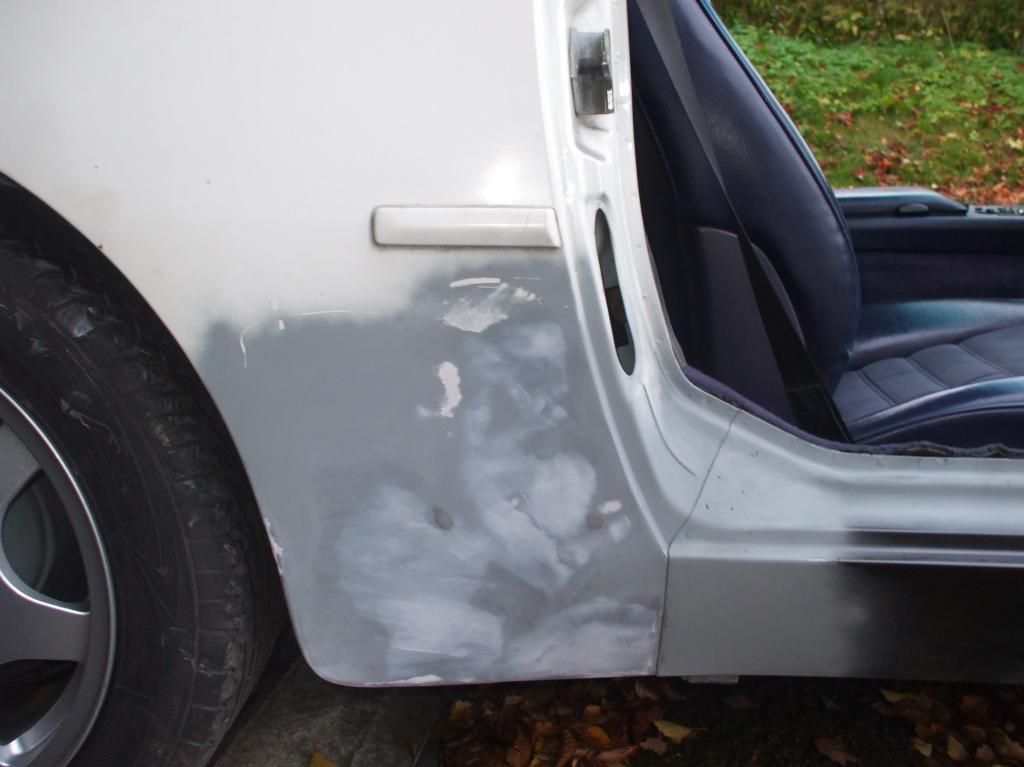
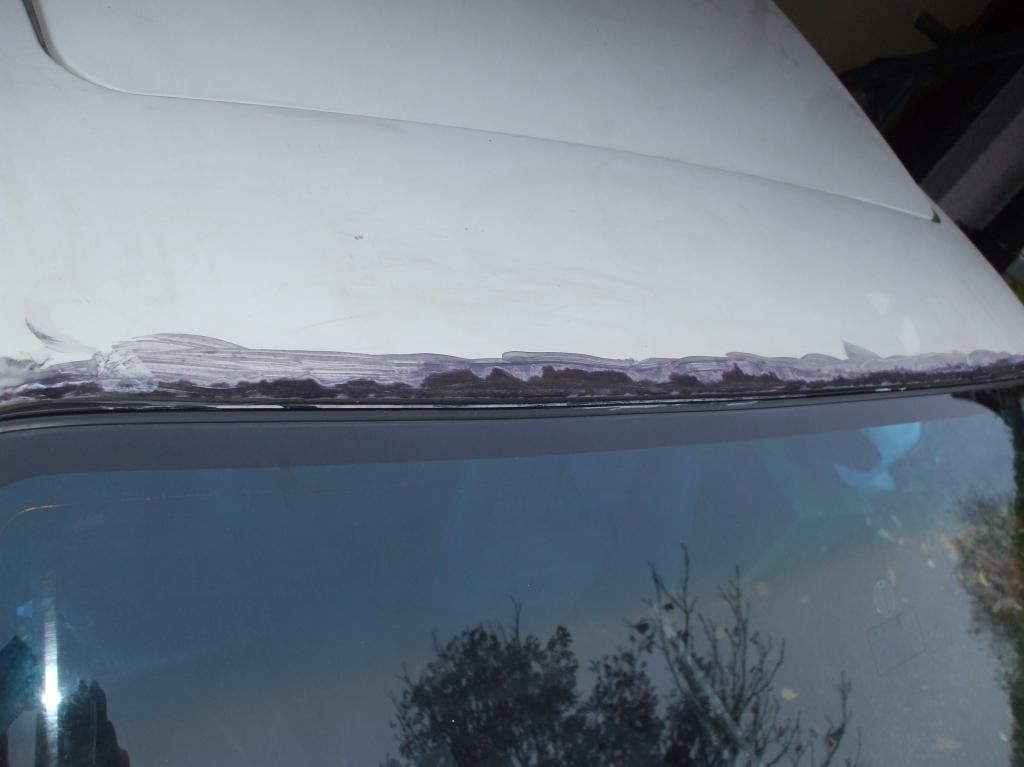
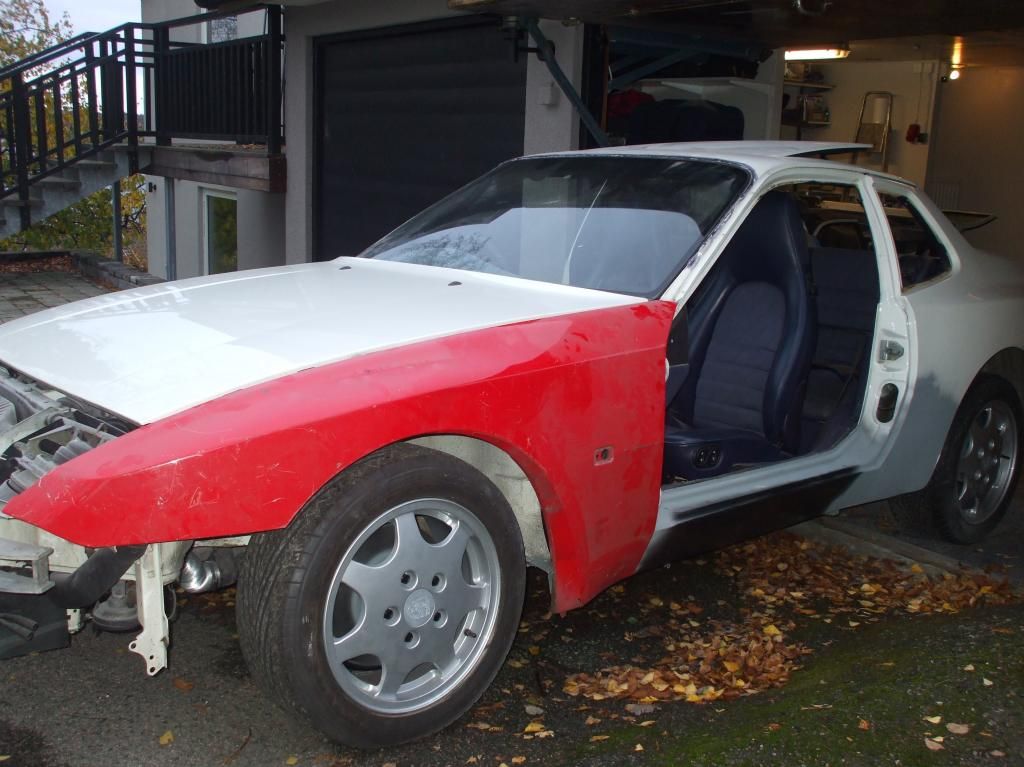
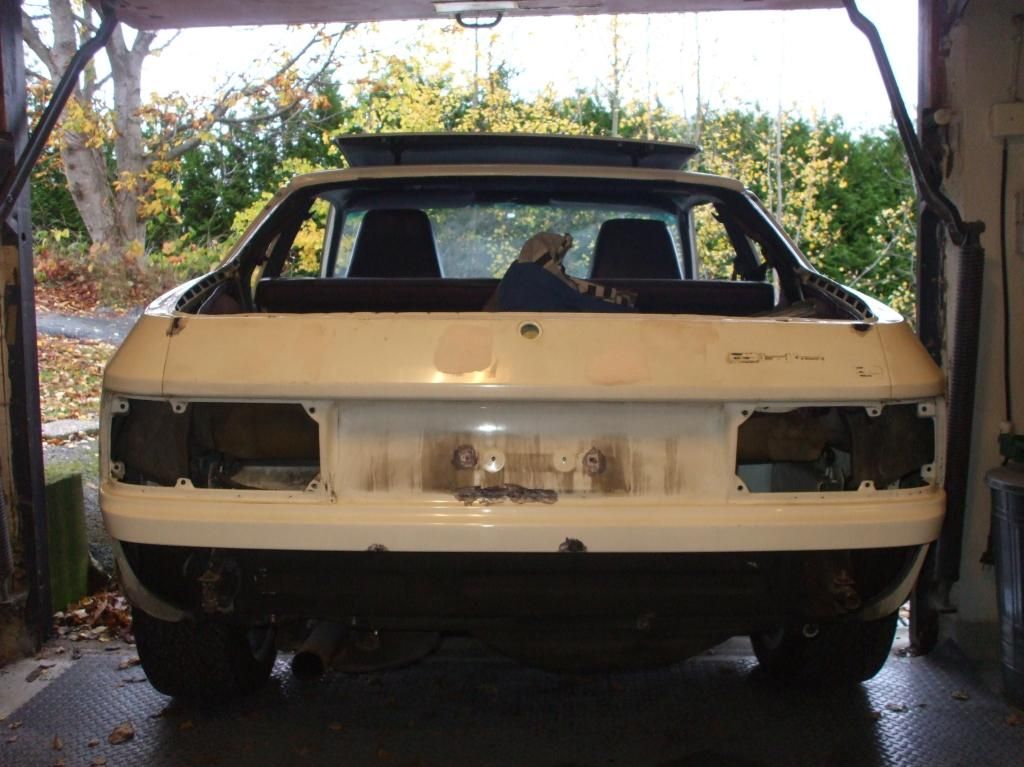
Just waiting on the bodyshop giving me a date to take it in now. They indicated mid November and said it would probably take them 2 weeks so with any luck I'll it all back together for Xmas!

Posts made and opinions expressed are those of the individual forum members
Use of the Forum is subject to the Terms and Conditions
Disclaimer
The opinions expressed on this site are not necessarily those of the Club, who shall have no liability in respect of them or the accuracy of the content. The Club assumes no responsibility for any effects arising from errors or omissions.
Porsche Club Great Britain gives no warranties, guarantees or assurances and makes no representations or recommendations regarding any goods or services advertised on this site. It is the responsibility of visitors to satisfy themselves that goods and/or services supplied by any advertiser are bona fide and in no instance can the Porsche Club Great Britain be held responsible.
When responding to advertisements please ensure that you satisfy yourself of any applicable call charges on numbers not prefixed by usual "landline" STD Codes. Information can be obtained from the operator or the white pages. Before giving out ANY information regarding cars, or any other items for sale, please satisfy yourself that any potential purchaser is bona fide.
Directors of the Board of Porsche Club GB, Club Office Staff, Register Secretaries and Regional Organisers are often requested by Club members to provide information on matters connected with their cars and other matters referred to in the Club Rules. Such information, advice and assistance provided by such persons is given in good faith and is based on the personal experience and knowledge of the individual concerned.
Neither Porsche Club GB, nor any of the aforementioned, shall be under any liability in respect of any such information, advice or assistance given to members. Members are advised to consult qualified specialists for information, advice and assistance on matters connected with their cars at all times.


